Photoshop CS6 Tutorial: How to Make an Editable TEXT Portrait from a Photo.
Figuration: Tutorial
Description
Lincoln file:
http://goo.gl/IQaH96
Subscribe to Blue Lightning TV!:
http://goo.gl/HEpuJ4
Website:
http://www.bluelightningtv.com/
Get up to 20% off Photoshop + Lightroom! Only $7.99 p/month:
http://goo.gl/QFznn7
Facebook:
https://goo.gl/fHLJsh
Twitter:
https://twitter.com/bluelightningtv
Metadata
| Video ID | 114 | Youtube URL | Photoshop CS6 Tutorial: How to Make an Editable TEXT Portrait from a Photo. |
|---|---|
| Captions Available | Yes |
| Captions Downloadable | Yes |
| Playlists | |
| Duration | 00:09:58 |
| Definition | hd |
| Keywords | |
| License | youtube |
| Embeddable | Yes |
| Views | 212205 |
| Likes | 1892 |
| Dislikes | 35 |
| Favourites | 0 |
| Comments | 327 |
| Created | 2017-05-04 1:00:42 PM |
| Updated | 2017-05-04 1:10:57 PM |
Captions
ASR: en
0:00:07.670,0:00:13.259
hi this is Marty from Blue Lightning TV
0:00:10.759,0:00:15.630
quite a while ago I did a tutorial
0:00:13.259,0:00:18.930
showing how to make a portrait out of
0:00:15.630,0:00:22.199
text in this tutorial I'll show you how
0:00:18.930,0:00:24.960
to do it quicker and better including
0:00:22.199,0:00:27.660
how to make it in color you can mix
0:00:24.960,0:00:30.929
fonts and sizes and because they alive
0:00:27.660,0:00:33.329
they're fully editable feel free to use
0:00:30.929,0:00:35.820
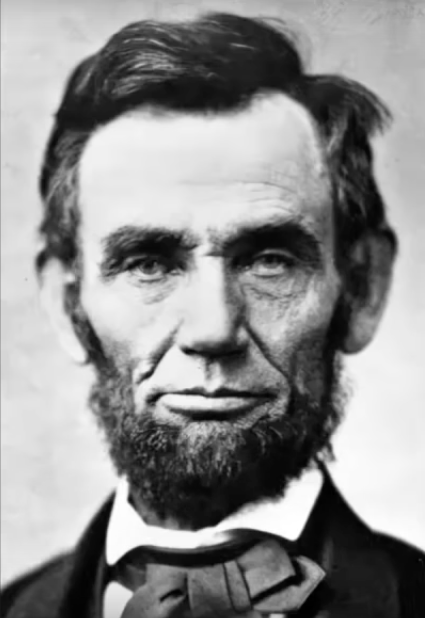
any photo you'd like if you want to use
0:00:33.329,0:00:37.610
this image it's link is located in the
0:00:35.820,0:00:42.270
video's description or project files
0:00:37.610,0:00:45.600
it's size is approximately 1300 by 1900
0:00:42.270,0:00:48.780
pixels with a resolution of 150 pixels
0:00:45.600,0:00:51.809
per inch if you're using a color photo
0:00:48.780,0:00:56.100
be saturated by pressing ctrl shift you
0:00:51.809,0:00:58.410
on a PC or command shift you on a Mac to
0:00:56.100,0:01:01.260
make the darkest tones black and the
0:00:58.410,0:01:03.930
lightest tones white press ctrl or
0:01:01.260,0:01:06.150
command shift l we need to make a
0:01:03.930,0:01:08.820
selection around the head and shoulders
0:01:06.150,0:01:11.670
for this example I'll use the pencil
0:01:08.820,0:01:14.100
tool first click on your quick mask
0:01:11.670,0:01:17.280
button and make sure black is your
0:01:14.100,0:01:21.390
foreground color if it isn't click on
0:01:17.280,0:01:25.830
this small black and white box icon open
0:01:21.390,0:01:28.140
your pencil tool will make the size 5
0:01:25.830,0:01:31.049
pixels and the hardness a hundred
0:01:28.140,0:01:33.509
percent draw around the head and
0:01:31.049,0:01:37.890
shoulders it doesn't have to be perfect
0:01:33.509,0:01:41.310
especially around the hair open your
0:01:37.890,0:01:44.610
paint bucket tool click down inside the
0:01:41.310,0:01:47.369
portrait to fill it in press Q to make
0:01:44.610,0:01:51.140
the quick mask into a selection invert
0:01:47.369,0:01:56.670
it by pressing ctrl or command shift i
0:01:51.140,0:01:59.700
go to select and save selection name it
0:01:56.670,0:02:03.210
highlights and click OK or press Enter
0:01:59.700,0:02:08.190
or return delete the selection by
0:02:03.210,0:02:10.590
pressing ctrl or command D press ctrl or
0:02:08.190,0:02:12.450
command J to make a copy of the original
0:02:10.590,0:02:16.530
image
0:02:12.450,0:02:20.489
go to filter and filter gallery open the
0:02:16.530,0:02:23.120
artistic folder and click cut out make
0:02:20.489,0:02:27.060
the number of levels to the edge
0:02:23.120,0:02:33.390
simplicity 5 and the edge fidelity one
0:02:27.060,0:02:42.060
then click OK go to image adjustments
0:02:33.390,0:02:47.790
and threshold the threshold is 128 go to
0:02:42.060,0:02:53.010
select and color range select shadows
0:02:47.790,0:02:57.900
and click OK we'll save the selection
0:02:53.010,0:03:00.959
and name it shadows then delete the
0:02:57.900,0:03:04.079
selection click on the new layer button
0:03:00.959,0:03:06.390
to make a new layer we'll fill it with
0:03:04.079,0:03:11.280
white and since white is our background
0:03:06.390,0:03:14.849
color press ctrl or command + delete go
0:03:11.280,0:03:16.889
to window and character in the character
0:03:14.849,0:03:20.639
panel choose a font that has at least
0:03:16.889,0:03:22.590
two weights I'm using aerial for the
0:03:20.639,0:03:26.069
highlights of the portrait I'll use
0:03:22.590,0:03:29.310
Arial regular the size is eight points
0:03:26.069,0:03:31.290
and the letting is seven points letting
0:03:29.310,0:03:36.030
is the amount of space between lines of
0:03:31.290,0:03:38.489
text press the all caps icon this makes
0:03:36.030,0:03:42.510
the text all caps even if the original
0:03:38.489,0:03:45.540
text is upper and lower case go to the
0:03:42.510,0:03:49.650
top left corner click down and drag it
0:03:45.540,0:03:53.190
to the bottom right corner this text box
0:03:49.650,0:03:55.889
or bounding box makes the text we place
0:03:53.190,0:03:59.190
inside this area conform to the
0:03:55.889,0:04:01.769
dimensions of the box if you resize the
0:03:59.190,0:04:04.260
bounding box Photoshop adjusts the
0:04:01.769,0:04:07.889
wrapped ends of the text to account for
0:04:04.260,0:04:10.790
the new size for this example I'll fill
0:04:07.889,0:04:13.609
it with Lincoln's Gettysburg Address I
0:04:10.790,0:04:16.289
already searched for it in my browser
0:04:13.609,0:04:18.900
when you find the text block you'd like
0:04:16.289,0:04:22.820
to use in your portrait highlight it and
0:04:18.900,0:04:26.030
press ctrl or command C to copy it I'll
0:04:22.820,0:04:28.580
minimize the browser's window
0:04:26.030,0:04:31.280
click down inside the top left corner of
0:04:28.580,0:04:34.630
the bounding box and press ctrl or
0:04:31.280,0:04:37.070
command V to paste the text into it
0:04:34.630,0:04:41.169
click on the thumbnail of the text to
0:04:37.070,0:04:45.440
accept it press Z to open your zoom tool
0:04:41.169,0:04:48.590
zoom into your text and click on your
0:04:45.440,0:04:52.250
type tool let's make the entire text
0:04:48.590,0:04:54.380
block into one unbroken paragraph I'll
0:04:52.250,0:04:58.010
click to the left of the first character
0:04:54.380,0:05:00.200
and press the backspace key to move it
0:04:58.010,0:05:02.960
to the left so it's flushed with the
0:05:00.200,0:05:04.520
bounding box I'll click to the left of
0:05:02.960,0:05:07.910
the first character of the second
0:05:04.520,0:05:10.130
paragraph and press the Delete key until
0:05:07.910,0:05:13.760
the text moves up to meet the first
0:05:10.130,0:05:18.470
paragraph continue until we have one
0:05:13.760,0:05:22.430
unbroken paragraph highlight it and copy
0:05:18.470,0:05:26.030
it press ctrl or command 0 to see the
0:05:22.430,0:05:27.919
entire document on your screen click to
0:05:26.030,0:05:31.790
the right of the last character and
0:05:27.919,0:05:34.250
paste in the text continue to paste the
0:05:31.790,0:05:37.250
text in until all the bounding box is
0:05:34.250,0:05:39.950
filled with the text to get rid of the
0:05:37.250,0:05:42.110
uneven lines of text on the right go to
0:05:39.950,0:05:45.620
the middle right of the bounding box and
0:05:42.110,0:05:49.250
press and hold ctrl on a PC or command
0:05:45.620,0:05:52.520
on a Mac when you see this white pointer
0:05:49.250,0:05:54.910
drag it to the right then click the
0:05:52.520,0:05:59.419
thumbnail of the text layer to accept it
0:05:54.910,0:06:03.169
let's name it highlights and then make a
0:05:59.419,0:06:05.720
copy of it click off the eyeball of the
0:06:03.169,0:06:09.350
original text to hide it and we'll name
0:06:05.720,0:06:11.770
the copy shadows double-click on the
0:06:09.350,0:06:15.460
thumbnail to highlight the text and
0:06:11.770,0:06:19.550
change the font to the heaviest weight
0:06:15.460,0:06:23.450
make the size 12 points and the letting
0:06:19.550,0:06:27.460
nine points click on the thumbnail to
0:06:23.450,0:06:30.590
accept it open your channels panel and
0:06:27.460,0:06:32.750
ctrl-click or command click on the
0:06:30.590,0:06:35.210
shadows thumbnail to make it into a
0:06:32.750,0:06:38.120
selection open back up your layers panel
0:06:35.210,0:06:39.440
and click on the layer mask button to
0:06:38.120,0:06:41.630
make a layer mask
0:06:39.440,0:06:46.670
next to the active layer which is the
0:06:41.630,0:06:50.150
shadows text make the highlights text
0:06:46.670,0:06:53.360
layer visible and active go back to your
0:06:50.150,0:06:55.430
channels panel and ctrl-click or command
0:06:53.360,0:06:58.310
click on the highlights thumbnail to
0:06:55.430,0:07:01.340
make it into a selection and then go to
0:06:58.310,0:07:05.270
the shadows thumbnail and press ctrl alt
0:07:01.340,0:07:07.430
on a PC or command option on a Mac to
0:07:05.270,0:07:10.190
subtract this shape from the highlight
0:07:07.430,0:07:13.880
shape leaving just the highlights of the
0:07:10.190,0:07:16.700
portrait open back up your layers panel
0:07:13.880,0:07:18.740
and click on the layer mask button to
0:07:16.700,0:07:23.480
make a layer mask next to the highlights
0:07:18.740,0:07:26.360
text as I mentioned at the beginning the
0:07:23.480,0:07:28.610
text is live and editable so for example
0:07:26.360,0:07:31.940
if we want to increase the size of the
0:07:28.610,0:07:33.740
text in the shadow areas double-click on
0:07:31.940,0:07:37.220
the thumbnail of the shadows text to
0:07:33.740,0:07:42.740
highlight all the text and type in a
0:07:37.220,0:07:46.730
higher number to accept it click back on
0:07:42.740,0:07:49.520
the thumbnail to modify the size of the
0:07:46.730,0:07:52.520
text in the highlight areas make the
0:07:49.520,0:07:54.140
highlights layer active and double-click
0:07:52.520,0:07:57.880
on the thumbnail to highlight all the
0:07:54.140,0:08:02.360
text I'll change the point size 26 and
0:07:57.880,0:08:04.130
click on the thumbnail to accept it next
0:08:02.360,0:08:06.950
I'll show you how to make your portrait
0:08:04.130,0:08:09.890
into full color make the top layer
0:08:06.950,0:08:12.950
active and click on the new layer button
0:08:09.890,0:08:15.680
to make a new layer we'll fill it with
0:08:12.950,0:08:22.010
white and since white is our foreground
0:08:15.680,0:08:25.600
color press alt or option + delete hide
0:08:22.010,0:08:28.610
the layer open your channels panel and
0:08:25.600,0:08:31.520
click on the dotted circular icon at the
0:08:28.610,0:08:34.430
bottom to select all the tonal values of
0:08:31.520,0:08:37.479
your image open back up your layers
0:08:34.430,0:08:40.640
panel and make the white layer visible
0:08:37.479,0:08:44.180
invert the selection by pressing ctrl
0:08:40.640,0:08:47.960
shift I on a PC or command shift I on a
0:08:44.180,0:08:51.050
Mac to hide the selection press ctrl or
0:08:47.960,0:08:52.779
command H let's fill the selection with
0:08:51.050,0:08:56.450
gradient colors
0:08:52.779,0:08:59.320
open your gradient tool and click on the
0:08:56.450,0:09:02.899
gradient bar to open the gradient editor
0:08:59.320,0:09:08.110
click on the lower left stop and the
0:09:02.899,0:09:11.690
color box pick a color click OK and
0:09:08.110,0:09:17.990
click on the lower right stop pick
0:09:11.690,0:09:20.360
another color and close the windows I'll
0:09:17.990,0:09:22.010
choose a linear gradient have fun
0:09:20.360,0:09:25.279
experimenting with all the different
0:09:22.010,0:09:28.760
types of gradients go to the top of your
0:09:25.279,0:09:31.630
documents press and hold shift drag down
0:09:28.760,0:09:34.040
the gradient to the bottom and release a
0:09:31.630,0:09:36.260
quick way to change the colors of the
0:09:34.040,0:09:40.300
gradient is to click on the adjustment
0:09:36.260,0:09:43.490
layer button and choose hue/saturation
0:09:40.300,0:09:47.180
by sliding the amounts of hue saturation
0:09:43.490,0:09:51.740
and lightness you can non-destructively
0:09:47.180,0:09:54.410
change the color of your portrait this
0:09:51.740,0:09:56.589
is Marty from Blue Lightning TV thanks
0:09:54.410,0:09:56.589
for watching
standard: en
0:00:08.530,0:00:11.549
Hi, this is Marty from Blue Lightning TV.
0:00:11.549,0:00:16.849
Quite a while ago, I did a tutorial
showing how to make a portrait out of text.
0:00:16.849,0:00:21.619
In this tutorial, I'll show you how to do
it quicker and better.
0:00:21.619,0:00:24.480
Including how to make it in color.
0:00:24.480,0:00:30.159
You can mix fonts and sizes and because
they're "live", they're fully editable.
0:00:30.159,0:00:32.620
Feel free to use any photo you'd like.
0:00:32.620,0:00:34.239
If you want to use this image,
0:00:34.239,0:00:38.460
its link is located in the video's
description or project files.
0:00:38.460,0:00:41.369
Its size is approximately, 1300
0:00:41.369,0:00:43.390
by 1900 pixels
0:00:43.390,0:00:47.170
with the resolution of 150 pixels per inch.
0:00:47.170,0:00:49.350
If you're using a color photo
0:00:49.350,0:00:53.099
desaturate it by pressing Ctrl + Shift + "u" on a PC
0:00:53.099,0:00:55.960
or Cmd + Shift + 'u" on a Mac.
0:00:55.960,0:00:58.190
To make the darkest tones, black
0:00:58.190,0:01:00.220
and the lightest tones, white...
0:01:00.220,0:01:03.300
press Ctrll or Cmd + Shift + "L".
0:01:03.300,0:01:06.790
We need to make a selection around the
head and shoulders.
0:01:06.790,0:01:10.659
For this example, I'll use the Pencil tool.
0:01:10.659,0:01:12.509
First, click on your quick mask button...
0:01:12.509,0:01:15.740
and make sure black is your foreground
color.
0:01:15.740,0:01:16.939
If it isn't,
0:01:16.939,0:01:20.960
click on this small black and white box
icon.
0:01:20.960,0:01:23.760
Open your pencil tool.
0:01:23.760,0:01:25.550
We'll make the Size...
0:01:25.550,0:01:30.000
5 pixels and the Hardness... 100%.
0:01:30.000,0:01:34.299
Draw around the head and shoulders. It
doesn't have to be perfect, especially
0:01:34.299,0:01:37.490
around the hair.
0:01:37.490,0:01:40.110
Open your paint bucket tool.
0:01:40.110,0:01:43.610
Click down inside the portrait to fill
it in.
0:01:43.610,0:01:46.890
Press "Q" to make the quickmask into
a selection.
0:01:46.890,0:01:47.829
Invert it...
0:01:47.829,0:01:52.040
by pressing Ctrl or Cmd + Shift + "i".
0:01:52.040,0:01:56.280
Go to Select and Save Selection.
0:01:56.280,0:01:57.850
Name it, "Highlights"...
0:01:57.850,0:02:01.920
and click, OK or press Enter or Return.
0:02:01.920,0:02:03.130
Delete the selection
0:02:03.130,0:02:07.240
by pressing Ctrl or Cmd + "d".
0:02:07.240,0:02:12.659
Press Ctrl or Cmd + "j" to make a
copy of the original image.
0:02:12.659,0:02:13.980
Go to Filter...
0:02:13.980,0:02:16.019
and Filter Gallery.
0:02:16.019,0:02:18.119
Open the "Artistic" folder...
0:02:18.119,0:02:18.889
and click
0:02:18.889,0:02:20.299
"Cutout".
0:02:20.299,0:02:22.729
Make the number of Levels, 2...
0:02:22.729,0:02:25.429
the Edge Simplicity, 5...
0:02:25.429,0:02:27.680
and the Edge Fidelity, 1.
0:02:27.680,0:02:32.239
Then, click OK.
0:02:32.239,0:02:37.689
Go to Image...Adjustments...and Threshold.
0:02:37.689,0:02:41.889
The Threshold is 128.
0:02:41.889,0:02:43.019
Go to Select
0:02:43.019,0:02:45.819
and Color Range.
0:02:45.819,0:02:47.279
Select...
0:02:47.279,0:02:48.749
Shadows...
0:02:48.749,0:02:51.789
and click, OK.
0:02:51.789,0:02:54.309
We'll save the selection
0:02:54.309,0:02:57.010
and name it, "Shadows".
0:02:57.010,0:02:59.919
Then, delete the selection.
0:02:59.919,0:03:01.709
Click on the new layer button
0:03:01.709,0:03:03.299
to make a new layer.
0:03:03.299,0:03:07.159
We'll fill it with White...and since white is
our background color,
0:03:07.159,0:03:11.159
press Ctrl or Cmd + Delete.
0:03:11.159,0:03:14.129
Go to Window... and Character.
0:03:14.129,0:03:15.650
In the Character panel,
0:03:15.650,0:03:18.219
choose a font that has at least 2 weights.
0:03:18.219,0:03:20.419
I'm using, "Arial".
0:03:20.419,0:03:22.210
For the Highlights of the portrait,
0:03:22.210,0:03:24.569
I'll use, Arial Regular.
0:03:24.569,0:03:28.889
The Size is 8 points and the "Leading"
is 7 points.
0:03:28.889,0:03:32.899
"Leading" is the amount of space between
the lines of text.
0:03:32.899,0:03:35.609
Press the "All Caps" icon.
0:03:35.609,0:03:42.099
This makes the text all caps even if the
original text is upper and lower case.
0:03:42.099,0:03:44.939
Go to the top, left corner... click down...
0:03:44.939,0:03:48.809
and drag it of the bottom, right corner.
0:03:48.809,0:03:51.819
This "text box" or "bounding box"...
0:03:51.819,0:03:56.669
makes the text we place inside this area,
conform to the dimensions of the
0:03:56.669,0:03:57.979
box.
0:03:57.979,0:04:03.779
If you re-size the bounding box, Photoshop
adjusts the wrapped ends of the text to
0:04:03.779,0:04:06.459
account for the new size.
0:04:06.459,0:04:09.199
For this example, I'll fill it with
Lincoln's
0:04:09.199,0:04:11.299
"Gettysburg Address".
0:04:11.299,0:04:14.400
I already searched for it in my browser.
0:04:14.400,0:04:18.139
When you find the text block you'd like to
use in your portrait,
0:04:18.139,0:04:19.479
highlight it...
0:04:19.479,0:04:23.090
and press Ctrl or Cmd + "c" to copy it.
0:04:23.090,0:04:26.250
I'll minimize the browser's window...
0:04:26.250,0:04:29.970
click down inside the top, left corner of
the bounding box
0:04:29.970,0:04:32.419
and press Ctrl or Cmd + "v"...
0:04:32.419,0:04:35.410
to paste the text into it.
0:04:35.410,0:04:38.570
Click on the thumbnail of the text to
accept it.
0:04:38.570,0:04:41.939
Press, "z" to open your Zoom tool.
0:04:41.939,0:04:44.819
Zoom into your text...
0:04:44.819,0:04:47.229
and click on your Type tool.
0:04:47.229,0:04:52.220
Let's make the entire text block into
one unbroken paragraph.
0:04:52.220,0:04:55.199
I'll click to the left of the first
character...
0:04:55.199,0:05:00.159
and press the Backspace key to move it
to the left, so it's flush with the
0:05:00.159,0:05:01.629
bounding box.
0:05:01.629,0:05:05.530
I'll click to the left of the first
character of the second paragraph...
0:05:05.530,0:05:07.630
and press the Delete key...
0:05:07.630,0:05:12.050
until the text moves up to meet the
first paragraph.
0:05:12.050,0:05:17.019
Continue until we have one unbroken
paragraph.
0:05:17.019,0:05:18.150
Highlight it...
0:05:18.150,0:05:19.610
and copy it.
0:05:19.610,0:05:21.890
Press Ctrl or Cmd + Zero...
0:05:21.890,0:05:25.629
to see the entire document on your
screen.
0:05:25.629,0:05:30.739
Click to the right of the last character
and paste in the text.
0:05:30.739,0:05:34.889
Continue to paste the text in until
all of the bounding box is filled with the
0:05:34.889,0:05:36.349
text.
0:05:36.349,0:05:39.759
To get rid of the uneven lines of text
on the right,
0:05:39.759,0:05:42.230
go to the middle, right of the bounding
box...
0:05:42.230,0:05:45.230
and press and hold Ctrl on a PC
0:05:45.230,0:05:47.399
or Cmd on a Mac.
0:05:47.399,0:05:49.699
When you see this white pointer,
0:05:49.699,0:05:52.219
drag it to the right.
0:05:52.219,0:05:55.580
Then, click on the thumbnail of the text layer to
accept it.
0:05:55.580,0:05:57.490
Let's name it...
0:05:57.490,0:05:58.560
"Highlights"...
0:05:58.560,0:06:01.919
and then make a copy of it.
0:06:01.919,0:06:05.139
Click off the eyeball of the original
text to hide it...
0:06:05.139,0:06:06.790
and we'll name the copy...
0:06:06.790,0:06:08.740
"Shadows".
0:06:08.740,0:06:12.329
Double-click on the thumbnail to
highlight the text...
0:06:12.329,0:06:16.270
and change the font to the heaviest
weight.
0:06:16.270,0:06:18.889
Make the size, 12 points...
0:06:18.889,0:06:22.300
and the Leading, 9 points.
0:06:22.300,0:06:25.060
Click on the thumbnail to accept it.
0:06:25.060,0:06:28.189
Open your Channels panel...
0:06:28.189,0:06:29.550
and Ctrl-click...
0:06:29.550,0:06:33.869
or Cmd-click on the Shadows thumbnail
to make it into a selection.
0:06:33.869,0:06:35.930
Open back up to you Layers panel...
0:06:35.930,0:06:37.940
and click on the Layer mask button...
0:06:37.940,0:06:44.940
to make a layer mask next to the active
layer, which is the Shadows text.
0:06:45.380,0:06:48.020
Make the Highlights text layer, visible...
0:06:48.020,0:06:49.659
and active.
0:06:49.659,0:06:51.440
Go back to your Channels panel...
0:06:51.440,0:06:55.270
and Ctrl-click or Cmd-click on
the Highlights thumbnail...
0:06:55.270,0:06:57.370
to make it into a selection...
0:06:57.370,0:06:59.889
and then go to the Shadows thumbnail...
0:06:59.889,0:07:02.749
and press Ctrl+ Alt on a PC
0:07:02.749,0:07:05.089
or Cmd + Opt on a Mac...
0:07:05.089,0:07:08.520
to subtract the shape from the
Highlights shape...
0:07:08.520,0:07:12.589
leaving just the highlights of the
portrait.
0:07:12.589,0:07:14.699
Open back up your Layers panel...
0:07:14.699,0:07:18.830
and click on the layer mask button to
make a layer mask next to the highlights
0:07:18.830,0:07:21.699
text.
0:07:21.699,0:07:23.379
As I mentioned at the beginning,
0:07:23.379,0:07:25.860
the text is "live" and editable...
0:07:25.860,0:07:31.379
so for example, if we want to increase
the size of the text in the shadow areas,
0:07:31.379,0:07:34.729
double-click on the thumbnail of the
Shadows text to highlight all the
0:07:34.729,0:07:36.489
text
0:07:36.489,0:07:41.099
and type in a higher number.
0:07:41.099,0:07:45.319
To accept it, click back on the thumbnail.
0:07:45.319,0:07:49.199
To modify the size of the text in the
highlight areas,
0:07:49.199,0:07:51.810
make the Highlights layer active...
0:07:51.810,0:07:55.529
and double-click on the thumbnail to
highlight all the text.
0:07:55.529,0:07:58.539
I'll change point size to 6...
0:07:58.539,0:08:01.900
and click on the thumbnail to accept it.
0:08:01.900,0:08:06.339
Next, I'll show you how to make your
portrait into full color.
0:08:06.339,0:08:08.660
Make the top layer active...
0:08:08.660,0:08:12.159
and click on the new layer button to make
a new layer.
0:08:12.159,0:08:14.069
We'll fill it with White...
0:08:14.069,0:08:17.090
and since White is our foreground color
0:08:17.090,0:08:21.759
press, Alt or Opt + Delete.
0:08:21.759,0:08:23.839
Hide the layer...
0:08:23.839,0:08:26.159
open your Channels panel...
0:08:26.159,0:08:31.479
and click on the dotted, circular icon at
the bottom to select all the tonal values
0:08:31.479,0:08:33.210
of your image.
0:08:33.210,0:08:38.080
Open back up your layers panel and
make the white layer visible.
0:08:38.080,0:08:39.629
Invert the selection...
0:08:39.629,0:08:42.500
by pressing Ctrl + Shift + 'i" on a PC
0:08:42.500,0:08:45.530
or Cmd + Shift + "i" on a Mac.
0:08:45.530,0:08:46.970
To hide the selection,
0:08:46.970,0:08:49.770
press Ctrl or Cmd + "h".
0:08:49.770,0:08:53.440
Let's fill the selection with gradient
colors.
0:08:53.440,0:08:55.920
Open your Gradient tool...
0:08:55.920,0:09:00.200
and click on the gradient bar to open the
gradient editor.
0:09:00.200,0:09:02.660
Click on the lower, left "stop"...
0:09:02.660,0:09:04.870
and the color box.
0:09:04.870,0:09:06.730
Pick a color...
0:09:06.730,0:09:08.820
click, OK...
0:09:08.820,0:09:11.590
and click on the lower, right "stop".
0:09:11.590,0:09:14.350
Pick another color...
0:09:14.350,0:09:17.900
and close the windows.
0:09:17.900,0:09:19.960
I'll choose a linear gradient.
0:09:19.960,0:09:24.470
Have fun experimenting with all the
different types of gradients.
0:09:24.470,0:09:26.310
Go to the top of your document...
0:09:26.310,0:09:28.240
press and hold, Shift...
0:09:28.240,0:09:30.310
drag down the gradient to the bottom...
0:09:30.310,0:09:32.200
and release.
0:09:32.200,0:09:35.340
A quick way to change the colors of the
gradient...
0:09:35.340,0:09:38.130
is to click on the adjustment layer
button...
0:09:38.130,0:09:41.080
and choose, Hue Saturation.
0:09:41.080,0:09:43.250
By sliding the amounts of Hue...
0:09:43.250,0:09:46.030
Saturation and Lightness,
0:09:46.030,0:09:51.630
you can non-destructively change the
color of your portrait.
0:09:51.630,0:09:54.169
This is Marty from Blue Lightning TV.
0:09:54.169,0:09:54.629
Thanks for watching!
Profiles
Profile 1
| Purpose | Tutorial (why) |
|---|---|
| Content | |
| Participants | Photoshop (m) geek, Celebrity (m) |
| Form | Tutorial (how) |
| Time | |
| Place |
Profile 2
| Purpose | Tutorial |
|---|---|
| Content | Portrait, Text |
| Participants | Photoshop (m) geek, Celebrity (m) |
| Form | Tutorial (how) |
| Time | Real time |
| Place | Desktop |