Photoshop Tutorial: How to Make a Basket-Weave Effect from a Photo
Figuration: Tutorial
Description
Subscribe to Blue Lightning TV!:
http://goo.gl/HEpuJ4
Website:
http://www.bluelightningtv.com/
Get up to 20% off Photoshop + Lightroom! Only $7.99 p/month:
http://goo.gl/QFznn7
Facebook:
https://goo.gl/fHLJsh
Twitter:
https://twitter.com/bluelightningtv
Metadata
| Video ID | 118 | Youtube URL | Photoshop Tutorial: How to Make a Basket-Weave Effect from a Photo |
|---|---|
| Captions Available | Yes |
| Captions Downloadable | Yes |
| Playlists | |
| Duration | 00:07:21 |
| Definition | hd |
| Keywords | |
| License | youtube |
| Embeddable | Yes |
| Views | 202482 |
| Likes | 1492 |
| Dislikes | 17 |
| Favourites | 0 |
| Comments | 191 |
| Created | 2017-05-04 1:00:42 PM |
| Updated | 2017-05-04 1:10:59 PM |
Captions
ASR: en
0:00:07.639,0:00:13.170
hi this is Marty from Blue Lightning TV
0:00:10.410,0:00:15.480
I'm going to show you how to create a
0:00:13.170,0:00:19.109
cool-looking interlocking basket weave
0:00:15.480,0:00:21.300
effect of your photos this effect works
0:00:19.109,0:00:25.250
especially well on closely cropped
0:00:21.300,0:00:29.369
portraits open a photo you'd like to use
0:00:25.250,0:00:32.340
open your crop tool and type in 870
0:00:29.369,0:00:34.590
pixels for the width and the height type
0:00:32.340,0:00:38.160
in a hundred fifty pixels per inch for
0:00:34.590,0:00:40.620
the resolution and check delete cropped
0:00:38.160,0:00:44.250
pixels this will delete everything
0:00:40.620,0:00:46.309
around the cropped area go to a corner
0:00:44.250,0:00:49.920
and when you see a diagonal double-arrow
0:00:46.309,0:00:52.739
hold down shift and alt on windows or
0:00:49.920,0:00:55.199
shift + option on a Mac as you drag it
0:00:52.739,0:00:58.590
in until most of the head is inside the
0:00:55.199,0:01:01.680
box to reposition it click inside and
0:00:58.590,0:01:05.040
drag it so it's centered then press
0:01:01.680,0:01:07.200
Enter or return it immediately crops to
0:01:05.040,0:01:10.170
the width height and resolution that you
0:01:07.200,0:01:14.270
typed in to see your image at a hundred
0:01:10.170,0:01:16.860
percent press ctrl or command + 1 if
0:01:14.270,0:01:18.299
your foreground and background colors
0:01:16.860,0:01:22.830
aren't black and white respectively
0:01:18.299,0:01:25.799
press D on your keyboard make two copies
0:01:22.830,0:01:29.939
of it by pressing ctrl or command J
0:01:25.799,0:01:32.970
twice click the thumbnail of the bottom
0:01:29.939,0:01:35.780
layer to make it active and press alt or
0:01:32.970,0:01:41.180
option + delete to fill it with black
0:01:35.780,0:01:45.509
make the top layer active and go to edit
0:01:41.180,0:01:48.630
preferences and guides grids and slices
0:01:45.509,0:01:51.329
in the grid section click the color box
0:01:48.630,0:01:55.909
and pick a bright color for the grid
0:01:51.329,0:02:00.030
then click OK or press Enter or return
0:01:55.909,0:02:03.630
make the grid line every 217 pixels and
0:02:00.030,0:02:08.069
divide it into six subdivisions then
0:02:03.630,0:02:11.940
click OK or press Enter or return go to
0:02:08.069,0:02:13.560
view and make sure Snap is checked if it
0:02:11.940,0:02:16.800
isn't just click on it
0:02:13.560,0:02:20.840
to see the grid go to show and click
0:02:16.800,0:02:24.239
grid open your rectangular marquee tool
0:02:20.840,0:02:26.790
go to the top left corner and drag down
0:02:24.239,0:02:29.280
a rectangular selection across three
0:02:26.790,0:02:31.290
columns of boxes to the bottom it'll
0:02:29.280,0:02:34.920
snap to the grid because we have snapped
0:02:31.290,0:02:36.780
checked skip one column and hold down
0:02:34.920,0:02:38.970
shift as you drag down another
0:02:36.780,0:02:42.360
rectangular selection across three
0:02:38.970,0:02:48.060
columns continue to skip one column and
0:02:42.360,0:02:50.459
drag over three click the layer mask
0:02:48.060,0:02:53.880
icon to make a layer mask of the
0:02:50.459,0:02:56.250
selection next to the active layer go to
0:02:53.880,0:03:00.180
the top left corner and drag to the
0:02:56.250,0:03:07.890
right across three rows continue to skip
0:03:00.180,0:03:10.739
one row and drag over three make layer
0:03:07.890,0:03:13.890
one active and click the layer mask icon
0:03:10.739,0:03:16.500
to make a layer mask of the selection we
0:03:13.890,0:03:20.370
can hide the grid now press ctrl or
0:03:16.500,0:03:22.530
command H to hide it ctrl-click or
0:03:20.370,0:03:25.079
command click on the layer mask of the
0:03:22.530,0:03:28.049
horizontal rows to make a selection of
0:03:25.079,0:03:31.590
it go to the layer mask of the vertical
0:03:28.049,0:03:35.130
columns and hold down ctrl shift alt on
0:03:31.590,0:03:37.739
windows or command shift option on a Mac
0:03:35.130,0:03:39.269
to make a selection that overlaps the
0:03:37.739,0:03:44.870
vertical columns with the horizontal
0:03:39.269,0:03:49.290
rows go to select and save selection
0:03:44.870,0:03:51.569
when you see this window click OK press
0:03:49.290,0:03:56.630
Q to make the selection into a quick
0:03:51.569,0:03:59.670
mask open your paint bucket tool and
0:03:56.630,0:04:03.120
left click inside the second empty box
0:03:59.670,0:04:06.720
at the top to fill it in skip a box and
0:04:03.120,0:04:12.359
left click on the one after it continue
0:04:06.720,0:04:14.730
this pattern on every other row then go
0:04:12.359,0:04:18.299
to the first empty box on the second row
0:04:14.730,0:04:21.000
and fill it in continue to fill in every
0:04:18.299,0:04:23.780
other empty box in every other row so
0:04:21.000,0:04:27.360
your final quick mask looks like this
0:04:23.780,0:04:30.960
press Q to revert it back into a select
0:04:27.360,0:04:32.669
and press ctrl or command J to cut the
0:04:30.960,0:04:35.759
shape of the selection from the active
0:04:32.669,0:04:38.129
layer click the thumbnail of the top
0:04:35.759,0:04:40.319
layer to make it active click the
0:04:38.129,0:04:44.189
channels tab to open the channels panel
0:04:40.319,0:04:48.000
and ctrl-click or command click on alpha
0:04:44.189,0:04:50.879
1 to make a selection of its shape click
0:04:48.000,0:04:54.360
back on the layers panel and press Q to
0:04:50.879,0:04:56.699
make it into a quick mask this time left
0:04:54.360,0:04:59.460
click inside the first empty box at the
0:04:56.699,0:05:02.789
top left and fill in every other empty
0:04:59.460,0:05:05.219
box on every other row then left click
0:05:02.789,0:05:08.189
on the second empty box of the second
0:05:05.219,0:05:11.639
row and continue this pattern so your
0:05:08.189,0:05:15.750
quick mask looks like this press Q to
0:05:11.639,0:05:18.150
make it into a selection and press ctrl
0:05:15.750,0:05:20.639
or command J to cut the shape of the
0:05:18.150,0:05:23.129
selection from the active layer the
0:05:20.639,0:05:25.740
basket-weave effect comes to life once
0:05:23.129,0:05:27.210
we add shadows to these shapes we need
0:05:25.740,0:05:29.819
to clip the shapes to the layers
0:05:27.210,0:05:31.440
directly below each one in order to
0:05:29.819,0:05:35.009
restrict their shadows to their
0:05:31.440,0:05:39.569
respective layers to do this go to layer
0:05:35.009,0:05:41.639
and create clipping mask notice the
0:05:39.569,0:05:43.740
active layer moved to the right which
0:05:41.639,0:05:45.900
indicates that it's now clipping to the
0:05:43.740,0:05:49.589
one layer below it will clip these
0:05:45.900,0:05:53.039
shapes as well make it active and this
0:05:49.589,0:05:58.069
time we'll use the shortcut ctrl Alt key
0:05:53.039,0:06:04.009
on Windows or command option G on a Mac
0:05:58.069,0:06:09.750
click the FX icon and choose outer glow
0:06:04.009,0:06:14.039
click the color box and pick black then
0:06:09.750,0:06:17.129
click OK change the blend mode to
0:06:14.039,0:06:20.370
multiply and make the opacity fifty
0:06:17.129,0:06:23.939
percent make the size 40 pixels and
0:06:20.370,0:06:27.599
click OK to copy the outer glow shadows
0:06:23.939,0:06:29.699
to the other shapes go to the FX icon to
0:06:27.599,0:06:32.610
the right of the layer and hold down alt
0:06:29.699,0:06:38.190
or option as you drag it up to the top
0:06:32.610,0:06:40.180
layer next we'll add a texture but first
0:06:38.190,0:06:42.910
make a composite snapshot
0:06:40.180,0:06:46.870
your image to do this make the top layer
0:06:42.910,0:06:50.289
active and press ctrl shift alt e on
0:06:46.870,0:06:57.009
windows or command shift option e on a
0:06:50.289,0:07:00.150
Mac go to filter and filter gallery open
0:06:57.009,0:07:03.430
the texture folder and click texturizer
0:07:00.150,0:07:06.310
choose burlap and make the scaling a
0:07:03.430,0:07:09.580
hundred percent the relief is one and
0:07:06.310,0:07:14.470
the light is from the top then click OK
0:07:09.580,0:07:16.780
or press Enter or return this is Marty
0:07:14.470,0:07:19.229
from Blue Lightning TV thanks for
0:07:16.780,0:07:19.229
watching
standard: en
0:00:00.070,0:00:05.160
0:00:08.400,0:00:11.040
Hi. This is Marty from Blue Lightning TV.
0:00:11.040,0:00:14.120
I'm going to show you how to create a cool-looking,
0:00:14.120,0:00:17.369
interlocking, basket-weave effect of your photos.
0:00:17.369,0:00:22.380
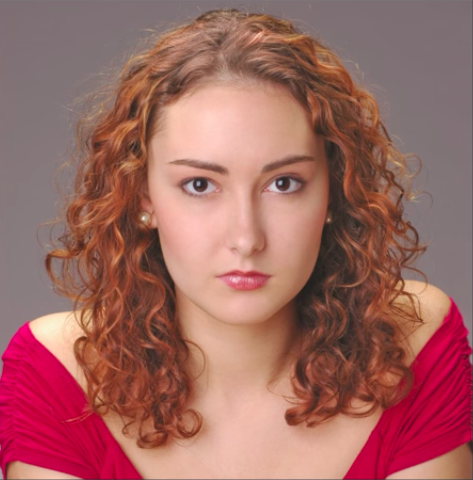
This effect works especially well on closely-cropped portraits.
0:00:22.380,0:00:27.300
Open a photo you'd like to use. Open your Crop Tool
0:00:27.300,0:00:30.550
and type in 870 pixels for the Width
0:00:30.550,0:00:35.480
and the Height. Type in a 150 pixels per inch for the Resolution
0:00:35.480,0:00:39.210
and check "Delete Cropped Pixels".
0:00:39.210,0:00:42.460
This will delete everything around the cropped area.
0:00:42.460,0:00:46.829
Go to a corner and when you see a diagonal, double-arrow,
0:00:46.829,0:00:49.860
hold down Shift + Alt on Windows
0:00:49.860,0:00:53.300
or Shift + Option on a Mac as you drag it in
0:00:53.300,0:00:57.170
until most of the head is inside the box. To reposition it,
0:00:57.170,0:01:00.320
click inside and drag it so it's centered.
0:01:00.320,0:01:05.510
Then, press Enter or Return. It immediately crops to the Width,
0:01:05.510,0:01:10.850
Height and Resolution that you typed in. To see your image at 100%,
0:01:10.850,0:01:17.130
press Ctrl or Cmd + 1. If your foreground and background colors
0:01:17.130,0:01:20.170
aren't black and white respectively, press "d"
0:01:20.170,0:01:23.490
on your keyboard. Make two copies of it
0:01:23.490,0:01:26.750
by pressing Ctrl or Cmd + J, twice.
0:01:28.300,0:01:31.340
Click the thumbnail of the bottom layer to make it active
0:01:31.340,0:01:35.710
and press Alt or Option + Delete to fill it with black.
0:01:35.710,0:01:40.159
Make the top layer active and go to
0:01:40.159,0:01:45.800
Edit, Preferences and "Guides, Grids & Slices"
0:01:45.800,0:01:49.340
In the Grid section, click the color box
0:01:49.340,0:01:52.360
and pick a bright color for the grid. Then,
0:01:52.360,0:01:57.820
click OK or press Enter or Return. Make the Grid Line
0:01:57.820,0:02:02.689
every 217 pixels and divide it into 6 subdivisions.
0:02:02.689,0:02:06.560
Then, click OK or press Enter or Return.
0:02:06.560,0:02:11.340
Go to View and make sure "Snap" is checked.
0:02:11.340,0:02:14.840
If it isn't, just click on it. To see the grid,
0:02:14.840,0:02:21.110
Go to "Show" and click "Grid". Open your Rectangular Marquee Tool,
0:02:21.110,0:02:25.970
go to the top, left corner and drag down a rectangular selection
0:02:25.970,0:02:30.560
across 3 columns of boxes to the bottom. It'll snap to the grid because
0:02:30.560,0:02:31.920
we have "Snap" checked.
0:02:31.920,0:02:35.599
Skip 1 column and hold down Shift
0:02:35.599,0:02:39.700
as you drag down another rectangular selection across 3 columns.
0:02:39.730,0:02:43.790
Continue to skip 1 column and drag over 3.
0:02:46.700,0:02:49.220
Click the Layer Mask icon
0:02:49.220,0:02:52.819
to make a layer mask of the selection next to the active layer.
0:02:52.819,0:02:56.750
Go to the top, left corner and drag to the right
0:02:56.750,0:03:00.319
across 3 rows. Continue to skip
0:03:00.319,0:03:02.800
1 row and drag over 3.
0:03:07.100,0:03:13.300
Make Layer 1 active
and click the layer mask icon to make a layer mask of the selection.
0:03:13.300,0:03:16.489
We can hide the grid now. Press Ctrl or
0:03:16.489,0:03:20.440
Cmd + H to hide it. Ctrl-click
0:03:20.440,0:03:23.940
or Cmd-click on the layer mask of the horizontal rows
0:03:23.940,0:03:27.470
to make a selection of it. Go to the layer mask of
0:03:27.470,0:03:33.100
the vertical columns and hold down
Ctrl + Shift + Alt on WIndows
0:03:33.100,0:03:35.400
or Cmd + Shift + Option on a Mac
0:03:35.470,0:03:38.769
to make a selection that overlaps the vertical columns
0:03:38.769,0:03:42.239
with the horizontal rows. Go to Select
0:03:42.239,0:03:47.110
and "Save Selection". When you see this window,
0:03:47.110,0:03:50.940
click OK. Press "Q" to make the selection
0:03:50.940,0:03:55.830
into a Quickmask. Open your Paint Bucket Tool
0:03:56.800,0:04:00.650
and left-click inside the second empty box at the top
0:04:00.650,0:04:05.700
to fill it in. Skip a box and left-click on the one after it.
0:04:05.700,0:04:08.800
Continue this pattern on every other row.
0:04:11.000,0:04:15.120
Then, go to the first empty box on the second row
0:04:15.120,0:04:19.410
and fill it in. Continue to fill in every other empty box
0:04:19.410,0:04:23.400
in every other row, so your final Quickmask looks like this.
0:04:24.100,0:04:28.009
Press Q to revert it back into a selection
0:04:28.009,0:04:33.800
and press Ctrl or Cmd + J to cut the
shape of the selection from the active layer.
0:04:33.800,0:04:34.259
0:04:34.259,0:04:37.699
Click the thumbnail of the top layer to make it active.
0:04:37.699,0:04:41.380
Click the "Channel" tab to open the Channels panel
0:04:41.380,0:04:45.050
and Ctrl-click or Cmd-click on "Alpha 1"
0:04:45.050,0:04:49.919
to make a selection of its shape. Click back on the Layers panel
0:04:49.919,0:04:53.050
and press "Q" to make it into a Quickmask.
0:04:53.050,0:04:57.720
This time, left-click inside the first empty box at the top, left
0:04:57.720,0:05:01.820
and fill in every other empty box on every other row.
0:05:01.820,0:05:06.240
Then, left-click on the second empty box of the second row
0:05:06.240,0:05:09.800
and continue this pattern, so your Quick mask looks like this.
0:05:10.880,0:05:14.600
Press "Q" to make it into a selection
0:05:14.600,0:05:19.120
and press Ctrl or Cmd + J
to cut the shape of the selection from the
0:05:19.120,0:05:20.470
active layer.
0:05:20.470,0:05:25.310
The basket weave effect comes to life
once we add shadows to these shapes.
0:05:25.310,0:05:29.120
We need to clip the shapes to the
layers directly below each one
0:05:29.120,0:05:33.050
in order to restrict their shadows to
their respective layers.
0:05:33.050,0:05:37.500
To do this, go to layer and "Create Clipping Mask".
0:05:39.020,0:05:42.919
Notice the active layer moved to the right,
which indicates that it's now
0:05:42.919,0:05:47.400
clipping to the one layer below it. We'll clip these shapes, as well.
0:05:47.400,0:05:50.360
Make it active and this time,
0:05:50.360,0:05:53.430
we'lluse the shortcut: Ctrl + Alt + G
0:05:53.430,0:05:57.800
on Windows or Cmd + Option + G on a Mac.
0:05:58.860,0:06:02.700
Click the "fx" icon and choose: Outer Glow.
0:06:04.710,0:06:06.100
Click the color box
0:06:08.139,0:06:10.900
and pick Black. Then, click OK.
0:06:12.940,0:06:18.250
Change the Blend Mode to Multiply and make the Opacity 50%.
0:06:18.250,0:06:21.700
Make the Size: 40 pixels and click OK.
0:06:22.240,0:06:25.880
To copy the outer glow shadows to the other shapes,
0:06:25.880,0:06:29.680
go to the "fx" icon to the right of the layer and hold down
0:06:29.680,0:06:34.000
Alt or Option as you drag it up to the top layer.
0:06:35.610,0:06:41.139
Next, we'll add a texture, but first make a
"composite snapshot" of your image.
0:06:41.139,0:06:44.310
To do this, make the top layer active
0:06:44.310,0:06:48.030
and press Ctrl +Shift + Alt + E on Windows
0:06:48.030,0:06:51.300
or Cmd + Shift + Option + E on a Mac.
0:06:53.100,0:06:56.660
Go to Filter and Filter Gallery.
0:06:56.660,0:07:00.819
Open the "Texture" folder and click "Texturizer".
0:07:00.819,0:07:04.810
Choose "Burlap" and make the Scaling 100%,
0:07:04.810,0:07:08.669
the Relief is 1 and the Light is from the Top.
0:07:08.669,0:07:11.600
Then, click OK or press Enter or Return.
0:07:13.699,0:07:17.180
This is Marty from Blue Lightning TV.
Thanks for watching!
Profiles
Profile 1
| Purpose | Tutorial (why) |
|---|---|
| Content | |
| Participants | nameless (f) model, Photoshop (m) geek |
| Form | Tutorial (how) |
| Time | |
| Place |
Profile 2
| Purpose | Tutorial |
|---|---|
| Content | Portrait |
| Participants | nameless (f) model, Photoshop (m) geek |
| Form | Tutorial (how) |
| Time | Real time |
| Place | Desktop |
Profile 4
| Purpose | |
|---|---|
| Content | Portrait |
| Participants | |
| Form | |
| Time | |
| Place |