Photoshop Tutorial: How to Create an Awesome Poster with Wrap-around Text
Figuration: Tutorial
Description
“Bank Bold” font:
https://1drv.ms/u/s!ArAEPhCK6XBWjQqxumfhaO0Vtrrn
“Dense Regular” font:
https://1drv.ms/u/s!ArAEPhCK6XBWjQtTF6uz8FY8QDqi
Lorem Ipsum text generators:
http://www.blindtextgenerator.com/lorem-ipsum
http://generator.lorem-ipsum.info/
http://loripsum.net/
Refine Edge tutorial:
https://goo.gl/gGBaii
Select and Mask tutorial:
https://goo.gl/9p9uar
Photo provided by http://www.shutterstock.com
Image ID: 178704302
Royalty-Free Music provided by http://www.beatsuite.com
High quality, copyright-free music for YouTube.
Music track: “Hellwars”
For a limited time, get 20% off Photoshop CC + Lightroom + more all together for $7.99/month p/month!:
https://creative.adobe.com/promo/BLTVCCPP?sdid=KTSWF
Become a Patron to Blue Lighting TV for as little as $2/month:
https://www.patreon.com/bluelightningtv
BLTV TV Channel:
https://www.youtube.com/user/bluelightningtv
BLTV Website:
http://www.bluelightningtv.com/
BLTV Facebook:
https://www.facebook.com/Blue-Lightning-TV-330761246941375/
BLTV Facebook “Subscriber Page”:
https://www.facebook.com/BLTVsubscribers
Tumblr:
http://bluelightningtv.tumblr.com/
Twitter:
https://twitter.com/bluelightningtv
Google+:
https://plus.google.com/u/0/+MartyGeller
Pinterest:
https://www.pinterest.com/bluelightningtv/
LinkedIn:
www.linkedin.com/in/martygeller
Metadata
| Video ID | 141 | Youtube URL | Photoshop Tutorial: How to Create an Awesome Poster with Wrap-around Text |
|---|---|
| Captions Available | Yes |
| Captions Downloadable | Yes |
| Playlists | |
| Duration | 00:16:14 |
| Definition | hd |
| Keywords | |
| License | youtube |
| Embeddable | Yes |
| Views | 8647 |
| Likes | |
| Dislikes | |
| Favourites | 0 |
| Comments | 19 |
| Created | 2017-05-04 1:00:42 PM |
| Updated | 2017-05-04 1:11:20 PM |
Captions
ASR: en
0:00:07.730,0:00:14.639
hi this is Marty from Blue Lightning TV
0:00:11.210,0:00:16.980
I'm going to show you how to create a
0:00:14.639,0:00:20.010
powerfully compelling poster with
0:00:16.980,0:00:22.920
gradient text a beautifully affected
0:00:20.010,0:00:30.900
photo and body copy that wraps around
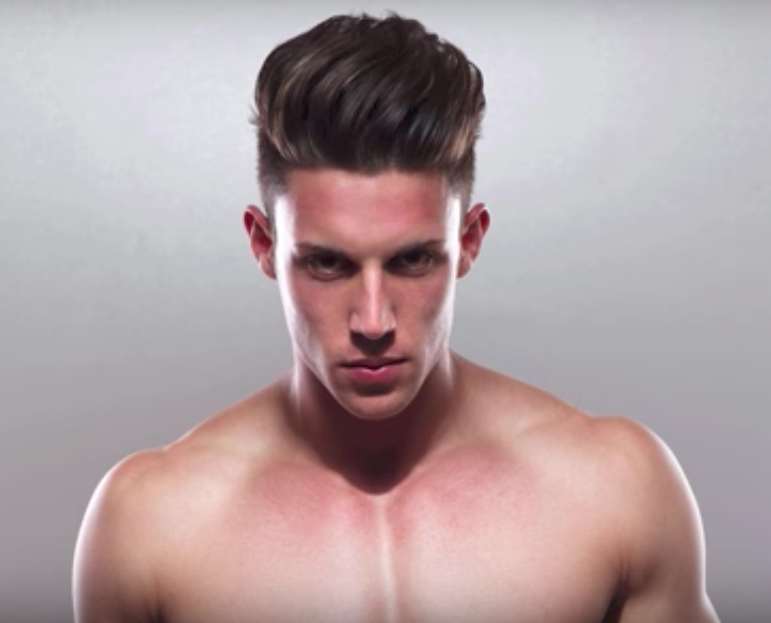
0:00:22.920,0:00:32.430
your subject open a photo of someone
0:00:30.900,0:00:35.550
that you'd like to use for this project
0:00:32.430,0:00:38.100
I downloaded this one from shutterstock
0:00:35.550,0:00:39.960
before we begin I want to mention that
0:00:38.100,0:00:42.629
I'll be moving a bit quicker for more
0:00:39.960,0:00:44.280
advanced users the first step is to
0:00:42.629,0:00:46.860
separate the subject from its background
0:00:44.280,0:00:50.460
by making a selection around your
0:00:46.860,0:00:52.680
subject for this example I'll use the
0:00:50.460,0:00:56.100
quick selection tool which I covered how
0:00:52.680,0:00:58.920
to use in many of my tutorials refine
0:00:56.100,0:01:01.609
your selection by using the selected
0:00:58.920,0:01:01.609
mask filter
0:01:02.760,0:01:07.039
or the refine edge
0:01:04.909,0:01:09.950
depending on which photoshop version
0:01:07.039,0:01:11.810
you're using i did in-depth tutorials on
0:01:09.950,0:01:13.939
both filters so if you'd like to watch
0:01:11.810,0:01:17.289
them i provided their links in my
0:01:13.939,0:01:17.289
video's description below
0:01:18.240,0:01:23.210
output it to a new layer with layer mask
0:01:24.800,0:01:29.990
we'll convert it into a smart object
0:01:26.630,0:01:31.970
which will allow us to modify or adjust
0:01:29.990,0:01:34.330
the filters that we'll be adding to the
0:01:31.970,0:01:34.330
image
0:01:34.810,0:01:38.440
click the icon
0:01:36.440,0:01:42.940
the upper right of the layers panel and
0:01:38.440,0:01:42.940
click convert to smart object
0:01:44.070,0:01:50.909
layer below it by control clicking or
0:01:46.979,0:01:53.160
command clicking the new layer icon will
0:01:50.909,0:01:55.350
fill the empty layer with black but
0:01:53.160,0:01:57.300
first if your foreground and background
0:01:55.350,0:02:00.050
colors aren't black and white
0:01:57.300,0:02:02.820
respectively press D on your keyboard
0:02:00.050,0:02:06.930
since black is your foreground color
0:02:02.820,0:02:09.450
press alt or option + delete to fill the
0:02:06.930,0:02:12.610
empty layer with black
0:02:09.450,0:02:15.150
make the top layer active
0:02:12.610,0:02:18.690
and click the adjustment layer icon
0:02:15.150,0:02:18.690
click hue/saturation
0:02:21.840,0:02:30.150
and check colorize
0:02:25.180,0:02:30.150
for the hue I'll type in 2009
0:02:31.030,0:02:34.709
raishin 53
0:02:34.880,0:02:39.970
lightness I'll keep it at zero feel free
0:02:37.610,0:02:44.170
to adjust these settings to your image
0:02:39.970,0:02:44.170
make your image active
0:02:44.880,0:02:48.770
filter and filter gallery
0:02:49.220,0:02:54.110
if you want to see more of your image
0:02:51.230,0:02:56.770
press ctrl or command and the minus key
0:02:54.110,0:02:56.770
on your keyboard
0:02:58.460,0:03:04.569
open the distort folder
0:03:01.569,0:03:07.800
and click diffuse glow
0:03:04.569,0:03:11.640
I'll keep the graininess zero
0:03:07.800,0:03:14.670
the glow amount to and the career amount
0:03:11.640,0:03:17.000
10 but again feel free to adjust these
0:03:14.670,0:03:17.000
amounts
0:03:18.500,0:03:24.870
click the FX icon
0:03:21.940,0:03:24.870
click outer glow
0:03:27.900,0:03:33.490
the color is white
0:03:31.000,0:03:36.520
Len mode is normal
0:03:33.490,0:03:39.390
the opacity is a hundred percent the
0:03:36.520,0:03:42.960
technique is softer
0:03:39.390,0:03:46.230
and the spread is 0 for this image I
0:03:42.960,0:03:48.420
made the size 20 pixels however you may
0:03:46.230,0:03:50.069
want to adjust the size amount depending
0:03:48.420,0:03:54.680
on the size and resolution of your
0:03:50.069,0:03:54.680
document click inner glow
0:03:56.580,0:04:02.310
the color is white
0:03:59.130,0:04:06.750
the blend mode is colored Dodge
0:04:02.310,0:04:12.000
and the opacity is 50% the technique is
0:04:06.750,0:04:16.440
softer and the source is edge I'll make
0:04:12.000,0:04:18.840
the choke ten percent and the size 250
0:04:16.440,0:04:21.560
pixels but again even want to adjust
0:04:18.840,0:04:21.560
these amounts
0:04:24.670,0:04:30.630
to save space in the layers panel let's
0:04:27.490,0:04:30.630
collapse the effects
0:04:30.940,0:04:38.399
we're ready to add our main text
0:04:34.529,0:04:40.829
open your horizontal type tool will make
0:04:38.399,0:04:44.639
our text temporarily white so we can see
0:04:40.829,0:04:47.399
it over the background to do this invert
0:04:44.639,0:04:50.759
the foreground and background colors by
0:04:47.399,0:04:53.269
clicking this icon or by pressing X on
0:04:50.759,0:04:53.269
your keyboard
0:04:53.529,0:04:59.499
pick a font i'm using bank gothic bold
0:04:57.279,0:05:01.149
if you'd like to use it as well i
0:04:59.499,0:05:04.359
provided its link in my video's
0:05:01.149,0:05:07.239
description or project files below make
0:05:04.359,0:05:10.469
it sighs temporarily a hundred points so
0:05:07.239,0:05:10.469
it's large enough to see
0:05:11.610,0:05:15.420
click the center of
0:05:13.449,0:05:18.000
icon
0:05:15.420,0:05:21.780
click on your document and type out your
0:05:18.000,0:05:24.720
text we want to ultimately increase its
0:05:21.780,0:05:28.240
size to near the edges of our poster to
0:05:24.720,0:05:31.660
do this click your move tool
0:05:28.240,0:05:34.569
and press ctrl or command T to open your
0:05:31.660,0:05:36.819
transform tool go to a corner and when
0:05:34.569,0:05:40.300
you see a diagonal double-arrow press
0:05:36.819,0:05:45.690
and hold alt or option + shift as you
0:05:40.300,0:05:45.690
drag it out then press Enter or return
0:05:45.770,0:05:53.470
Center it over the document press ctrl
0:05:48.800,0:05:53.470
or command a to select our canvas
0:05:55.139,0:06:00.110
and click the align horizontal centers
0:05:57.659,0:06:00.110
icon
0:06:00.350,0:06:07.360
be selected press ctrl or command D go
0:06:05.060,0:06:10.449
to view
0:06:07.360,0:06:14.050
rulers and snap are checked if they
0:06:10.449,0:06:17.110
aren't just click on them go to the left
0:06:14.050,0:06:19.449
ruler and drag out a guideline until it
0:06:17.110,0:06:22.180
snaps to the left edge of your text if
0:06:19.449,0:06:26.480
you don't see the guideline Prince ctrl
0:06:22.180,0:06:28.520
or command H go back to the ruler
0:06:26.480,0:06:30.880
and drink at another guideline to the
0:06:28.520,0:06:33.410
right edge of your text
0:06:30.880,0:06:37.930
scroll to the top of the layers panel
0:06:33.410,0:06:42.520
and drag your text layer to the top
0:06:37.930,0:06:44.850
click the FX icon and click gradient
0:06:42.520,0:06:44.850
overlay
0:06:46.580,0:06:52.210
click the gradient bar to open the
0:06:50.050,0:06:56.039
editor
0:06:52.210,0:06:56.039
black white preset
0:06:56.889,0:07:04.569
left stop click the color box to open
0:07:01.659,0:07:06.879
the color picker pick a color for the
0:07:04.569,0:07:09.249
bottom of your gradient text since I
0:07:06.879,0:07:15.270
already know the color I want I'll type
0:07:09.249,0:07:18.279
it into the hexadecimal field 12 d 0 FF
0:07:15.270,0:07:21.460
once you pick your color to accept it
0:07:18.279,0:07:25.150
press Enter or return three times to
0:07:21.460,0:07:30.180
close all three windows make a copy of
0:07:25.150,0:07:30.180
the text by pressing ctrl or command J
0:07:31.240,0:07:38.590
txt and press and hold shift as you drag
0:07:34.720,0:07:40.990
the copy straight down press T to open
0:07:38.590,0:07:43.870
your type tool and highlight your text
0:07:40.990,0:07:46.630
if your new line of text has more
0:07:43.870,0:07:49.900
characters than it has now go to the T
0:07:46.630,0:07:52.050
icon at the top and drag your cursor to
0:07:49.900,0:07:52.050
the left
0:07:52.630,0:07:58.510
now type out your text
0:07:55.990,0:08:01.690
to increase its size click your move
0:07:58.510,0:08:05.640
tool and open your transform tool to
0:08:01.690,0:08:05.640
increase its size to the guidelines
0:08:06.050,0:08:11.750
to move your text one pixel at a time
0:08:09.020,0:08:14.110
press the left or right arrow key on
0:08:11.750,0:08:15.940
your keyboard
0:08:14.110,0:08:18.460
once your text is lined up with the
0:08:15.940,0:08:21.910
guidelines press Enter or return to
0:08:18.460,0:08:24.310
accept it use your up or down arrow key
0:08:21.910,0:08:26.950
on your keyboard to slide your text up
0:08:24.310,0:08:29.290
or down equidistant to the bottom of
0:08:26.950,0:08:31.670
your document as your other text is to
0:08:29.290,0:08:34.870
the top of your document
0:08:31.670,0:08:37.360
scroll to the bottom
0:08:34.870,0:08:38.890
make the black layer active above it
0:08:37.360,0:08:41.110
we're going to place another line of
0:08:38.890,0:08:44.390
text which will appear behind our
0:08:41.110,0:08:48.580
subject at our other lines of text
0:08:44.390,0:08:48.580
open your horizontal type tool again
0:08:48.720,0:08:51.529
on the background
0:08:52.180,0:08:58.089
for this text I'll use dense regular if
0:08:55.960,0:09:02.640
you'd like to use it I provided its link
0:08:58.089,0:09:02.640
as well I'll increase its size
0:09:03.320,0:09:07.430
at my text since i'm going to ultimately
0:09:05.450,0:09:10.250
increase its size to the edges of my
0:09:07.430,0:09:13.220
poster i'll zoom out of my document by
0:09:10.250,0:09:15.820
pressing ctrl or command + the minus key
0:09:13.220,0:09:15.820
on my keyboard
0:09:16.080,0:09:21.420
open your move tool
0:09:18.490,0:09:24.330
and drag your text to the centre Oh
0:09:21.420,0:09:27.490
when your transform tool and increase
0:09:24.330,0:09:30.570
your text to the edges of your poster
0:09:27.490,0:09:32.670
before we give this text some color
0:09:30.570,0:09:35.010
we first need to clip our subjects
0:09:32.670,0:09:37.410
adjustment layer to just the subject
0:09:35.010,0:09:39.840
otherwise the adjustment layer will
0:09:37.410,0:09:42.570
affect all the layers below it including
0:09:39.840,0:09:45.150
this text will make a huge saturation
0:09:42.570,0:09:49.020
adjustment layer into a clipping mask by
0:09:45.150,0:09:53.010
first making it active and pressing ctrl
0:09:49.020,0:09:56.220
alt G on Windows or command option G on
0:09:53.010,0:09:58.920
a Mac now the adjustment layer is
0:09:56.220,0:10:03.270
affecting only our subject and no other
0:09:58.920,0:10:06.240
layers double click your bottom text to
0:10:03.270,0:10:10.140
highlight it at the top click the color
0:10:06.240,0:10:12.870
box to open the color picker and pick a
0:10:10.140,0:10:19.490
color for your background text I'll type
0:10:12.870,0:10:19.490
in 0 0 498 see
0:10:21.209,0:10:26.129
open your move tool to seat your
0:10:24.149,0:10:30.839
document back onto your canvas press
0:10:26.129,0:10:34.170
ctrl or command 0 to make our bottom and
0:10:30.839,0:10:37.920
top text pop more we'll add soft black
0:10:34.170,0:10:40.889
gradients behind them to do this make
0:10:37.920,0:10:43.350
the adjustment layer active and click
0:10:40.889,0:10:46.769
the new layer icon to make a new layer
0:10:43.350,0:10:49.920
above it we want the foreground color to
0:10:46.769,0:10:53.059
be black so press X on your keyboard to
0:10:49.920,0:10:56.150
invert your colors
0:10:53.059,0:10:58.520
open your gradient tool
0:10:56.150,0:11:02.540
make sure your linear gradient icon is
0:10:58.520,0:11:05.150
active click the gradient bar to open
0:11:02.540,0:11:10.450
the gradient editor click the foreground
0:11:05.150,0:11:10.450
to transparent preset and click OK
0:11:11.570,0:11:16.970
top of your poster and press and hold
0:11:13.730,0:11:20.560
shift as you drag the gradient tool to
0:11:16.970,0:11:23.630
approximately here go to the bottom and
0:11:20.560,0:11:27.140
repeat the process as you drag the tool
0:11:23.630,0:11:30.640
up next we'll add text that wraps around
0:11:27.140,0:11:32.840
the outside of our subject
0:11:30.640,0:11:35.330
ctrl-click or command click the
0:11:32.840,0:11:38.410
thumbnail of our subject to make a
0:11:35.330,0:11:38.410
selection of its shape
0:11:39.110,0:11:42.570
select
0:11:41.080,0:11:44.760
fie
0:11:42.570,0:11:47.700
expand
0:11:44.760,0:11:49.500
I'll expanded 20 pixels but you may want
0:11:47.700,0:11:52.910
to adjust this amount based on your
0:11:49.500,0:11:52.910
document size and resolution
0:11:53.470,0:11:59.550
invert your selection by pressing ctrl
0:11:56.170,0:11:59.550
or command shift I
0:12:00.339,0:12:06.509
open your rectangular marquee tool
0:12:04.259,0:12:09.449
and place your cursor on the left guide
0:12:06.509,0:12:12.989
line below your top text press and hold
0:12:09.449,0:12:15.449
alt or option + shift as you drag your
0:12:12.989,0:12:18.929
tool to the lower right guide line above
0:12:15.449,0:12:22.300
your text then release your selection
0:12:18.929,0:12:24.910
now should look similar to mine
0:12:22.300,0:12:28.240
open your paths panel if you don't see
0:12:24.910,0:12:33.160
it go to window and pads open the flyout
0:12:28.240,0:12:35.860
list and click make work path
0:12:33.160,0:12:38.430
keep the default tolerance of point five
0:12:35.860,0:12:38.430
pixels
0:12:39.840,0:12:46.460
then save the path
0:12:43.410,0:12:48.310
and click ok
0:12:46.460,0:12:49.779
before we add the text
0:12:48.310,0:12:52.240
we'll wrap around the outside of our
0:12:49.779,0:12:55.180
subject we need to temporarily hide the
0:12:52.240,0:12:57.340
large text behind air subject to avoid
0:12:55.180,0:12:59.740
activating the large text when we click
0:12:57.340,0:13:01.420
on our document open back the layers
0:12:59.740,0:13:04.690
panel
0:13:01.420,0:13:08.850
click the new layer icon to make a new
0:13:04.690,0:13:12.490
layer and scroll down to your large text
0:13:08.850,0:13:15.580
click the eyeball icon to hide the text
0:13:12.490,0:13:17.590
and scroll back up to the empty layer
0:13:15.580,0:13:20.920
you just made
0:13:17.590,0:13:22.540
open your type tool again
0:13:20.920,0:13:25.470
and invert your foreground and
0:13:22.540,0:13:25.470
background colors
0:13:26.120,0:13:33.350
i'll pick bank gothic bold once you pick
0:13:29.240,0:13:35.980
your font click this icon which opens
0:13:33.350,0:13:40.110
the character and paragraph panels I'll
0:13:35.980,0:13:43.980
make it size 16 points
0:13:40.110,0:13:46.290
and the letting 15 points letting is the
0:13:43.980,0:13:48.260
space between lines of text you can
0:13:46.290,0:13:51.779
change these amounts later if you like
0:13:48.260,0:13:55.829
open the paragraph panel and click the
0:13:51.779,0:13:59.339
left align text icon hide the guidelines
0:13:55.829,0:14:01.860
by pressing ctrl or command H we're
0:13:59.339,0:14:05.250
ready to add paragraphs of text to the
0:14:01.860,0:14:07.680
left of our subject click inside the
0:14:05.250,0:14:10.860
path there are three ways you can add
0:14:07.680,0:14:15.080
text inside a work path one way is to
0:14:10.860,0:14:18.080
actually type your text inside the path
0:14:15.080,0:14:21.280
another way is to copy and paste text
0:14:18.080,0:14:21.280
from an outside source
0:14:23.150,0:14:29.930
and the third way is the paste in or
0:14:26.030,0:14:32.750
generate lorem ipsum this is essentially
0:14:29.930,0:14:35.540
filler text also known as dummy text
0:14:32.750,0:14:37.220
it's meant to serve as a placeholder to
0:14:35.540,0:14:41.360
the actual text that you'll ultimately
0:14:37.220,0:14:43.390
use version cs6 and later already comes
0:14:41.360,0:14:45.830
with its own lorem ipsum generator
0:14:43.390,0:14:48.320
however if you are using an earlier
0:14:45.830,0:14:51.860
version I included a few links of free
0:14:48.320,0:14:55.570
online lorem ipsum generators if you're
0:14:51.860,0:14:59.330
using CS fix or later go to type and
0:14:55.570,0:15:02.870
paste lorem ipsum automatically it
0:14:59.330,0:15:06.080
pastes in the font size letting and
0:15:02.870,0:15:09.890
alignment you chose when we click on
0:15:06.080,0:15:12.350
right align text and text justifies to
0:15:09.890,0:15:15.080
the right edge of our pants I'll click
0:15:12.350,0:15:17.560
back on left align text however feel
0:15:15.080,0:15:21.830
free to experiment with the alignments
0:15:17.560,0:15:23.769
click your move tool and open back your
0:15:21.830,0:15:27.040
pants panel
0:15:23.769,0:15:29.870
click the thumbnail of path one and open
0:15:27.040,0:15:33.140
back your type tool
0:15:29.870,0:15:36.410
click inside the right path I'll click
0:15:33.140,0:15:40.519
the right align text icon
0:15:36.410,0:15:43.120
and go back to type and paste lorem
0:15:40.519,0:15:43.120
ipsum
0:15:43.649,0:15:46.999
click your move tool
0:15:47.320,0:15:52.070
and close the character
0:15:49.400,0:15:55.330
paragraph panels
0:15:52.070,0:15:55.330
open back your layers panel
0:15:56.420,0:16:10.310
arch text and make it visible this is
0:16:07.279,0:16:12.760
Marty from Blue Lightning TV thanks for
0:16:10.310,0:16:12.760
watching
standard: en
0:00:08.580,0:00:11.560
Hi. This is Marty from Blue Lightning TV.
0:00:12.200,0:00:16.720
I'm going to show you how to create a powerfully compelling poster
0:00:16.900,0:00:23.940
with gradient text, a beautifully-effected photo and body copy that wraps around your subject.
0:00:29.800,0:00:32.800
Open a photo of someone that you'd like to use for this project.
0:00:33.100,0:00:35.800
I downloaded this one from Shutterstock.
0:00:36.080,0:00:41.400
Before we begin, I want to mention that I'll
be moving a bit quicker for more advanced users.
0:00:41.700,0:00:46.180
The first step is to separate the subject
from its background by making a selection
0:00:46.180,0:00:47.640
around your subject.
0:00:48.000,0:00:54.960
For this example, I'll use the Quick Selection
Tool, which I covered how to use in many of my tutorials.
0:00:55.760,0:01:00.300
Refine your selection by using Select and Mask filter
0:01:03.180,0:01:08.020
or Refine Edge filter depending on which Photoshop version you're using.
0:01:08.030,0:01:13.150
I did in-depth tutorials on both filters,
so if you want to watch them, I provided their
0:01:13.150,0:01:15.760
links in my video's description below.
0:01:18.620,0:01:21.720
Output it to a "Layer with Layer Mask".
0:01:25.020,0:01:30.880
We'll convert it into a Smart Object , which
will allow us to modify or adjust the filters
0:01:30.880,0:01:32.880
that we'll be adding to the image.
0:01:35.260,0:01:41.900
Click the icon at the upper right of the Layers
panel and click "Convert to Smart Object".
0:01:43.580,0:01:49.640
Make a new layer below it, by Ctrl-clicking
or Cmd-clicking the New Layer icon.
0:01:50.780,0:01:56.599
We'll fill the empty layer with black, but
first, if your foreground and background layers
0:01:56.599,0:02:00.920
aren't black and white respectively, press
"D" on your keyboard.
0:02:00.920,0:02:07.509
Since black is your foreground color, press
Alt or Option + Delete to fill the empty layer
0:02:07.509,0:02:09.780
with black.
0:02:09.780,0:02:15.220
Make the top layer active and click the Adjustment
layer icon.
0:02:15.900,0:02:17.920
Click "Hue/Saturation"
0:02:22.240,0:02:24.120
and check, "Colorize".
0:02:25.420,0:02:36.900
For the Hue, I'll type in 209, the Saturation:
53 and for Lightness, I'll keep it at 0.
0:02:37.240,0:02:40.060
Feel free to adjust these settings for your image.
0:02:40.740,0:02:47.640
Make your image active and go to Filter and
Filter Gallery.
0:02:49.620,0:02:55.480
If you want to see more of your image, press
Ctrl or Cmd and the minus key on your keyboard.
0:02:58.880,0:03:03.700
Open the "Distort" folder and click "Diffuse Glow".
0:03:04.520,0:03:12.540
I'll keep the Graininess: 0, the Glow Amount:
2 and the Clear Amount: 10,
0:03:12.740,0:03:15.680
but again, feel free to adjust these amounts.
0:03:18.880,0:03:23.580
Click the "fx" icon and click "Outer Glow".
0:03:28.400,0:03:35.900
The color is white, the Blend Mode is Normal
and the Opacity is 100%.
0:03:36.500,0:03:41.340
The technique is "Softer" and the Spread is 0.
0:03:42.000,0:03:48.019
For this image, I made the Size: 20 pixels,
however, you may want to adjust the size amount
0:03:48.020,0:03:51.240
depending on the size and resolution of your document.
0:03:51.940,0:03:53.540
Click Inner Glow.
0:03:57.040,0:04:04.960
The color is white, the Blend Mode is "Color
Dodge" and the Opacity is 50%.
0:04:05.920,0:04:10.960
The Technique is Softer and the Source is Edge.
0:04:11.600,0:04:20.020
I'll make the Choke 10% and the Size: 250 pixels, but again, you may want to adjust these amounts.
0:04:25.140,0:04:29.220
To save space in the Layers panel, let's collapse the effects.
0:04:31.220,0:04:33.580
We're ready to add our main text.
0:04:35.220,0:04:37.480
Open your Horizontal Type Tool.
0:04:37.960,0:04:42.440
We'll make our text temporarily white, so
we can see it over the background.
0:04:42.440,0:04:50.140
To do this, invert the foreground and background
colors by clicking this icon or by pressing
0:04:50.140,0:04:52.000
"x" on our keyboard.
0:04:53.980,0:04:54.900
Pick a font.
0:04:55.070,0:04:58.000
I'm using Bank Gothic Bold.
0:04:58.000,0:05:03.820
If you'd like to use as well, I provided its
link in my video's description or project files below.
0:05:04.160,0:05:08.880
Make its size temporarily 100 points, so its large enough to see.
0:05:12.080,0:05:14.300
Click the "Center Alignment" icon.
0:05:15.840,0:05:18.880
Click on your document and type out your text.
0:05:19.960,0:05:24.420
We want to increase its size to near the edges
of our poster.
0:05:24.640,0:05:33.020
To do this, click your Move Tool and press
Ctrl or Cmd + T to open your Transform Tool.
0:05:33.300,0:05:39.660
Go to a corner and when you see a diagonal,
double-arrow, press and hold Alt or Option
0:05:39.660,0:05:42.060
+ Shift as you drag it out.
0:05:42.240,0:05:44.520
Then, press Enter or Return.
0:05:45.620,0:05:51.880
To center it over the document, press Ctrl
or Cmd + A to select our canvas
0:05:55.580,0:05:59.080
and click the "Align Horizontal Centers" icon.
0:06:00.160,0:06:09.960
To deselect it, press Ctrl or Cmd + D. Go
to View and make sure Rulers and Snap are checked.
0:06:10.200,0:06:12.400
If they aren't just click on them.
0:06:13.340,0:06:19.440
Go to the left ruler and drag out a guide
line until it snaps to the left edge of your text.
0:06:19.740,0:06:25.640
If you don't see the guide line, press Ctrl
or Cmd + H. Go back to the ruler
0:06:26.540,0:06:30.160
and drag our another guide line to the right edge of
your text.
0:06:31.460,0:06:36.840
Scroll to the top of the Layers panel and
drag your text layer to the top.
0:06:38.280,0:06:43.820
Click the "fx" icon and click "Gradient Overlay".
0:06:46.980,0:06:51.020
Click the gradient bar to open the Gradient Editor.
0:06:51.820,0:06:58.640
Click the "Black, White" Preset and the lower, left Stop.
0:06:59.520,0:07:03.060
Click the color box to open the Color Picker.
0:07:03.580,0:07:06.340
Pick a color for the bottom of your gradient text.
0:07:06.560,0:07:15.820
Since I already know the color I want, I'll
type it into the hexadecimal field: 12D0FF.
0:07:16.120,0:07:23.380
Once you pick your color, to accept it, press
Enter or Return three times to close all three windows.
0:07:24.400,0:07:28.800
Make a copy of the text by pressing Ctrl or Cmd + J.
0:07:30.800,0:07:36.540
Go to the text and press and hold Shift as you drag the copy straight down.
0:07:37.220,0:07:41.760
Press “T” to open your Type Tool and highlight your text.
0:07:42.020,0:07:47.540
If your new line of text has more characters
than it has now, go to the "T" icon at the
0:07:47.540,0:07:50.720
top and drag your cursor to the left.
0:07:53.160,0:07:55.220
Now, type out your text.
0:07:55.980,0:08:02.400
To increase its size, click your Move Tool
and open your Transform Tool to increase its
0:08:02.400,0:08:04.360
size to the guidelines.
0:08:06.700,0:08:12.860
To move your text over 1 pixels at a time,
press the left or right arrow key on your keyboard.
0:08:14.280,0:08:19.380
Once your text is lined up with the guide
lines, press Enter or Return to accept it.
0:08:19.960,0:08:26.280
Use your up or down arrow key on your keyboard
to slide your text up or down equidistant
0:08:26.280,0:08:30.920
to the the bottom of your document as your
other text is to the top of your document.
0:08:32.240,0:08:36.560
Scroll to the bottom and make the black layer active.
0:08:36.880,0:08:41.900
Above it, we're going to place another line
of text, which will appear behind our subject
0:08:41.900,0:08:43.740
and our other lines of text.
0:08:44.640,0:08:50.060
Open your Horizontal Type Tool again and click
on the background.
0:08:52.620,0:08:55.720
For this text, I'll use "Dense Regular".
0:08:55.960,0:08:59.140
If you'd like to use it, I provided its link, as well.
0:08:59.460,0:09:04.340
I'll increase its size and type out my text.
0:09:04.340,0:09:08.820
Since, I'm going to ultimately increase its
size to the edges of my poster, I'll zoom
0:09:08.820,0:09:14.620
out of my document by pressing Ctrl or Cmd
plus the minus key on my keyboard.
0:09:16.260,0:09:20.740
Open your Move Tool and drag your text to the center.
0:09:21.260,0:09:26.840
Open your Transform Tool and increase your
text to the edges of your poster.
0:09:27.740,0:09:33.660
Before we give this text some color, we first
need to clip our subject's adjustment layer
0:09:33.660,0:09:39.220
to just the subject, otherwise the adjustment
layer will affect all the layers below it
0:09:39.220,0:09:40.800
including this text.
0:09:41.140,0:09:47.760
We'll make the Hue/Saturation adjustment layer
into a clipping mask by first, making it active
0:09:47.760,0:09:53.800
and pressing Ctrl + Alt + G on Windows or
Cmd + Option + G on a Mac.
0:09:54.460,0:09:59.920
Now, the Adjustment layer is affecting only
our subject and no other layers.
0:10:00.600,0:10:04.260
Double-click your bottom text to highlight it.
0:10:04.600,0:10:12.220
At the top, click the color box to open the
Color Picker and pick a color for your background text.
0:10:12.440,0:10:18.160
I'll type in: 00498C.
0:10:21.640,0:10:23.340
Open your Move Tool.
0:10:23.580,0:10:28.960
To fit your document back onto your canvas,
press Ctrl or Cmd + 0.
0:10:29.400,0:10:35.880
To make our bottom and top text pop more,
we'll add soft black gradients behind them.
0:10:36.080,0:10:44.400
To do this, make the adjustment layer active and click the New Layer icon to make a new layer above it.
0:10:45.160,0:10:51.620
We want the foreground color to be black,
so press "x" on your keyboard to invert your colors.
0:10:53.380,0:10:59.480
Open your Gradient Tool and make sure your
Linear Gradient icon is active.
0:11:00.100,0:11:03.880
Click the gradient bar to open the Gradient Editor.
0:11:04.260,0:11:09.340
Click the "Foreground to Transparent" preset
and click OK.
0:11:11.020,0:11:15.040
Go to the top of your poster and press and hold Shift
0:11:15.300,0:11:18.500
as you drag the Gradient Tool to approximately here.
0:11:19.340,0:11:24.440
Go to the bottom and repeat the process as you drag the tool up.
0:11:24.780,0:11:29.360
Next, we'll add text that wraps around the
outside of our subject.
0:11:30.920,0:11:37.120
Ctrl-click or Cmd-click the thumbnail of our
subject to make a selection of its shape.
0:11:38.720,0:11:43.500
Go to Select, Modify and Expand.
0:11:45.060,0:11:50.040
I'll expand it 20 pixels, but you may want
to adjust this amount based on your document's
0:11:50.040,0:11:51.720
size and resolution.
0:11:53.440,0:11:58.320
Invert your selection by pressing Ctrl or Cmd + Shift + I.
0:12:00.820,0:12:08.660
Open your Rectangular Marquee Tool and place
your cursor on the left guideline below your top text.
0:12:08.880,0:12:15.140
Press and hold Alt or Option + Shift as you
drag your tool to the lower, right guideline
0:12:15.140,0:12:16.600
above your text.
0:12:16.740,0:12:17.940
Then, release.
0:12:18.200,0:12:20.960
Your selection now should look similar to mine.
0:12:22.600,0:12:24.020
Open your Paths panel.
0:12:24.200,0:12:27.380
If you don't see it, go to Window and Paths.
0:12:27.560,0:12:32.240
Open the fly-out list and click "Make Work Path".
0:12:33.520,0:12:37.140
Keep the default Tolerance of point 5 pixels.
0:12:40.260,0:12:45.040
Then, save the Path and click OK.
0:12:46.860,0:12:51.660
Before we add the text that will wrap around
the outside of our subject, we need to temporarily
0:12:51.660,0:12:57.350
hide the large text behind our subject to
avoid activating the large text when we click
0:12:57.350,0:12:58.520
on our document.
0:12:58.960,0:13:00.580
Open back the Layers panel.
0:13:01.980,0:13:08.960
Click the New Layer icon to make a new layer
and scroll down to your large text.
0:13:09.640,0:13:16.860
Click the eyeball icon to hide the text and
scroll back up to the empty layer you just made.
0:13:18.120,0:13:24.080
Open your Type Tool again and invert your
foreground and background colors.
0:13:26.220,0:13:28.540
I'll pick Bank Gothic Bold.
0:13:28.740,0:13:35.840
Once you pick your font, click this icon,
which opens the Character and Paragraph panels.
0:13:36.580,0:13:43.040
I'll make its size 16 points and the Leading 15 points.
0:13:43.140,0:13:45.860
Leading is the space between lines of text.
0:13:46.040,0:13:48.620
You can change these amounts later if you like.
0:13:48.980,0:13:54.640
Open the Paragraph panel and click the "Left
Align Text" icon.
0:13:54.900,0:13:58.800
Hide the guidelines by pressing Ctrl or Cmd + H.
0:13:59.240,0:14:03.500
We're ready to add paragraphs of text to the left of our subject.
0:14:04.660,0:14:06.120
Click inside the path.
0:14:06.300,0:14:09.860
There are 3 ways you can add text inside a work path.
0:14:10.160,0:14:13.820
One way is to actually type your text inside the path.
0:14:15.680,0:14:20.320
Another way is to copy and paste text from
an outside source
0:14:23.540,0:14:28.620
and the third way is to paste in or generate "Lorem Ipsum".
0:14:28.820,0:14:33.240
This is essentially filler text, also known
as "dummy text".
0:14:33.420,0:14:38.480
It's meant to serve as a placeholder for the
actual text that you'll ultimately use.
0:14:38.640,0:14:45.160
Version CS6 and later already comes with its
own Lorem Ipsum generator, however, if you're
0:14:45.160,0:14:51.320
using an earlier version, I included a few
links of free, online Lorem Ipsum generators.
0:14:51.480,0:14:58.180
If you're using CS6 or later, go to Type and
"Paste Lorem Ipsum".
0:14:58.300,0:15:04.720
Automatically, it pastes in the font, size,
Leading and alignment you chose.
0:15:05.400,0:15:11.860
When we click on "Right Align Text", our text
justifies to the right edge of our path.
0:15:11.860,0:15:17.540
I'll click back on "Left Align Text", however,
feel free to experiment with the alignments.
0:15:18.280,0:15:23.180
Click your Move Tool and open back your Paths panel.
0:15:23.820,0:15:29.000
Click the thumbnail of "Path 1" and open your Type Tool.
0:15:29.940,0:15:32.020
Click inside the right path.
0:15:32.600,0:15:41.480
I'll click the "Right Align Text" icon and
go back to Type and "Paste Lorem Ipsum".
0:15:44.280,0:15:50.880
Click your Move Tool and close the Character
and Paragraph panels.
0:15:52.300,0:15:59.880
Open back your Layers panel, scroll to the
large text and make it visible.
0:16:06.840,0:16:09.820
This is Marty from Blue Lightning TV.
0:16:09.820,0:16:10.900
Thanks for watching!
Profiles
Profile 1
| Purpose | Tutorial (why) |
|---|---|
| Content | |
| Participants | nameless (m) model, Photoshop (m) geek |
| Form | Tutorial (how) |
| Time | |
| Place |
Profile 2
| Purpose | Tutorial |
|---|---|
| Content | Portrait, Text |
| Participants | nameless (m) model, Photoshop (m) geek |
| Form | Tutorial (how) |
| Time | Real time |
| Place | Desktop |