Photoshop Tutorial: How to Create the Sin City Graphic Novel Effect from a Photo!
Figuration: Tutorial
Description
Komika Display Kaps font:
http://bltvfiles.com/files/Komika%20Display%20Kaps.ttf
Komika Display Kaps Bold font:
http://bltvfiles.com/files/Komika%20Dispaly%20Kaps%20Bold.ttf
Photo provided by http://www.shutterstock.com
Image ID: 366951353
High quality, Royalty-free Music
provided by http://www.mysoundmarket.com
Track: "Trace the Suspect"
Become a Patron to Blue Lighting TV:
https://www.patreon.com/bluelightningtv
BLTV TV Channel:
https://www.youtube.com/user/bluelightningtv
BLTV Website:
http://www.bluelightningtv.com/
For a limited time, get an instant 20% OFF Photoshop CC + Lightroom CC + more all together for only $7.99/month:
https://creative.adobe.com/promo/BLTVCCPP?sdid=KTSWF
BLTV Facebook:
https://www.facebook.com/Blue-Lightning-TV-330761246941375/
BLTV Facebook “Subscriber Page”:
https://www.facebook.com/BLTVsubscribers
Tumblr:
http://bluelightningtv.tumblr.com/
Twitter:
https://twitter.com/bluelightningtv
Google+:
https://plus.google.com/u/0/+MartyGeller
Pinterest:
https://www.pinterest.com/bluelightningtv/
LinkedIn:
www.linkedin.com/in/martygeller
Metadata
| Video ID | 152 | Youtube URL | Photoshop Tutorial: How to Create the Sin City Graphic Novel Effect from a Photo! |
|---|---|
| Captions Available | Yes |
| Captions Downloadable | Yes |
| Playlists | |
| Duration | 00:08:12 |
| Definition | hd |
| Keywords | |
| License | youtube |
| Embeddable | Yes |
| Views | 27929 |
| Likes | 650 |
| Dislikes | 8 |
| Favourites | 0 |
| Comments | 66 |
| Created | 2017-05-04 1:00:43 PM |
| Updated | 2017-05-04 1:11:30 PM |
Captions
ASR: en
0:00:08.719,0:00:16.080
hi this is Marty from Blue Lightning TV
0:00:12.410,0:00:19.770
I'm going to show you how to create the
0:00:16.080,0:00:26.789
look of a panel in a powerful neo-noir
0:00:19.770,0:00:29.189
graphic novel Sin City create a new
0:00:26.789,0:00:33.030
document by pressing control n on
0:00:29.189,0:00:38.570
Windows or command n on a Mac
0:00:33.030,0:00:42.899
make its width 1550 pixels its height
0:00:38.570,0:00:47.449
870 pixels and it's resolution 150
0:00:42.899,0:00:47.449
pixels per inch then click OK
0:00:48.360,0:00:53.280
open a photo of someone that you'd like
0:00:50.820,0:00:56.130
to use for this project I downloaded
0:00:53.280,0:00:58.860
this one from shutterstock to place it
0:00:56.130,0:01:02.400
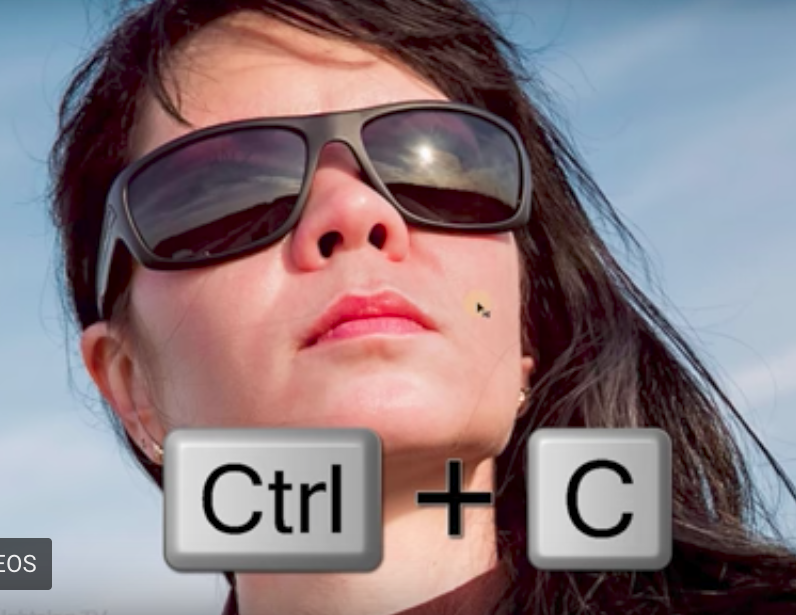
into your other document press ctrl or
0:00:58.860,0:01:05.910
command a to select it all and ctrl or
0:01:02.400,0:01:09.780
command C to copy it open your first
0:01:05.910,0:01:12.600
document and press ctrl or command V to
0:01:09.780,0:01:15.000
paste your photo onto it to adjust its
0:01:12.600,0:01:18.870
size open your transform tool by
0:01:15.000,0:01:21.869
pressing ctrl or command T to see the
0:01:18.870,0:01:25.240
transforms entire bounding box press
0:01:21.869,0:01:28.360
ctrl or command 0
0:01:25.240,0:01:33.040
go to a corner and press and hold shift
0:01:28.360,0:01:35.439
as you drag it in or out if you need to
0:01:33.040,0:01:38.530
reposition it just go inside the
0:01:35.439,0:01:41.950
transform and drag your photo then press
0:01:38.530,0:01:46.740
Enter or return to fit it back onto your
0:01:41.950,0:01:46.740
canvas press ctrl or command 0
0:01:48.020,0:01:54.679
merge the two layers by pressing ctrl or
0:01:51.079,0:01:56.929
command e will convert our image into a
0:01:54.679,0:02:00.170
smart object so we can modify it
0:01:56.929,0:02:02.319
non-destructively click the icon at the
0:02:00.170,0:02:07.060
upper right of the layers panel and
0:02:02.319,0:02:07.060
click convert to smart object
0:02:08.660,0:02:16.000
go to image adjustments and threshold
0:02:17.680,0:02:24.989
the threshold level defaults to 128 I'll
0:02:21.730,0:02:24.989
use this amount
0:02:25.600,0:02:30.130
next we'll brush black around our
0:02:28.430,0:02:32.830
subject
0:02:30.130,0:02:34.760
click the new layer icon to make a new
0:02:32.830,0:02:38.390
layer
0:02:34.760,0:02:41.630
open your pencil tool
0:02:38.390,0:02:44.420
and pencil picker will take care of the
0:02:41.630,0:02:48.240
size in a moment make sure its hardness
0:02:44.420,0:02:50.640
and opacity are both a hundred percent
0:02:48.240,0:02:53.460
to make your brush bigger or smaller
0:02:50.640,0:02:55.710
press the right or left bracket key on
0:02:53.460,0:02:58.630
your keyboard and make sure your caps
0:02:55.710,0:03:01.780
lock key is not on
0:02:58.630,0:03:03.880
brush around your subject and fill in
0:03:01.780,0:03:06.760
areas on your subject that may be
0:03:03.880,0:03:09.040
distracting feel free to leave white
0:03:06.760,0:03:11.890
around some edges to help define
0:03:09.040,0:03:14.560
boundaries of the head and body you can
0:03:11.890,0:03:17.739
always change it later if you want
0:03:14.560,0:03:19.930
click the new layer icon to make a new
0:03:17.739,0:03:23.110
layer will fill the empty layer with
0:03:19.930,0:03:26.050
fifty percent gray to do this press
0:03:23.110,0:03:30.190
Shift + the f5 key at the top of your
0:03:26.050,0:03:35.459
keyboard to open the fill window click
0:03:30.190,0:03:35.459
fifty percent gray and click OK
0:03:36.220,0:03:43.200
go to filter noise and add noise
0:03:44.680,0:03:54.070
make the amount four hundred percent
0:03:48.130,0:04:01.960
gaussian and monochromatic then click OK
0:03:54.070,0:04:01.960
go to filter blur and motion blur
0:04:02.940,0:04:10.530
make the angle 70 degrees and the
0:04:07.350,0:04:13.650
distance two thousand pixels then press
0:04:10.530,0:04:16.830
Enter or return will increase the motion
0:04:13.650,0:04:20.480
blur by pressing ctrl or command F for
0:04:16.830,0:04:23.900
more times change its blend mode to
0:04:20.480,0:04:23.900
vivid light
0:04:24.420,0:04:30.200
click the adjustment layer icon and
0:04:27.200,0:04:32.570
click levels
0:04:30.200,0:04:35.030
to restrict the adjustment layer to
0:04:32.570,0:04:37.430
effect only the one layer beneath it we
0:04:35.030,0:04:39.920
need to make it into a clipping mask to
0:04:37.430,0:04:44.390
do this either clip the clipping mask
0:04:39.920,0:04:48.880
icon or press ctrl alt G on windows or
0:04:44.390,0:04:48.880
command option G on a Mac
0:04:51.080,0:04:56.479
drag the shadow input level to the right
0:04:53.900,0:04:58.720
until there's just enough rain on the
0:04:56.479,0:04:58.720
face
0:04:59.360,0:05:04.370
drag the highlight input level to the
0:05:01.819,0:05:07.900
left until there's just enough rain on
0:05:04.370,0:05:07.900
the black areas of your image
0:05:07.990,0:05:15.810
next we'll add a talk bubble
0:05:11.850,0:05:15.810
open your custom shape tool
0:05:15.820,0:05:28.889
choose shape and make the fill white
0:05:21.969,0:05:28.889
make the stroke 8 pixels and black
0:05:30.530,0:05:38.240
open your shape thumbnails and open your
0:05:35.070,0:05:38.240
list of shape presets
0:05:38.510,0:05:45.330
click talk bubbles when you see this
0:05:42.570,0:05:47.250
message it's just asking us if we want
0:05:45.330,0:05:50.400
to either replace the current thumbnails
0:05:47.250,0:05:52.140
with the top bubble thumbnails or if we
0:05:50.400,0:05:57.590
want to add them under the current
0:05:52.140,0:05:57.590
thumbnails I'll click OK to replace them
0:05:58.249,0:06:06.439
I'll choose this one click the gear icon
0:06:02.359,0:06:11.659
at the top and tick define proportions
0:06:06.439,0:06:14.639
and check from Center drag the shape out
0:06:11.659,0:06:18.389
to any size you like
0:06:14.639,0:06:24.029
to hide the pants press ctrl or command
0:06:18.389,0:06:27.919
H to reposition it press V to open your
0:06:24.029,0:06:27.919
move tool and move it
0:06:28.659,0:06:36.979
open your horizontal type tool and pick
0:06:33.379,0:06:39.740
a comic font I'm using kamika display
0:06:36.979,0:06:41.960
regular and bold if you'd like to use
0:06:39.740,0:06:44.030
them I provided their links in my
0:06:41.960,0:06:50.949
video's description or project files
0:06:44.030,0:06:50.949
i'll make the size 43 points and sharp
0:06:51.360,0:06:59.520
choose Center alignment and black for
0:06:55.680,0:07:03.419
the color click on the talk bubble and
0:06:59.520,0:07:06.210
type at your text to adjust the space
0:07:03.419,0:07:09.599
between your lines of text highlight
0:07:06.210,0:07:14.120
both lines and go to window and
0:07:09.599,0:07:17.370
character the character panel will open
0:07:14.120,0:07:22.860
drag the leading icon to the left or
0:07:17.370,0:07:25.069
right then you can close the panel to
0:07:22.860,0:07:28.259
adjust the space between two characters
0:07:25.069,0:07:31.740
click between them and press and hold
0:07:28.259,0:07:35.509
alt or option as you press the left or
0:07:31.740,0:07:35.509
right arrow key on your keyboard
0:07:40.260,0:07:46.680
I'd like to make the second line bold
0:07:42.660,0:07:49.190
I'll highlight it and click the bold
0:07:46.680,0:07:49.190
font
0:07:49.420,0:07:56.440
to reposition your text on the bubble
0:07:52.110,0:08:05.020
open your move tool and simply drag your
0:07:56.440,0:08:10.020
text this is Marty from Blue Lightning
0:08:05.020,0:08:10.020
TV thanks for watching
standard: en
0:00:09.660,0:00:16.520
Hi. This is Marty from Blue Lightning TV.
I'm going to show you how to create the look
0:00:16.529,0:00:23.409
of a panel in the powerful, neo-noir, graphic novel, "Sin City".
0:00:26.000,0:00:32.000
Create a new document by pressing Ctrl + N on Windows or Cmd + N on a Mac.
0:00:33.700,0:00:40.440
Make its Width: 1550 pixels, its Height: 870 pixels
0:00:41.140,0:00:46.160
and its Resolution: 150 pixels per inch. Then, click OK.
0:00:49.060,0:00:55.240
Open a photo of someone that you’d like to use for this project. I downloaded this one from Shutterstock.
0:00:55.600,0:01:02.340
To place it into your other document, press
Ctrl or Cmd + A to select it all and Ctrl
0:01:02.350,0:01:11.390
or Cmd + C to copy it. Open your first document
and press Ctrl or Cmd + V to paste your photo onto it..
0:01:11.760,0:01:18.800
To adjust its size, open your Transform
Tool by pressing Ctrl or Cmd + T. To see the
0:01:18.800,0:01:28.340
Transform's entire bounding box, press Ctrl
or Cmd + 0. Go to a corner and press and hold
0:01:28.340,0:01:36.390
Shift as you drag it in or out. If you need
to reposition it, just go inside the Transform
0:01:36.390,0:01:39.950
and drag your photo. Then, press Enter or Return.
0:01:40.620,0:01:45.080
To fit it back onto your canvas, press Ctrl or Cmd + 0.
0:01:48.180,0:01:55.880
Merge the two layers by pressing Ctrl or Cmd + E. We'll convert our image into a Smart Object,
0:01:55.880,0:02:01.300
so we can modify it non-destructively.
Click the icon at the upper-right of the Layers
0:02:01.320,0:02:05.720
panel and click "Convert to Smart Object".
0:02:09.240,0:02:14.300
Go to Image, Adjustments and "Threshold".
0:02:18.200,0:02:23.420
The Threshold Level defaults to 128. I'll
use this amount.
0:02:26.140,0:02:29.380
Next, we'll brush black around our subject.
0:02:30.620,0:02:40.200
Click the New Layer icon to make
a new layer. Open your Pencil Tool and Pencil Picker.
0:02:40.780,0:02:47.260
We'll take care of the size in a moment.
Make sure its Hardness and Opacity are 100%.
0:02:48.820,0:02:54.540
To make your brush bigger or smaller, press
the right or left Bracket key on your keyboard
0:02:54.550,0:03:02.480
and make sure your CapsLock key is NOT on.
Brush around your subject and fill in areas
0:03:02.480,0:03:08.650
on you subject that may be distracting. Feel
free to leave white around some edges to help
0:03:08.650,0:03:13.670
define boundaries of the head and body. You
can always change it later if you want.
0:03:15.140,0:03:18.400
Click the New Layer icon to make a new layer.
0:03:18.740,0:03:21.540
We'll fill the empty layer with 50% gray.
0:03:21.920,0:03:28.960
To do this, press Shift + the F5 key at the top of your keyboard to open the Fill window.
0:03:29.840,0:03:33.720
Click 50% gray and click OK.
0:03:36.840,0:03:41.780
Go to Filter, Noise and "Add Noise".
0:03:45.400,0:03:53.120
Make the Amount: 400%, Gaussian and Monochromatic. Then, click OK.
0:03:55.000,0:04:00.340
Go to Filter, Blur and Motion Blur.
0:04:03.320,0:04:11.820
Make the Angle: 70 degrees and the Distance: 2000 pixels. Then, press Enter or Return.
0:04:12.440,0:04:18.080
We'll increase the Motion Blur by pressing Ctrl or Cmd +F, four more times.
0:04:18.560,0:04:22.300
Change its Blend Mode to Vivid Light.
0:04:25.040,0:04:29.160
Click the Adjustment Layer icon and click "Levels".
0:04:30.720,0:04:37.340
To restrict the Adjustment layer to affect only the 1 layer beneath it, we need to make it into a Clipping Mask.
0:04:37.340,0:04:47.160
To do this, either click the Clipping Mask icon or press Ctrl +Alt + G on Windows or Cmd + Option + G on a Mac.
0:04:51.520,0:04:57.280
Drag the Shadow Input level to the right until there's just enough rain on the face.
0:04:59.740,0:05:06.520
Drag the Highlight Input level to the left until there's just enough rain on the black areas of your image.
0:05:08.340,0:05:10.620
Next, we'll add a talk bubble.
0:05:12.600,0:05:14.600
Open your Custom Shape Tool.
0:05:16.440,0:05:21.200
Choose "Shape" and make the "Fill": white.
0:05:22.740,0:05:27.320
Make the Stroke: 8 pixels and black.
0:05:31.200,0:05:36.960
Open your Shape thumbnails and open your list of Shape presets.
0:05:39.200,0:05:40.820
Click "Talk Bubbles".
0:05:41.980,0:05:47.600
When you see this message, it's just asking us if we want to either replace the current thumbnails
0:05:47.600,0:05:53.160
with the Talk Bubble thumbnails or we want to add them under the current thumbnails.
0:05:53.480,0:05:55.740
I'll click OK to replace them.
0:05:58.960,0:06:09.340
I'll choose this one. Click the gear icon at the top and tick "Define Proportions" and check "From Center".
0:06:10.740,0:06:13.420
Drag the shape out to any size you like.
0:06:15.480,0:06:19.380
To hide the Paths, press Ctrl or Cmd + H.
0:06:21.240,0:06:26.120
To reposition it, press "v" to open your Move Tool... and move it.
0:06:29.340,0:06:31.460
Open your Horizontal Type Tool
0:06:32.940,0:06:40.300
and pick a comic font. Im using Komika Display Regular" and "Bold". If you'd like to use them,
0:06:40.300,0:06:44.660
I provided their links in my video's description or project files.
0:06:45.160,0:06:49.200
I'll make the size 43 points and Sharp.
0:06:52.060,0:06:56.380
Choose "Center Alignment" and black for the color.
0:06:58.040,0:07:01.220
Click on the talk bubble and type out your text.
0:07:02.320,0:07:11.440
To adjust the space between your lines of text, highlight both lines and go to Window and Character.
0:07:12.360,0:07:18.300
The Character panel will open. Drag the "Leading"icon to the left or right.
0:07:19.720,0:07:21.600
Then, you can close the panel.
0:07:22.740,0:07:27.120
To adjust the space between two characters, click between them
0:07:27.460,0:07:34.080
and press and hold Alt or Option as you press the left or right arrow key on your keyboard.
0:07:40.700,0:07:47.520
I'd like to make the second line Bold. I'll highlight it and click the Bold font.
0:07:50.120,0:07:57.280
To reposition your text on the bubble, open your Move Tool and simply drag your text.
0:08:03.560,0:08:08.060
This is Marty from Blue Lightning TV. Thanks for watching!
Profiles
Profile 1
| Purpose | Tutorial (why) |
|---|---|
| Content | |
| Participants | nameless (f) model, Photoshop (m) geek |
| Form | Tutorial (how) |
| Time | |
| Place |
Profile 2
| Purpose | Tutorial |
|---|---|
| Content | Portrait |
| Participants | nameless (f) model, Photoshop (m) geek |
| Form | Tutorial (how) |
| Time | Real time |
| Place | Desktop |