Photoshop tutorial: How to Make an Overlapping, Photo Strip effect.
Figuration: Tutorial
Description
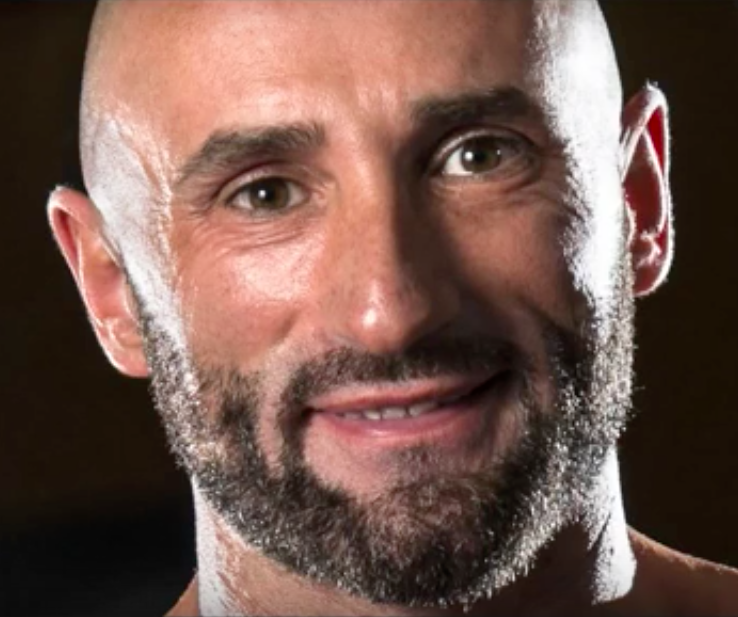
Shutterstock photo / Image ID: 193405127
http://www.shutterstock.com/pic.mhtml?id=193405127&src=id
Click below to SUBSCRIBE!
http://www.youtube.com/subscription_center?add_user=bluelightningtv
Click below for BLTV's WEBSITE!
http://www.bluelightningtv.com/
Twitter: https://twitter.com/BlueLightningTV
Get up to 20% off Photoshop + Lightroom! Only $7.99 p/month:
http://goo.gl/QFznn7
Metadata
| Video ID | 156 | Youtube URL | Photoshop tutorial: How to Make an Overlapping, Photo Strip effect. |
|---|---|
| Captions Available | Yes |
| Captions Downloadable | Yes |
| Playlists | |
| Duration | 00:06:44 |
| Definition | hd |
| Keywords | |
| License | youtube |
| Embeddable | Yes |
| Views | 44054 |
| Likes | 608 |
| Dislikes | 6 |
| Favourites | 0 |
| Comments | 74 |
| Created | 2017-05-04 1:00:43 PM |
| Updated | 2017-05-04 1:11:35 PM |
Captions
ASR: en
0:00:07.990,0:00:12.940
hi this is Marty from Blue Lightning TV
0:00:10.420,0:00:15.459
I'm going to show you how to create
0:00:12.940,0:00:18.520
overlapping vertical photo strips from a
0:00:15.459,0:00:21.340
single photo and then color eyes and
0:00:18.520,0:00:25.599
effect each strip individually creating
0:00:21.340,0:00:28.359
a fun interesting look open a photo
0:00:25.599,0:00:32.650
you'd like to use I downloaded this
0:00:28.359,0:00:35.530
portrait from shutterstock.com make a
0:00:32.650,0:00:40.089
copy of your photo by pressing ctrl J on
0:00:35.530,0:00:44.049
Windows or command J on a Mac click the
0:00:40.089,0:00:50.080
adjustment layer icon and choose solid
0:00:44.049,0:00:51.729
color pick white and click OK we want to
0:00:50.080,0:00:54.190
bring the color fill adjustment layer
0:00:51.729,0:00:56.440
below layer 1 there are two ways of
0:00:54.190,0:00:58.720
doing this one way is to drag it to the
0:00:56.440,0:01:01.720
line between layer 1 and the background
0:00:58.720,0:01:03.989
and then release I'll press ctrl or
0:01:01.720,0:01:06.820
command Z to undo the last step the
0:01:03.989,0:01:10.119
second way to place the color fill below
0:01:06.820,0:01:13.929
layer 1 is to use the shortcut ctrl or
0:01:10.119,0:01:16.000
command + the left bracket key click the
0:01:13.929,0:01:20.229
thumbnail of layer 1 to make it active
0:01:16.000,0:01:23.049
and open you a rectangle tool choose
0:01:20.229,0:01:26.909
shape if you're working on a version
0:01:23.049,0:01:29.829
earlier than cs6 the shape icon is here
0:01:26.909,0:01:31.570
the fill color is irrelevant since we're
0:01:29.829,0:01:34.570
ultimately going to fill the shape with
0:01:31.570,0:01:38.619
the photo make sure the stroke is empty
0:01:34.570,0:01:40.810
its symbol is the red diagonal line drag
0:01:38.619,0:01:45.280
a vertical rectangular shape across your
0:01:40.810,0:01:50.530
image position the rectangle below layer
0:01:45.280,0:01:53.200
1 to move or rotate it open your
0:01:50.530,0:01:56.710
transform tool by pressing ctrl or
0:01:53.200,0:01:59.319
command t when you see a curved
0:01:56.710,0:02:02.020
double-arrow rotate it to an angle you
0:01:59.319,0:02:04.119
like you can always change it later I'll
0:02:02.020,0:02:06.880
drag the shape over the left side of the
0:02:04.119,0:02:09.970
portrait drag any middle point on the
0:02:06.880,0:02:12.250
edges to extend or shorten the shape to
0:02:09.970,0:02:16.900
accept the transform press Enter or
0:02:12.250,0:02:19.420
return make a top layer active make it
0:02:16.900,0:02:20.780
into a clipping mask by pressing ctrl
0:02:19.420,0:02:24.590
Alt key on when
0:02:20.780,0:02:26.569
those or command option G on a Mac this
0:02:24.590,0:02:28.940
clips the photo to the shape directly
0:02:26.569,0:02:31.690
below it hiding everything on the photo
0:02:28.940,0:02:34.280
except for the area inside the shape
0:02:31.690,0:02:40.459
make the rectangle layer active and
0:02:34.280,0:02:43.430
click the FX icon choose drop shadow the
0:02:40.459,0:02:46.610
blend mode is multiply and the opacity
0:02:43.430,0:02:49.280
is twenty percent uncheck global light
0:02:46.610,0:02:52.280
and make the angle a hundred thirty-two
0:02:49.280,0:02:55.820
degrees for this photo I'll make the
0:02:52.280,0:02:58.580
distance 20 pixels and the size 5 pixels
0:02:55.820,0:03:00.440
however keep in mind you may want to use
0:02:58.580,0:03:02.209
different amounts for the distance and
0:03:00.440,0:03:05.620
size depending on the size and
0:03:02.209,0:03:11.540
resolution of your photo click stroke
0:03:05.620,0:03:17.390
click the color box pick white and click
0:03:11.540,0:03:22.780
OK make the position inside click color
0:03:17.390,0:03:27.530
overlay and change the blend mode to hue
0:03:22.780,0:03:29.840
click the color box and pick a color you
0:03:27.530,0:03:32.690
like to colorize your photo you can
0:03:29.840,0:03:34.700
always change it later click off the
0:03:32.690,0:03:37.790
eyeball next the color overlay to
0:03:34.700,0:03:39.560
temporarily hide the effect next we'll
0:03:37.790,0:03:42.980
group the clipped photo and the shape
0:03:39.560,0:03:45.890
into a folder to do this shift-click on
0:03:42.980,0:03:49.640
the photo to highlight it and then press
0:03:45.890,0:03:52.459
ctrl or command G make a copy of the
0:03:49.640,0:03:56.480
folder and position the copy under the
0:03:52.459,0:03:58.519
original open the folder copy and click
0:03:56.480,0:04:01.340
the rectangle thumbnail to make the
0:03:58.519,0:04:05.780
shape active open the path selection
0:04:01.340,0:04:07.670
tool and drag the copy to the right open
0:04:05.780,0:04:11.269
your transform tool to angle and
0:04:07.670,0:04:14.090
position it to your liking then press
0:04:11.269,0:04:17.479
Enter or return remember you can always
0:04:14.090,0:04:21.500
go back and change it later close the
0:04:17.479,0:04:26.210
folder make a copy and position copy to
0:04:21.500,0:04:29.539
below copy one open the folder of copy
0:04:26.210,0:04:33.240
to and as before make the rectangle
0:04:29.539,0:04:39.360
shape active open your transform tool
0:04:33.240,0:04:41.250
to reposition and angle it continue the
0:04:39.360,0:04:43.530
same steps to create the rest of the
0:04:41.250,0:04:46.470
vertical panels now that we have our
0:04:43.530,0:04:49.130
finished vertical strip portrait let's
0:04:46.470,0:04:52.410
change the hues of each individual panel
0:04:49.130,0:04:57.539
open the top folder and click next to
0:04:52.410,0:05:00.150
color overlay to make it visible close
0:04:57.539,0:05:03.449
the folder and open the folder directly
0:05:00.150,0:05:05.759
below it make its color overlay visible
0:05:03.449,0:05:08.069
and double-click on the words color
0:05:05.759,0:05:11.840
overlay to see it in a layer style
0:05:08.069,0:05:15.330
window click on the color box and pick
0:05:11.840,0:05:18.690
another color and click OK on both
0:05:15.330,0:05:21.840
windows continue these steps for the
0:05:18.690,0:05:24.300
rest of the panels if you have cs6 or
0:05:21.840,0:05:26.880
later I'll show you how you can use the
0:05:24.300,0:05:31.139
color lookup filters to give each panel
0:05:26.880,0:05:33.840
its own unique look first make sure the
0:05:31.139,0:05:36.479
color overlay effect is hidden on all of
0:05:33.840,0:05:39.330
your panels make the clipped photo
0:05:36.479,0:05:44.250
active and click the adjustment layer
0:05:39.330,0:05:47.460
icon choose color lookup and click the
0:05:44.250,0:05:49.770
clip to layer icon this will restrict
0:05:47.460,0:05:55.520
the effect to the individual panel below
0:05:49.770,0:05:58.500
it in the layers panel open load 3d lut
0:05:55.520,0:06:00.780
each of these effects were historically
0:05:58.500,0:06:03.840
used by the film industry to apply
0:06:00.780,0:06:05.789
specific looks to film scenes go through
0:06:03.840,0:06:08.550
each one to determine which one you like
0:06:05.789,0:06:10.889
for your individual panels once you've
0:06:08.550,0:06:14.789
chosen the one you want click on it to
0:06:10.889,0:06:18.840
apply the effect close the folder and
0:06:14.789,0:06:21.479
open the one above it as before make the
0:06:18.840,0:06:25.830
clipped photoactive click the adjustment
0:06:21.479,0:06:32.340
layer and choose color lookup clip it
0:06:25.830,0:06:34.740
and pick another effect continue adding
0:06:32.340,0:06:37.110
different effects to each panel until
0:06:34.740,0:06:39.190
you're happy with the result this is
0:06:37.110,0:06:41.910
Marty from Blue Lightning TV
0:06:39.190,0:06:41.910
thanks for watching
standard: en
0:00:00.030,0:00:07.030
0:00:08.460,0:00:13.180
Hi. This is Marty from Blue Lightning TV.
I'm going to show you how to create
0:00:13.180,0:00:16.450
overlapping, vertical photo strips from a single photo
0:00:16.450,0:00:20.640
and then colorize and effect each strip individually
0:00:20.640,0:00:22.880
creating a fun, interesting look.
0:00:25.040,0:00:30.960
Open a photo you'd like to use. I downloaded this portrait from
Shutterstock dot com.
0:00:30.960,0:00:30.970
0:00:32.500,0:00:36.340
Make a copy of your photo by pressing Ctrl + J on WIndows
0:00:36.640,0:00:41.540
or Cmd + J on a Mac. Click the Adjustment Layer icon
0:00:42.820,0:00:44.640
and choose "Solid Color".
0:00:46.240,0:00:48.800
Pick white and click OK.
0:00:49.560,0:00:53.080
We want to bring the "Color Fill" adjustment layer below Layer 1
0:00:53.420,0:00:58.000
There are two ways of doing this. One way
is to drag it to the line between Layer 1
0:00:58.000,0:00:59.980
and the background and then release.
0:01:00.420,0:01:02.440
I'll press Ctrl or Cmd + Z
0:01:02.440,0:01:03.820
to undo the last step.
0:01:04.400,0:01:09.160
The second way to place the Color Fill below Layer 1 is to use the shortcut
0:01:09.170,0:01:12.420
Ctrl or Cmd + [
0:01:13.620,0:01:16.340
Click the thumbnail of Layer 1 to make it active
0:01:17.320,0:01:20.500
and open your Rectangle Tool. Choose
0:01:20.500,0:01:24.899
"Shape". If you're working on a version earlier than CS6,
0:01:24.899,0:01:30.369
the Shape icon is here. The Fill color is
irrelevant, since we're ultimately going
0:01:30.369,0:01:32.240
to fill the shape with the photo.
0:01:32.660,0:01:35.840
Make sure the Stroke is empty. Its symbol
0:01:35.840,0:01:41.420
is the red, diagonal line. Drag a vertical,
rectangular shape across your image.
0:01:43.380,0:01:45.939
Position the rectangle below Layer 1
0:01:48.240,0:01:49.940
To move or rotate it,
0:01:49.950,0:01:54.170
open your Transform Tool by pressing Ctrl or Cmd + T.
0:01:55.780,0:01:57.719
When you see a curved, double-arrow,
0:01:57.719,0:02:01.560
rotate it to an angle you like. You can always change it later.
0:02:02.020,0:02:06.320
I'll drag the shape over the left side
of the portrait. Drag any middle point
0:02:06.320,0:02:08.280
on the edges to extend
0:02:08.400,0:02:11.400
or shorten the shape. To accept the Transform,
0:02:11.410,0:02:15.490
Press Enter or Return. Make the top layer
0:02:15.490,0:02:18.830
active. Make it into a clipping mask by pressing
0:02:18.830,0:02:23.850
Ctrl + Alt + G on Windows or Cmd + Option + G on a Mac.
0:02:24.440,0:02:27.260
This clips the photo to the shape directly below it
0:02:27.270,0:02:31.780
hiding everything on a photo except for the area inside the shape.
0:02:32.440,0:02:35.440
Make the Rectangle layer active and click
0:02:35.450,0:02:38.550
the "fx" icon. Choose
0:02:38.550,0:02:42.190
"Drop Shadow". The blend mode is Multiply
0:02:42.820,0:02:46.940
and the Opacity is 20%. Uncheck Global Light
0:02:47.460,0:02:50.160
and make the Angle: 132 degrees.
0:02:50.640,0:02:53.960
For this photo, I'll make the Distance: 20 pixels
0:02:54.300,0:02:57.860
and the Size: 5 pixels, however, keep in mind,
0:02:57.860,0:03:01.030
you may want to use different amounts for the Distance and Size
0:03:01.030,0:03:04.080
depending on the size and resolution of your photo.
0:03:04.460,0:03:07.800
Click Stroke. Click to color box,
0:03:09.740,0:03:12.200
pick white and click OK.
0:03:13.820,0:03:15.940
Make the Position: Inside,
0:03:16.740,0:03:20.560
click "Color Overlay" and change the blend mode
0:03:20.980,0:03:24.960
to "Hue". Click the color box
0:03:26.620,0:03:29.340
and pick a color you like to colorize your photo.
0:03:29.340,0:03:33.330
You can always change it later. Click off the eyeball
0:03:33.330,0:03:36.340
next to Color Overlay temporarily hide the effect.
0:03:36.920,0:03:40.700
Next, we'll group the clipped photo and the shape into a folder.
0:03:40.710,0:03:45.630
To do this, Shift-click on the photo to highlight it and then,
0:03:45.630,0:03:50.390
press Ctrl or Cmd + G. Make a copy of the folder
0:03:50.820,0:03:55.820
and position the copy under the original. Open the folder copy
0:03:55.830,0:03:58.910
and click the rectangle thumbnail to make the shape
0:03:58.910,0:04:02.070
active. Open the "Path Selection Tool"
0:04:02.560,0:04:08.260
and drag the copy to the right. Open your
Transform Tool to angle and position it.
0:04:08.270,0:04:09.130
to your liking.
0:04:10.520,0:04:12.640
Then, press Enter or Return.
0:04:13.140,0:04:15.840
Remember, you can always go back and change it later.
0:04:16.979,0:04:20.030
Close the folder, make a copy
0:04:20.030,0:04:23.350
and position "copy 2" below "copy 1".
0:04:25.010,0:04:28.540
Open the folder of "copy 2" and as before,
0:04:28.540,0:04:33.150
make the rectangle shape active. Open your Transform Tool
0:04:33.150,0:04:35.030
to reposition and angle it.
0:04:38.670,0:04:42.800
Continue the same steps to create the rest of the vertical panels.
0:04:42.800,0:04:46.230
Now that we have our finished vertical, strip portrait,
0:04:46.230,0:04:49.510
let's change the hues of each individual panel.
0:04:49.510,0:04:53.460
Open the top folder and click next to "Color Overlay"
0:04:53.460,0:04:54.760
to make it visible.
0:04:57.260,0:05:00.860
Close the folder and open the folder directly below it.
0:05:01.460,0:05:06.710
Make its Color Overlay visible and
double-click on the words, "Color Overlay"
0:05:06.710,0:05:10.830
to see it in the Layer Style window. Click on the color box
0:05:12.240,0:05:15.290
and pick another color and click OK
0:05:15.290,0:05:20.160
on both Windows. Continue these steps for the rest of the panels.
0:05:20.160,0:05:25.770
If you have CS6 or later, I'll show you
how you can use the "Color Lookup" filters
0:05:25.770,0:05:28.470
to give each panel its own unique look.
0:05:29.870,0:05:33.330
First, make sure the Color Overlay effect is hidden
0:05:33.330,0:05:36.670
on all of your panels. Make the clipped photo
0:05:36.670,0:05:40.530
active and click the Adjustment Layer icon.
0:05:40.870,0:05:44.650
Choose Color Lookup and click the
0:05:44.650,0:05:49.940
clip-to-layer icon. This will restrict the
effect to the individual panel below in
0:05:49.950,0:05:51.050
the Layers panel.
0:05:52.580,0:05:55.500
Open "Load 3D LUT".
0:05:56.440,0:06:00.240
Each of these effects were historically used by the film industry
0:06:00.240,0:06:03.370
to apply specific looks to film scenes.
0:06:03.370,0:06:07.570
Go through each one to determine which
one you like for your individual panels.
0:06:07.930,0:06:12.490
Once you've chosen the one you want,
click on it to apply the effect.
0:06:13.620,0:06:16.780
Close the folder and open the one above it.
0:06:17.320,0:06:20.360
As before, make the clipped photo active,
0:06:20.840,0:06:24.400
click the adjustment layer and choose Color Lookup.
0:06:25.270,0:06:29.070
Clip it and pick another effect.
0:06:31.610,0:06:36.170
Continue adding different effects to
each panel until you're happy with the result.
0:06:36.320,0:06:40.230
This is Marty from Blue Lightning TV.
Thanks for watching!
Profiles
Profile 1
| Purpose | Tutorial (why) |
|---|---|
| Content | |
| Participants | nameless (m) model, Photoshop (m) geek |
| Form | Tutorial (how) |
| Time | |
| Place |
Profile 2
| Purpose | Tutorial |
|---|---|
| Content | Portrait |
| Participants | nameless (m) model, Photoshop (m) geek |
| Form | Tutorial (how) |
| Time | Real time |
| Place | Desktop |
Profile 4
| Purpose | |
|---|---|
| Content | Portrait |
| Participants | |
| Form | |
| Time | |
| Place |