Photoshop Tutorial: How to Quickly Transform Photos into Beautiful, Romantic Images
Figuration: Tutorial
Description
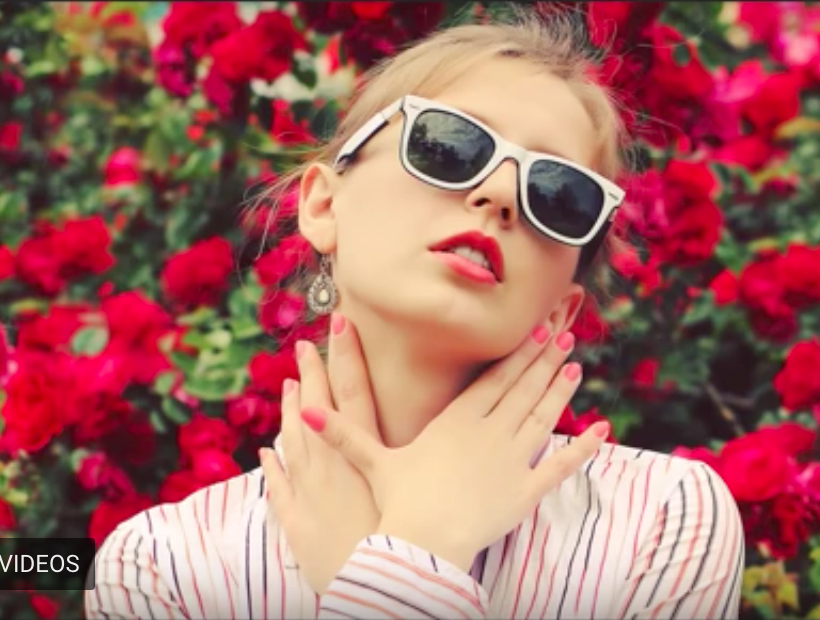
Shutterstock photo of girl in trendy glasses: Image ID: 195777914
URL: http://goo.gl/mCCiha
Bokeh Lights:
http://goo.gl/1Y3N3F
Jenna Sue Font:
http://goo.gl/1i1gy3
Get up to 20% off Photoshop + Lightroom! Only $7.99 p/month:
http://goo.gl/QFznn7
Metadata
| Video ID | 190 | Youtube URL | Photoshop Tutorial: How to Quickly Transform Photos into Beautiful, Romantic Images |
|---|---|
| Captions Available | Yes |
| Captions Downloadable | Yes |
| Playlists | |
| Duration | 00:06:58 |
| Definition | hd |
| Keywords | |
| License | youtube |
| Embeddable | Yes |
| Views | 61515 |
| Likes | 717 |
| Dislikes | 11 |
| Favourites | 0 |
| Comments | 89 |
| Created | 2017-05-04 1:00:43 PM |
| Updated | 2017-05-04 1:12:06 PM |
Captions
ASR: en
0:00:08.269,0:00:13.369
hi this is Marty from Blue Lightning TV
0:00:10.730,0:00:17.119
I'm going to show you how to give your
0:00:13.369,0:00:20.660
photos a dreamy romantic effect and then
0:00:17.119,0:00:23.270
add text to it to personalize them this
0:00:20.660,0:00:27.739
effect also works especially well on
0:00:23.270,0:00:29.599
portraits I provided this image of Boca
0:00:27.739,0:00:32.539
lights that will use later in this video
0:00:29.599,0:00:35.480
it's link is located in a video
0:00:32.539,0:00:37.789
description or project files open a
0:00:35.480,0:00:41.210
photo you'd like to use I downloaded
0:00:37.789,0:00:43.610
this photo from shutterstock.com the
0:00:41.210,0:00:47.810
size of this document is 1550 pixels
0:00:43.610,0:00:51.649
wide by 870 pixels high and has a
0:00:47.810,0:00:54.140
resolution of 150 pixels per inch in the
0:00:51.649,0:01:00.079
layers panel click the adjustment layer
0:00:54.140,0:01:03.860
icon and choose gradient map change the
0:01:00.079,0:01:06.159
blend mode to screen click the gradient
0:01:03.860,0:01:09.890
bar which opens the gradient editor
0:01:06.159,0:01:12.170
click the violet orange preset these
0:01:09.890,0:01:14.990
colors work well on most photos but for
0:01:12.170,0:01:18.009
this example I'll tweak them a bit click
0:01:14.990,0:01:25.340
the lower left stop the color box and
0:01:18.009,0:01:29.479
type in 32 2 24 c then click OK or press
0:01:25.340,0:01:36.319
Enter or return click the lower right
0:01:29.479,0:01:39.319
stop the color box and type in f8 a 658
0:01:36.319,0:01:43.999
then press Enter or return on both the
0:01:39.319,0:01:46.759
color picker and a gradient editor click
0:01:43.999,0:01:53.179
the adjustment layer icon again and this
0:01:46.759,0:01:55.490
time choose levels drag the input blacks
0:01:53.179,0:01:58.429
a little left of where the histogram
0:01:55.490,0:02:00.979
starts to rise this will slightly darken
0:01:58.429,0:02:04.539
the darkest colors drag the input
0:02:00.979,0:02:07.189
mid-tones to the left to lighten them
0:02:04.539,0:02:09.349
adding a soft warm color next to the
0:02:07.189,0:02:11.300
subjects face or shoulder is an
0:02:09.349,0:02:14.360
effective way to add an illuminating
0:02:11.300,0:02:16.850
naturalistic light effect to do this
0:02:14.360,0:02:21.080
click the new layer icon to make a new
0:02:16.850,0:02:24.720
layer and open your brush tool
0:02:21.080,0:02:27.270
choose a large brush for this document
0:02:24.720,0:02:29.670
I'll choose a brush size of 800 pixels
0:02:27.270,0:02:31.890
depending on the size and resolution of
0:02:29.670,0:02:34.080
your photo you may want to adjust the
0:02:31.890,0:02:37.430
amount of your brush size make the
0:02:34.080,0:02:40.290
hardness 0% and press Enter or return
0:02:37.430,0:02:43.260
make sure the opacity is a hundred
0:02:40.290,0:02:45.600
percent press the f5 key at the top of
0:02:43.260,0:02:48.570
your keyboard to open your brush panel
0:02:45.600,0:02:51.990
and make sure the only setting checked
0:02:48.570,0:02:55.610
is smoothing press f5 again to close the
0:02:51.990,0:03:02.010
panel click the foreground color and
0:02:55.610,0:03:06.300
type in FF d for 3d then click OK or
0:03:02.010,0:03:08.760
press Enter or return press B to open
0:03:06.300,0:03:11.700
your brush tool make sure your caps lock
0:03:08.760,0:03:13.700
key is turned off otherwise you won't be
0:03:11.700,0:03:16.800
able to see your brush on your screen
0:03:13.700,0:03:19.710
now left-click once next to your
0:03:16.800,0:03:23.760
subjects head and change the blend mode
0:03:19.710,0:03:25.260
to screen next we'll add the bokeh
0:03:23.760,0:03:29.580
lights to further enhance the overall
0:03:25.260,0:03:33.080
effect open the bokeh file I provided
0:03:29.580,0:03:37.290
press ctrl or command a to select it and
0:03:33.080,0:03:40.230
ctrl or command C to copy it open back
0:03:37.290,0:03:42.990
up your photo and press ctrl or command
0:03:40.230,0:03:46.440
V to paste the bokeh lights into your
0:03:42.990,0:03:49.800
document let's say your original photo
0:03:46.440,0:03:51.959
is vertical and much larger to transform
0:03:49.800,0:03:55.320
the bokeh lights to a vertical angle and
0:03:51.959,0:03:58.950
to increase its size press ctrl or
0:03:55.320,0:04:01.320
command T to open your transform tool go
0:03:58.950,0:04:04.260
to a corner and when you see a curved
0:04:01.320,0:04:07.530
double-arrow hold down shift as you
0:04:04.260,0:04:10.560
rotate it 90 degrees then go back to a
0:04:07.530,0:04:13.440
corner and when you see a straight 45
0:04:10.560,0:04:15.810
degree double arrow hold down shift and
0:04:13.440,0:04:18.390
drag it out until it completely covers
0:04:15.810,0:04:22.410
your document then press Enter or return
0:04:18.390,0:04:24.930
if you need to zoom out press Z to open
0:04:22.410,0:04:27.350
your zoom tool and hold down alt or
0:04:24.930,0:04:30.720
option as you click on your document
0:04:27.350,0:04:33.080
press ctrl or command 0 to fit your
0:04:30.720,0:04:37.789
document back on your screen
0:04:33.080,0:04:39.710
change the blend mode to screen as I
0:04:37.789,0:04:42.969
toggle back and forth you can see the
0:04:39.710,0:04:46.460
difference we're ready to set our text
0:04:42.969,0:04:49.340
open your horizontal type tool and pick
0:04:46.460,0:04:52.639
a handwritten font for this example I'm
0:04:49.340,0:04:54.979
using a font called Jenna sue if you'd
0:04:52.639,0:04:59.020
like to use it I provided its link as
0:04:54.979,0:05:03.020
well I'll type in 72 points for the size
0:04:59.020,0:05:06.199
smooth and left alignment click on the
0:05:03.020,0:05:08.750
color box and pick a dark color that
0:05:06.199,0:05:13.699
complements the colors in your photo for
0:05:08.750,0:05:18.050
this image I'll type in 5706 to be then
0:05:13.699,0:05:22.639
press Enter or return type out your main
0:05:18.050,0:05:25.430
text with this font you can type out a
0:05:22.639,0:05:28.729
heart shape by pressing Shift + the
0:05:25.430,0:05:35.680
number 6 to reposition it open your move
0:05:28.729,0:05:40.550
tool and move it click the FX icon and
0:05:35.680,0:05:43.099
click outer glow the blend mode is
0:05:40.550,0:05:46.300
screen and the opacity is seventy-five
0:05:43.099,0:05:53.210
percent click the color box and pick
0:05:46.300,0:05:55.099
white I'll make the size 27 pixels keep
0:05:53.210,0:05:56.990
in mind you may want to adjust this
0:05:55.099,0:06:01.849
amount depending on the size and
0:05:56.990,0:06:03.919
resolution of your photo as I toggle
0:06:01.849,0:06:06.310
back and forth you can see that the glow
0:06:03.919,0:06:08.719
makes the text stand out a bit more
0:06:06.310,0:06:11.539
click on your document to make your
0:06:08.719,0:06:14.719
secondary line of text if it's a long
0:06:11.539,0:06:19.699
line reduce the size and type out your
0:06:14.719,0:06:24.650
text open your move tool to reposition
0:06:19.699,0:06:27.259
it will copy the outer glow effect to
0:06:24.650,0:06:30.800
your secondary line of text to do this
0:06:27.259,0:06:33.979
hold down alt or option as you drag the
0:06:30.800,0:06:36.169
effects copy to the top layer double
0:06:33.979,0:06:39.379
click on outer glow to open it in the
0:06:36.169,0:06:41.750
layer style window change the opacity to
0:06:39.379,0:06:44.300
fifty percent for the size and
0:06:41.750,0:06:45.430
resolution of this photo I'll make the
0:06:44.300,0:06:51.340
spread seven
0:06:45.430,0:06:54.280
sent and the size 57 pixels this is
0:06:51.340,0:06:56.700
Marty from Blue Lightning TV thanks for
0:06:54.280,0:06:56.700
watching
standard: en
0:00:00.170,0:00:07.170
0:00:08.580,0:00:14.080
Hi. This is Marty from Blue Lightning TV.
I'm going to show you how to give your photos
0:00:14.600,0:00:17.460
a dreamy, romantic effect and then
0:00:17.460,0:00:20.470
add text to it to personalize them.
0:00:20.470,0:00:24.170
This effect also works especially well on portraits.
0:00:26.020,0:00:27.340
I provided this image of
0:00:27.340,0:00:30.040
Boca lights that we'll use later in this video.
0:00:30.220,0:00:34.500
Its link is located in a video description or project files.
0:00:35.100,0:00:36.800
Open a photo you'd like to use.
0:00:37.240,0:00:40.260
I downloaded this photo from Shutterstock.com.
0:00:41.300,0:00:44.440
The size of this document is 1550 pixels wide
0:00:44.860,0:00:48.440
by 870 pixels high and has a Resolution
0:00:48.440,0:00:52.540
of 150 pixels per inch. In the Layers panel,
0:00:52.980,0:00:56.180
click the Adjustment Layer icon and choose
0:00:56.180,0:01:01.640
"Gradient Map". Change the Blend Mode to Screen
0:01:03.140,0:01:04.640
Click the Gradient bar
0:01:04.640,0:01:09.160
which opens the Gradient Editor. Click the Violet/Orange preset
0:01:09.540,0:01:12.920
These colors work well on most photos, but for this example,
0:01:12.920,0:01:16.360
I'll tweak them a bit. Click the lower, left Stop
0:01:16.360,0:01:19.580
the color box and type in
0:01:19.580,0:01:23.320
3 2 2 2 4 C.
0:01:23.740,0:01:27.040
Then, click OK or press Enter or Return
0:01:28.380,0:01:30.140
Click the lower, right Stop
0:01:30.660,0:01:33.160
the color box and type in
0:01:33.170,0:01:36.610
F 8 A 6 5 8
0:01:37.020,0:01:40.360
Then, press Enter or Return on both the Color Picker
0:01:40.660,0:01:46.020
and the Gradient Editor. Click the Adjustment Layer icon again
0:01:46.020,0:01:48.700
and this time, choose "Levels".
0:01:51.820,0:01:56.819
Drag the input blacks a little left of where the histogram starts to rise.
0:01:56.819,0:01:59.599
This will slightly darken the darkest colors.
0:02:00.240,0:02:01.820
Drag the input midtones to the
0:02:01.980,0:02:03.020
left to lighten them
0:02:04.720,0:02:08.900
Adding a soft, warm color next to the subject's face or shoulder
0:02:09.380,0:02:12.900
is an effective way to add an illuminating, naturalistic light effect.
0:02:13.620,0:02:16.200
To do this, click the New Layer icon
0:02:16.200,0:02:17.460
to make a new layer
0:02:18.920,0:02:23.480
and open your Brush Tool. Choose a large brush
0:02:23.480,0:02:27.550
For this document, I'll choose a brush size of 800 pixels.
0:02:27.550,0:02:30.560
Depending on the size and resolution of your photo,
0:02:30.560,0:02:33.320
you may want to adjust the amount of your brush size
0:02:33.740,0:02:37.720
Make the Hardness: 0% and press Enter or Return.
0:02:38.180,0:02:41.060
Make sure the Opacity is 100%.
0:02:41.440,0:02:44.280
Press the F5 key at the top to your keyboard.
0:02:44.290,0:02:48.770
to open your brush panel and make sure
the only setting checked
0:02:48.770,0:02:52.480
is Smoothing. Press F5 again to close the panel.
0:02:53.660,0:02:55.680
Click the foreground color
0:02:56.000,0:02:57.100
and type in
0:02:57.360,0:03:00.420
F F D 4 3 D
0:03:00.640,0:03:03.700
Then, click OK or press Enter or Return.
0:03:05.080,0:03:07.340
Press "B" to open your Brush Tool.
0:03:07.560,0:03:13.940
Make sure your Caps Lock key is turned
off, otherwise, you won't be able to see your brush on your screen.
0:03:14.500,0:03:17.820
Now, left-click once next to your subject's head
0:03:18.640,0:03:20.760
and change the Blend Mode to Screen.
0:03:22.400,0:03:26.300
Next, we'll add the Bokeh lights to further
enhance the overall effect.
0:03:27.560,0:03:29.660
Open the bokeh file I provided.
0:03:30.160,0:03:32.920
Press Ctrl or Cmd + A to select it
0:03:33.280,0:03:36.080
and Ctrl or Cmd + C to copy it.
0:03:36.760,0:03:39.180
Open back up your photo and press
0:03:39.180,0:03:43.520
Ctrl or Cmd + V to paste the bokeh lights into your document.
0:03:44.500,0:03:47.459
Let's say your original photo is vertical
0:03:47.459,0:03:52.010
and much larger. To transform the bokeh lights to a vertical angle
0:03:52.010,0:03:53.890
and to increase its size,
0:03:54.320,0:03:58.300
press Ctrl or Cmd + T to open your Transform Tool.
0:03:58.580,0:04:02.300
Go to a corner and when you see a curved, double-arrow,
0:04:02.310,0:04:05.930
hold down Shift as you rotate it 90 degrees.
0:04:06.120,0:04:10.000
Then, go back to a corner and when you see a straight,
0:04:10.000,0:04:13.530
45-degree, double-arrow, hold down Shift
0:04:13.530,0:04:17.039
and drag it out until it completely covers your document.
0:04:17.039,0:04:20.410
Then, press Enter or Return. If you need to zoom
0:04:20.410,0:04:23.630
out, press "z" to open your Zoom Tool
0:04:23.630,0:04:28.080
and hold down Alt or Option as you click on your document.
0:04:28.080,0:04:32.660
Press Ctrl or Cmd + 0 to fit your document back on your screen.
0:04:33.700,0:04:36.200
Change the Blend Mode to Screen
0:04:37.460,0:04:40.560
As I toggle back and forth, you can see the difference.
0:04:40.880,0:04:46.060
We're ready to set our text. Open your Horizontal Type Tool
0:04:46.060,0:04:49.570
and pick a hand-written font. For this example,
0:04:49.570,0:04:53.700
I'm using a font called "Jenna Sue". If you'd like to use it,
0:04:53.700,0:04:57.370
I provided its link as well. I'll type in
0:04:57.370,0:05:00.720
72 points for the size, Smooth,
0:05:00.720,0:05:04.180
and left alignment. Click on a color box
0:05:04.800,0:05:08.540
and pick a dark color that complements the colors in your photo.
0:05:08.540,0:05:13.240
For this image, I'll type in 5 7 0 6 2 B
0:05:13.600,0:05:16.120
Then, press Enter or Return.
0:05:17.169,0:05:18.849
Type out your main text.
0:05:21.010,0:05:24.490
With this font, you can type out a heart shape by pressing
0:05:24.490,0:05:28.180
Shift + 6. To reposition it,
0:05:28.190,0:05:31.210
open your Move Tool and move it.
0:05:33.760,0:05:36.790
Click the FX icon and click
0:05:36.790,0:05:41.470
Outer Glow. The Blend Mode is Screen
0:05:41.470,0:05:46.290
and the Opacity is 75%. Click the color box
0:05:46.290,0:05:48.130
and pick white.
0:05:50.169,0:05:53.930
I'll makethe Size 27 pixels. Keep in mind,
0:05:53.930,0:05:57.699
you may want to adjust this amount
depending on the size and resolution
0:05:57.699,0:05:58.699
of your photo.
0:06:01.130,0:06:06.050
As I toggle back-and-forth, you can see
that the glow makes the text stand out a bit more.
0:06:06.360,0:06:06.360
0:06:07.110,0:06:10.410
Click on your document to make your secondary line of text.
0:06:10.770,0:06:14.100
If it's a long line, reduce the size
0:06:14.100,0:06:15.540
and type out your text.
0:06:18.139,0:06:20.379
Open your Move Tool to reposition it.
0:06:22.639,0:06:26.630
We'll copy the Outer Glow effect to your secondary line of text.
0:06:26.630,0:06:30.060
To do this, hold down Alt or Option
0:06:30.060,0:06:32.780
as you drag the effects copy to the top layer.
0:06:33.800,0:06:37.240
Double-click on Outer Glow to open it in the Layer Style window.
0:06:38.040,0:06:42.400
Change the Opacity to 50%. For the size and resolution
0:06:42.400,0:06:46.300
of this photo, I'll make the Spread: 7%
0:06:46.300,0:06:48.560
and the Size: 57 pixels.
0:06:51.060,0:06:53.680
This is Marty from Blue Lightning TV.
0:06:53.690,0:06:54.750
Thanks for watching!
Profiles
Profile 1
| Purpose | Tutorial (why) |
|---|---|
| Content | |
| Participants | nameless (f) model, Photoshop (m) geek |
| Form | Tutorial (how) |
| Time | |
| Place |
Profile 2
| Purpose | Tutorial |
|---|---|
| Content | Portrait, Text |
| Participants | Photoshop (m) geek |
| Form | Tutorial (how) |
| Time | Real time |
| Place | Desktop |