Photoshop Tutorial: Cross Processing Layer Setup
Figuration: Tutorial
Description
Links:
? Written Tutorial: https://dennystips.com/cross-processing-layer-setup/
? Photoshop & Lightroom Products: https://sparklestock.com
? Photoshop Books: http://amzn.to/2fDsVtZ
Subscribe:
?https://youtube.com/dennystips?sub_confirmation=1
Follow Me:
? Website: https://dennystips.com/
? Instagram: https://instagram.com/dennystips/
? Facebook: http://facebook.com/dennystips
? Snapchat: dennystips
?Twitter: https://twitter.com/dennystips
?? Did you like/dislike this video? Please let me know in the comments below.
Metadata
| Video ID | 242 | Youtube URL | Photoshop Tutorial: Cross Processing Layer Setup |
|---|---|
| Captions Available | Yes |
| Captions Downloadable | Yes |
| Playlists | |
| Duration | 00:05:38 |
| Definition | hd |
| Keywords | |
| License | youtube |
| Embeddable | Yes |
| Views | 1992 |
| Likes | 24 |
| Dislikes | 0 |
| Favourites | 0 |
| Comments | 14 |
| Created | 2017-05-04 1:00:44 PM |
| Updated | 2017-05-04 1:12:50 PM |
Captions
ASR: en
0:00:01.429,0:00:06.990
hello and welcome to a first episode of
0:00:04.110,0:00:08.519
Denny's tips my name is Danny and today
0:00:06.990,0:00:10.230
I'll be showing you how to create your
0:00:08.519,0:00:13.019
own cross processing effects using
0:00:10.230,0:00:14.730
Photoshop back in the days phone
0:00:13.019,0:00:17.039
photographers would deliberately develop
0:00:14.730,0:00:19.050
their photos with the wrong chemicals to
0:00:17.039,0:00:21.750
get really cool abstract and retro
0:00:19.050,0:00:24.029
effects we can now do a easel in
0:00:21.750,0:00:26.580
Photoshop and I have this awesome layer
0:00:24.029,0:00:28.980
set up that makes it incredibly easy in
0:00:26.580,0:00:30.810
this tutorial you'll learn how to sub
0:00:28.980,0:00:32.640
just three layers that will let you
0:00:30.810,0:00:36.270
create an infinite amount of retro
0:00:32.640,0:00:39.899
effects in a short time it's fun easy
0:00:36.270,0:00:41.960
and fast so if you're ready let's get
0:00:39.899,0:00:41.960
started
0:00:44.570,0:00:49.340
before we begin let me show you how this
0:00:46.850,0:00:51.530
works instead of learning how to create
0:00:49.340,0:00:53.000
just one cross processing effect you
0:00:51.530,0:00:54.379
will learn how to create a layer set up
0:00:53.000,0:00:57.739
that will let you create an unlimited
0:00:54.379,0:00:59.629
amount of effects looking in the layers
0:00:57.739,0:01:01.850
panel here you can see that we have
0:00:59.629,0:01:03.769
three brightness/contrast layers these
0:01:01.850,0:01:07.630
layers can be adjusted to create various
0:01:03.769,0:01:07.630
cross processing effects like this
0:01:12.060,0:01:17.670
and just like that we have a completely
0:01:14.399,0:01:19.439
different effect so what exactly is
0:01:17.670,0:01:22.439
happening here to show you how to
0:01:19.439,0:01:25.350
channel panel out like this each one of
0:01:22.439,0:01:26.970
these layers affect only one channel so
0:01:25.350,0:01:29.070
for example this red layer here will
0:01:26.970,0:01:31.289
affect the red channel the screen layer
0:01:29.070,0:01:33.750
will affect the green channel and the
0:01:31.289,0:01:35.310
same thing with this blue layer when I
0:01:33.750,0:01:37.530
make the adjustments to this red layer
0:01:35.310,0:01:39.509
you can see it any channels panel that
0:01:37.530,0:01:41.299
it's only affecting the red channel it's
0:01:39.509,0:01:43.200
not affecting the green or blue Channel
0:01:41.299,0:01:44.700
there's actually a name for this
0:01:43.200,0:01:47.220
technique and it's called channel
0:01:44.700,0:01:48.720
contrast but instead of using a curves
0:01:47.220,0:01:51.030
adjustment which most people don't
0:01:48.720,0:01:52.979
really know how to use you're using a
0:01:51.030,0:01:55.530
layer setup that's easier to adjust it's
0:01:52.979,0:01:59.340
faster to do and it's more suitable for
0:01:55.530,0:02:01.319
beginners okay so now you know how the
0:01:59.340,0:02:03.810
layers work it's time to learn how to
0:02:01.319,0:02:05.189
set up the layers go to your adjustments
0:02:03.810,0:02:07.619
panel and add a brightness contrast
0:02:05.189,0:02:09.750
adjustment layer if you don't see this
0:02:07.619,0:02:12.660
panel you can open it by going to window
0:02:09.750,0:02:14.569
adjustments when you make changes to
0:02:12.660,0:02:17.250
this layer it affects all three channels
0:02:14.569,0:02:19.829
so how do we make it so I only affects
0:02:17.250,0:02:22.320
one channel the answer is blending
0:02:19.829,0:02:24.870
options right click on the layer then
0:02:22.320,0:02:27.720
choose blending options in this area
0:02:24.870,0:02:29.310
here you'll see three check boxes these
0:02:27.720,0:02:31.920
check boxes basically tell Photoshop
0:02:29.310,0:02:33.840
which channel desolator should affect so
0:02:31.920,0:02:36.420
if we simply uncheck the green and blue
0:02:33.840,0:02:39.720
channel this layer will now only affect
0:02:36.420,0:02:41.880
the red channel we need three of these
0:02:39.720,0:02:43.680
layers one for each Channel so let's
0:02:41.880,0:02:46.859
duplicate the layer by pressing ctrl or
0:02:43.680,0:02:48.600
command J twice for better organization
0:02:46.859,0:02:51.239
I'm also going to rename the layers and
0:02:48.600,0:02:56.310
add color labels to it I'm winning this
0:02:51.239,0:02:58.230
one with reds greens and blues forty
0:02:56.310,0:03:00.150
color labels you can add them simply by
0:02:58.230,0:03:01.639
right clicking on the layer then picking
0:03:00.150,0:03:03.720
the color that you want to label it with
0:03:01.639,0:03:06.000
these labels don't actually do anything
0:03:03.720,0:03:07.680
other than labeling your layers with a
0:03:06.000,0:03:11.340
color so it doesn't really matter if you
0:03:07.680,0:03:13.739
do it or not we're done with the layer
0:03:11.340,0:03:15.959
organization now let's finish setting up
0:03:13.739,0:03:17.900
the layers right click on the green
0:03:15.959,0:03:20.489
channel then go to blending options
0:03:17.900,0:03:23.610
uncheck the red channel then check mark
0:03:20.489,0:03:25.150
the green channel click OK do the same
0:03:23.610,0:03:27.430
with the blue channel
0:03:25.150,0:03:30.040
right click on the layer go to blending
0:03:27.430,0:03:31.689
options uncheck the red channel and then
0:03:30.040,0:03:35.379
check mark the blue channel then click
0:03:31.689,0:03:37.569
OK the last thing to do is to go into
0:03:35.379,0:03:39.610
all of the adjustment layers and enabled
0:03:37.569,0:03:41.349
use like it's the option this option
0:03:39.610,0:03:43.180
presents Photoshop from trying to
0:03:41.349,0:03:46.390
preserve the tones in your image so you
0:03:43.180,0:03:47.950
can apply much more drastic effects play
0:03:46.390,0:03:49.780
around with the settings on all three
0:03:47.950,0:03:52.450
layers and see what kind of effects you
0:03:49.780,0:03:56.250
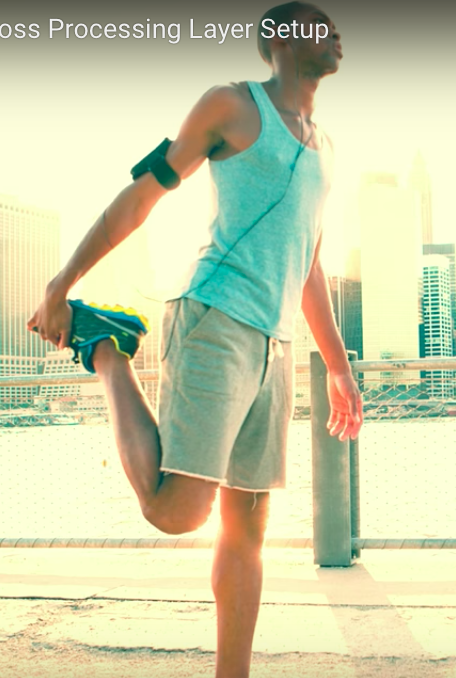
can create here are some examples of
0:03:52.450,0:03:56.250
effects that I made using this technique
0:04:34.650,0:04:38.460
hey guys thanks for checking out this
0:04:36.509,0:04:39.750
video I hope you liked it and if you
0:04:38.460,0:04:42.660
liked it click on the subscribe button
0:04:39.750,0:04:44.250
below otherwise keep watching and check
0:04:42.660,0:04:46.370
out these other videos so I think you
0:04:44.250,0:04:48.169
might enjoy
0:04:46.370,0:04:49.880
if you want to learn more about photo
0:04:48.169,0:04:52.400
effects that watch this video about
0:04:49.880,0:04:53.990
channel contrast channel contrast is not
0:04:52.400,0:04:56.030
only in central technique for creating
0:04:53.990,0:04:58.639
your own effects it's also a great way
0:04:56.030,0:05:00.139
to copy other people's effects so if
0:04:58.639,0:05:03.490
you're interested in learning more then
0:05:00.139,0:05:03.490
click on this video here to watch it
0:05:05.260,0:05:09.500
want to learn how to create your own
0:05:07.190,0:05:10.910
film like effects this video here will
0:05:09.500,0:05:12.770
teach you how to do it use any curves
0:05:10.910,0:05:14.419
adjustment which can also be used in
0:05:12.770,0:05:17.270
other software such as Adobe Lightroom
0:05:14.419,0:05:22.100
phase one capture one adobe after
0:05:17.270,0:05:23.750
effects and more do you want to learn
0:05:22.100,0:05:25.190
how to retouch your skin in photoshop
0:05:23.750,0:05:26.630
then watch this video to learn
0:05:25.190,0:05:29.590
professional techniques such as
0:05:26.630,0:05:29.590
frequency separation
0:05:36.830,0:05:38.890
you
standard: en
0:00:00.000,0:00:05.069
Hello and welcome to the first episode of Denny's Tips.
0:00:05.609,0:00:09.000
zmy name is Denny and today i'll be
showing you how to create your own cross
0:00:09.000,0:00:13.710
processing effects using Photoshop. Back
in the days from photographers would
0:00:13.710,0:00:17.820
deliberately develop the photos with
Iran chemicals to get really cool
0:00:17.820,0:00:23.279
abstract and retro effects. We can now do
easily in Photoshop and I had this
0:00:23.279,0:00:28.349
awesome layer set up that makes it
incredibly easy. iin this tutorial you'll
0:00:28.349,0:00:31.650
learn how to set up just three layers
that will let you create an infinite
0:00:31.650,0:00:38.879
amount of retro effects in a short time. It's fun, easy and fast. So if you're
0:00:38.879,0:00:41.879
ready let's get started!
0:00:44.420,0:00:49.339
Before we begin let me show you how this
works. Instead of learning how to create
0:00:49.339,0:00:53.000
just one cross processing effect, you
will learn how to create a layer set up
0:00:53.000,0:00:57.739
that will let you create an unlimited
amount of effects. Looking in the layers
0:00:57.739,0:01:01.879
panel here, you can see that we have
three brightness/contrast layers. These
0:01:01.879,0:01:05.600
layers can be adjusted to create various
cross processing effects like this...
0:01:12.220,0:01:17.620
... and just like that we have a completely
different effect. So what exactly is
0:01:17.620,0:01:21.370
happening here? To show you, I'll be dragging the
channels panel out like this.
0:01:21.370,0:01:26.710
Each one of these layers effect only one
channel. So for example this layer here
0:01:26.710,0:01:31.210
will affect the red channel. This green
layer will affect the green channel. And
0:01:31.210,0:01:35.380
the same thing with this blue layer. When
I make the adjustments to this red layer
0:01:35.380,0:01:39.730
you can see in the channels panel that it's
only affecting the red channel. It's not
0:01:39.730,0:01:43.150
affecting the green or blue channel.
There's actually a name for this
0:01:43.150,0:01:47.260
technique and it's called channel
contrast, but instead of using it curves
0:01:47.260,0:01:50.950
adjustment which most people don't
really know how to use, you are you using
0:01:50.950,0:01:55.300
a layer set up that's easier to adjust,
it's faster to do and it's more suitable
0:01:55.300,0:01:56.260
for beginners.
0:01:56.260,0:02:01.690
Ok so now that you know how do layers work
it's time to learn how to set up the
0:02:01.690,0:02:06.160
layers. Go to your adjustments panel and add
a brightness contrast adjustment layer
0:02:06.160,0:02:11.950
If you don't see this panel you can open
it by going to Window > Adjustments.
0:02:11.950,0:02:16.390
When you make changes to this layer, it affects
all three channels. So how do we make it
0:02:16.390,0:02:21.610
so I only affects one channel? The answer
is blending options. Right click on the
0:02:21.610,0:02:26.500
layer then choose blending options. In this
area here you'll see three check boxes.
0:02:26.500,0:02:30.640
These checkboxes basically tell
Photoshop which channel this layer
0:02:30.640,0:02:35.410
should affect. So if we simply uncheck
the green and blue channel, this layer
0:02:35.410,0:02:40.660
will only affect the red channel. We
need three of these layers - one for each
0:02:40.660,0:02:45.880
channel. So let's duplicate the layer by
pressing ctrl or command J twice.
0:02:45.880,0:02:49.600
For better organization i'm also going to
rename the layers and add color labels
0:02:49.600,0:02:50.350
to it.
0:02:50.350,0:02:57.640
I'm renaming this layer to reds... greens...
and blues. For the color labels you can add
0:02:57.640,0:03:00.760
them simply by right clicking on the
layer then picking the color that you
0:03:00.760,0:03:05.350
want to label it with. These labels don't
actually do anything other than labeling
0:03:05.350,0:03:10.780
your layers with a color so it doesn't
really matter if you do it or not. We're
0:03:10.780,0:03:15.310
done with the layer organization. Now
let's finish setting up the layers. Right
0:03:15.310,0:03:19.180
click on the green channel then go to
blending options. Check the red
0:03:19.180,0:03:22.180
channel then checkmark the green channel. Click OK.
0:03:22.750,0:03:27.400
Do the same of the blue channel. Right
click on the layer, go to Blending
0:03:27.400,0:03:31.720
Options, uncheck the red channel and
check mark the blue channel, then click
0:03:31.720,0:03:37.480
ok. The last thing to do is to go into
all of the adjustment layers and enable
0:03:37.480,0:03:41.410
the "Use Legacy" option. This option
prevents photoshop from trying to
0:03:41.410,0:03:46.390
preserve the tones in your image so you
can apply much more drastic effects. Play
0:03:46.390,0:03:49.780
around with the settings on all three
layers and see what kind of effects you
0:03:49.780,0:03:54.220
can create. Here are some examples of
effects that I made using this technique.
0:04:34.860,0:04:38.430
Hey guys thanks for checking out this
video. I hope you liked it and if you
0:04:38.430,0:04:42.629
liked it, click on the subscribe button
below. Otherwise keep watching and check
0:04:42.629,0:04:45.629
out these other videos that I think you
might enjoy.
0:04:46.520,0:04:49.910
If you want to learn more about photo
effects then watch this video about
0:04:49.910,0:04:54.199
Channel Contrast. Channel contrast is not
only an essential technique for creating
0:04:54.199,0:04:58.639
your own effects, it's also a great way
to copy other people's effects. So if
0:04:58.639,0:05:01.639
you're interested in learning more then
click on this video here to watch it.
0:05:05.350,0:05:09.490
Want to learn how to create your own
film like effects? This video here will
0:05:09.490,0:05:12.730
teach you how to do it using the curves
adjustment which can also be used in
0:05:12.730,0:05:17.260
other software such as Adobe Lightroom, Phase One Capture One, Adobe After
0:05:17.260,0:05:24.310
Effects and more. Do you want to learn
how to retouch your skin in Photoshop? Then
0:05:24.310,0:05:27.550
watch this video to learn professional
techniques such as frequency separation.
Screenshots

Profiles
Profile 1
| Purpose | Tutorial (why) |
|---|---|
| Content | |
| Participants | nameless (f) model, nameless (m) model, Photoshop (m) geek |
| Form | Tutorial (how) |
| Time | |
| Place |
Profile 2
| Purpose | Tutorial |
|---|---|
| Content | Scene |
| Participants | Photoshop (m) geek |
| Form | Tutorial (how), Mid shot |
| Time | Real time |
| Place | Desktop |