Useful Color Grading Chart for Photoshop
Figuration: Tutorial
Description
DOWNLOAD LINK
https://www.photoshoptutorials.ws/downloads/color-grade-better-free-charts-photoshop-lightroom/
Links:
? Written Tutorial: https://dennystips.com/photoshop-color-grading-chart/
? Photoshop & Lightroom Products: https://sparklestock.com
? Photoshop Books: http://amzn.to/2fDsVtZ
Subscribe:
?https://youtube.com/dennystips?sub_confirmation=1
Follow Me:
? Website: https://dennystips.com/
? Instagram: https://instagram.com/dennystips/
? Facebook: http://facebook.com/dennystips
? Snapchat: dennystips
?Twitter: https://twitter.com/dennystips
?? Did you like/dislike this video? Please let me know in the comments below.
Metadata
| Video ID | 252 | Youtube URL | Useful Color Grading Chart for Photoshop |
|---|---|
| Captions Available | Yes |
| Captions Downloadable | Yes |
| Playlists | |
| Duration | 00:06:05 |
| Definition | hd |
| Keywords | |
| License | youtube |
| Embeddable | Yes |
| Views | 4678 |
| Likes | 106 |
| Dislikes | 0 |
| Favourites | 0 |
| Comments | 10 |
| Created | 2017-05-04 1:00:44 PM |
| Updated | 2017-05-04 1:13:01 PM |
Captions
ASR: en
0:00:01.669,0:00:06.629
hello and welcome to this episode of
0:00:03.959,0:00:08.550
dennys tips color grading your photos in
0:00:06.629,0:00:10.980
Photoshop using it curves and June
0:00:08.550,0:00:12.360
saturation adjustments it's doable but
0:00:10.980,0:00:14.340
sometimes it's hard to see what's
0:00:12.360,0:00:15.990
happening so I make for you this
0:00:14.340,0:00:18.029
reference chart that you can import into
0:00:15.990,0:00:20.010
your photos and it will let me see
0:00:18.029,0:00:21.840
exactly how your adjustment layers are
0:00:20.010,0:00:24.660
affecting the tones and colors in your
0:00:21.840,0:00:26.130
photo the reference charts are intended
0:00:24.660,0:00:27.990
for people who already have some
0:00:26.130,0:00:30.720
experience celebrating their photos and
0:00:27.990,0:00:32.070
it's not really made for beginners so
0:00:30.720,0:00:33.719
I'm not going to be going into too much
0:00:32.070,0:00:35.270
detail about how to use in tone curves
0:00:33.719,0:00:37.890
how to use the hue/saturation
0:00:35.270,0:00:39.329
adjustments but if this is something
0:00:37.890,0:00:42.950
that might interest you then keep
0:00:39.329,0:00:42.950
watching and you'll see how it works
0:00:48.300,0:00:52.440
after downloading you'll find three
0:00:50.190,0:00:54.149
image files start by dragging and
0:00:52.440,0:00:56.790
dropping Dee to photoshop reference
0:00:54.149,0:00:58.980
chart images into your document you can
0:00:56.790,0:01:01.500
scale it to any size you like and then
0:00:58.980,0:01:03.000
press Enter when you're done make sure
0:01:01.500,0:01:05.190
that the top reference chart is
0:01:03.000,0:01:06.750
positioned as your top layer you can
0:01:05.190,0:01:08.600
then place their adjustment layers in
0:01:06.750,0:01:11.100
between the two reference chart layers
0:01:08.600,0:01:13.140
for most color grading effects you
0:01:11.100,0:01:16.140
really only need two layers are curves
0:01:13.140,0:01:17.850
and hue/saturation adjustment layer you
0:01:16.140,0:01:20.009
can add these layers by the way from the
0:01:17.850,0:01:21.710
adjustments panel if you don't see this
0:01:20.009,0:01:25.020
you can find it by going to window
0:01:21.710,0:01:27.000
adjustments click on this button here to
0:01:25.020,0:01:29.550
add the hue/saturation adjustment layer
0:01:27.000,0:01:33.149
and then click on this one to add the
0:01:29.550,0:01:35.910
curves adjustment layer so here's how it
0:01:33.149,0:01:38.429
works the upper tone chart here is for
0:01:35.910,0:01:39.929
your curves adjustment layer the bottom
0:01:38.429,0:01:43.380
chart here is for your hue and
0:01:39.929,0:01:45.360
saturation adjustment layer start with D
0:01:43.380,0:01:49.310
tone curves in the properties panel
0:01:45.360,0:01:51.690
click on the target adjustment tool here
0:01:49.310,0:01:53.429
this tool lets you click anywhere in
0:01:51.690,0:01:55.319
your image to add a point on your tone
0:01:53.429,0:01:57.119
curve but instead of clicking on your
0:01:55.319,0:01:59.869
image you'll be clicking on the chart
0:01:57.119,0:02:02.220
and dragging up or down to adjust it for
0:01:59.869,0:02:04.380
example if you want to lift the blacks
0:02:02.220,0:02:06.780
just drag upwards on the black part of
0:02:04.380,0:02:09.149
this chart if you want to start with d5
0:02:06.780,0:02:11.400
song chart which will give you the black
0:02:09.149,0:02:14.819
shadows mid-tones highlights and whites
0:02:11.400,0:02:18.330
if you need more precision then you can
0:02:14.819,0:02:20.160
switch to nine so much art the gradient
0:02:18.330,0:02:21.810
on the bottom of the chart is there only
0:02:20.160,0:02:25.110
so that you can be sure that your tones
0:02:21.810,0:02:26.730
are smooth and gradual to show you a
0:02:25.110,0:02:30.110
quick example I'm just going to make
0:02:26.730,0:02:30.110
some toner adjustments like this
0:02:34.510,0:02:38.500
next I'm will switch to red green and
0:02:36.519,0:02:41.409
blue channels to 10 T different tonal
0:02:38.500,0:02:43.090
areas like this by the way if you want
0:02:41.409,0:02:44.980
to learn more about this click on this
0:02:43.090,0:02:47.170
video here to learn about D tone chart
0:02:44.980,0:02:50.640
technique it's a great way to learn and
0:02:47.170,0:02:50.640
understand how to tone curve works
0:02:56.590,0:03:00.340
okay so I'm done and next we're going to
0:02:58.930,0:03:03.670
move to a hue saturation adjustment
0:03:00.340,0:03:05.830
layer now with this adjustment you can
0:03:03.670,0:03:07.300
use the target adjustment tool here if I
0:03:05.830,0:03:10.660
actually find that it's easier and more
0:03:07.300,0:03:13.629
precisely just use these sliders there
0:03:10.660,0:03:15.340
are four rows in the chart basically
0:03:13.629,0:03:17.920
when you're adjusting the hue look at
0:03:15.340,0:03:19.900
the huge chart here when you're
0:03:17.920,0:03:22.239
adjusting the saturation look at the
0:03:19.900,0:03:24.879
saturation chart same thing with the
0:03:22.239,0:03:26.739
lightness this chart lets you see
0:03:24.879,0:03:29.709
exactly what color adjustments you're
0:03:26.739,0:03:31.360
making the rainbow gradient up here is
0:03:29.709,0:03:35.500
to ensure that your results are smooth
0:03:31.360,0:03:37.150
and gradual now when you're making color
0:03:35.500,0:03:39.130
adjustments such as shifting the hues
0:03:37.150,0:03:41.019
it's very hard to notice the difference
0:03:39.130,0:03:42.519
so that's why it's important to look at
0:03:41.019,0:03:45.579
the color chart while you're making the
0:03:42.519,0:03:47.410
adjustments when you're done you can
0:03:45.579,0:03:49.420
delete the two layers with the chart and
0:03:47.410,0:03:52.480
that's how you use the tone and color
0:03:49.420,0:03:54.129
chart and Photoshop by the way if you
0:03:52.480,0:03:56.500
want to export this as a color lookup
0:03:54.129,0:03:58.510
table or let to use another software
0:03:56.500,0:04:01.019
such as Adobe Premiere or adobe media
0:03:58.510,0:04:05.650
encoder you can just go to file export
0:04:01.019,0:04:07.299
color lookup tables let's are a great
0:04:05.650,0:04:09.850
way to get the same consistent look and
0:04:07.299,0:04:12.810
other software if they support it it's
0:04:09.850,0:04:15.760
not supported in Lightroom right away
0:04:12.810,0:04:17.620
two ND tutorial here are some examples
0:04:15.760,0:04:20.010
of color grading effects may with this
0:04:17.620,0:04:20.010
technique
0:04:56.050,0:05:00.610
hey guys thanks for watching this video
0:04:58.270,0:05:03.039
I apologize for rushing through it and
0:05:00.610,0:05:04.900
not going into too much detail by Nate
0:05:03.039,0:05:06.400
get this video done and uploading before
0:05:04.900,0:05:08.530
I sleep because i have really slow
0:05:06.400,0:05:11.530
internet so it probably takes about 3-4
0:05:08.530,0:05:13.389
hours for it to upload anyways if you
0:05:11.530,0:05:15.069
want to learn more about this chart then
0:05:13.389,0:05:17.349
check out my video on how to use this
0:05:15.069,0:05:19.150
chart in Lightroom it's pretty much the
0:05:17.349,0:05:22.449
same thing by going to more detail and
0:05:19.150,0:05:24.970
as an example I use one of my favorite
0:05:22.449,0:05:26.830
photographers Musashi wack weave he
0:05:24.970,0:05:29.409
takes amazing photos and his post
0:05:26.830,0:05:31.210
processing style is very unique so in
0:05:29.409,0:05:33.520
that video i show you how i replicated
0:05:31.210,0:05:35.949
one of his looks not exactly the same
0:05:33.520,0:05:38.620
thing but very similar to it using the
0:05:35.949,0:05:40.389
same chart it's a great way to learn
0:05:38.620,0:05:42.610
more about color grading and how do you
0:05:40.389,0:05:44.259
put other people's effects so if you're
0:05:42.610,0:05:47.830
interesting that then click on the video
0:05:44.259,0:05:50.380
on be right to watch it anyways it is
0:05:47.830,0:05:51.700
420 am right now
0:05:50.380,0:05:53.620
sleep I hope you guys have an awesome
0:05:51.700,0:05:55.720
day let me know what you think any
0:05:53.620,0:05:57.250
comments and if you subscribe to my
0:05:55.720,0:06:00.090
channel thank you so much I really
0:05:57.250,0:06:00.090
appreciate it
standard: en
0:00:02.240,0:00:04.000
Hello and welcome to this episode of
0:00:04.010,0:00:04.020
0:00:04.020,0:00:06.470
Denny's tips. Color grading your photos
0:00:06.470,0:00:06.480
0:00:06.480,0:00:08.509
in photoshop using the curves and hue
0:00:08.509,0:00:08.519
0:00:08.519,0:00:10.940
saturation adjustment is doable but
0:00:10.940,0:00:10.950
0:00:10.950,0:00:12.259
sometimes it's hard to see what's
0:00:12.259,0:00:12.269
0:00:12.269,0:00:14.299
happening. So, I made for you this
0:00:14.299,0:00:14.309
0:00:14.309,0:00:15.980
reference chart that you can import into
0:00:15.980,0:00:15.990
0:00:15.990,0:00:17.870
your photos and it will let you see
0:00:17.870,0:00:17.880
0:00:17.880,0:00:20.029
exactly how your adjustment layers are
0:00:20.029,0:00:20.039
0:00:20.039,0:00:21.710
affecting the tones and colors in your
0:00:21.710,0:00:21.720
0:00:21.720,0:00:24.769
photo. The reference charts are intended for
0:00:24.769,0:00:24.779
0:00:24.779,0:00:26.599
people who already have some experience
0:00:26.599,0:00:26.609
0:00:26.609,0:00:28.910
colorgrading their photos and it's not
0:00:28.910,0:00:28.920
0:00:28.920,0:00:30.919
really made for beginners, so I'm not
0:00:30.919,0:00:30.929
0:00:30.929,0:00:32.510
going to be going into too much detail
0:00:32.510,0:00:32.520
0:00:32.520,0:00:34.880
about how to use the tone curves, how to use
0:00:34.880,0:00:34.890
0:00:34.890,0:00:37.520
the hue saturation adjustments. But, if this
0:00:37.520,0:00:37.530
0:00:37.530,0:00:39.340
is something that might interest you then keep
0:00:39.350,0:00:39.360
0:00:39.360,0:00:48.470
watching and we'll see how it works.
0:00:48.470,0:00:48.480
0:00:48.480,0:00:50.870
After downloading, you'll find 3 image files.
0:00:50.870,0:00:50.880
0:00:50.880,0:00:53.150
Start by dragging and dropping the two
0:00:53.150,0:00:53.160
0:00:53.160,0:00:55.160
photoshop reference chart images into
0:00:55.160,0:00:55.170
0:00:55.170,0:00:57.680
your document. You can scale it to any
0:00:57.680,0:00:57.690
0:00:57.690,0:00:59.689
size you like and then press Enter when
0:00:59.689,0:00:59.699
0:00:59.699,0:01:02.270
you're done. Make sure that the top
0:01:02.270,0:01:02.280
0:01:02.280,0:01:04.070
reference chart is position as your top
0:01:04.070,0:01:04.080
0:01:04.080,0:01:06.230
layer. You can then place your adjustment
0:01:06.230,0:01:06.240
0:01:06.240,0:01:07.999
layers in between the two reference
0:01:07.999,0:01:08.009
0:01:08.009,0:01:10.340
chart layers. For most color grading
0:01:10.340,0:01:10.350
0:01:10.350,0:01:12.560
effects, you really only need two layers
0:01:12.560,0:01:12.570
0:01:12.570,0:01:14.420
are curves and hue saturation adjustment
0:01:14.420,0:01:14.430
0:01:14.430,0:01:17.240
layer. You can add these layers by the
0:01:17.240,0:01:17.250
0:01:17.250,0:01:19.490
way from the adjustments panel, if you
0:01:19.490,0:01:19.500
0:01:19.500,0:01:20.930
don't see this, you can find it by going
0:01:20.930,0:01:20.940
0:01:20.940,0:01:24.109
to "Window" -> "Adjustments" click on this
0:01:24.109,0:01:24.119
0:01:24.119,0:01:25.700
button here to add the hue/saturation
0:01:25.700,0:01:25.710
0:01:25.710,0:01:28.700
adjustment layer and then click on this
0:01:28.700,0:01:28.710
0:01:28.710,0:01:30.469
one to add the curves adjustment layer.
0:01:30.469,0:01:30.479
0:01:30.479,0:01:33.800
So, here's how it works
0:01:33.800,0:01:33.810
0:01:33.810,0:01:35.990
the upper tone chart here is for your
0:01:35.990,0:01:36.000
0:01:36.000,0:01:38.660
curves adjustment layer, the bottom chart
0:01:38.660,0:01:38.670
0:01:38.670,0:01:39.980
here is for your hue and saturation
0:01:39.980,0:01:39.990
0:01:39.990,0:01:43.580
adjustment layer. Start with the tone
0:01:43.580,0:01:43.590
0:01:43.590,0:01:46.340
curves, in the "Properties" panel click on
0:01:46.340,0:01:46.350
0:01:46.350,0:01:50.300
targeted adjustment tool here, this
0:01:50.300,0:01:50.310
0:01:50.310,0:01:51.740
tool lets you click anywhere in your
0:01:51.740,0:01:51.750
0:01:51.750,0:01:53.719
image to add a point under the tone curve
0:01:53.719,0:01:53.729
0:01:53.729,0:01:55.699
but instead of clicking on your image
0:01:55.699,0:01:55.709
0:01:55.709,0:01:57.469
you'll be clicking on the chart and
0:01:57.469,0:01:57.479
0:01:57.479,0:02:00.469
dragging up or down to adjust it. For
0:02:00.469,0:02:00.479
0:02:00.479,0:02:02.330
example, if you want to lift the blacks
0:02:02.330,0:02:02.340
0:02:02.340,0:02:04.339
just drag upwards on the black part of
0:02:04.339,0:02:04.349
0:02:04.349,0:02:06.710
this chart. You want to start with the
0:02:06.710,0:02:06.720
0:02:06.720,0:02:08.690
five zone chart which will give you the
0:02:08.690,0:02:08.700
0:02:08.700,0:02:11.150
black shadows, mid-tones, highlights and
0:02:11.150,0:02:11.160
0:02:11.160,0:02:14.570
whites. If you need more precision then
0:02:14.570,0:02:14.580
0:02:14.580,0:02:17.460
you can switch to the 9 zone chart
0:02:17.460,0:02:17.470
0:02:17.470,0:02:19.710
the gradient on the bottom of the chart is
0:02:19.710,0:02:19.720
0:02:19.720,0:02:21.270
there only so that you can be sure that
0:02:21.270,0:02:21.280
0:02:21.280,0:02:24.780
your tones are smooth and gradual. To
0:02:24.780,0:02:24.790
0:02:24.790,0:02:26.700
show you a quick example, I'm just gonna make
0:02:26.700,0:02:26.710
0:02:26.710,0:02:34.710
some tone adjustments like this.
0:02:34.710,0:02:34.720
0:02:34.720,0:02:36.570
Next, I'm gonna switch to the red, green and
0:02:36.570,0:02:36.580
0:02:36.580,0:02:38.490
blue channels to tint the different tonal
0:02:38.490,0:02:38.500
0:02:38.500,0:02:41.340
areas like this. By the way, if you want
0:02:41.340,0:02:41.350
0:02:41.350,0:02:43.020
to learn more about this click on this
0:02:43.020,0:02:43.030
0:02:43.030,0:02:44.940
video here to learn about the tone chart
0:02:44.940,0:02:44.950
0:02:44.950,0:02:47.160
technique. It's a great way to learn and
0:02:47.160,0:02:47.170
0:02:47.170,0:02:56.770
understand how the tone curve works.
0:02:56.770,0:02:56.780
0:02:56.780,0:02:58.960
Ok, so I'm done and next we're gonna move
0:02:58.960,0:02:58.970
0:02:58.970,0:03:02.410
to hue/saturation adjustment layer. Now
0:03:02.410,0:03:02.420
0:03:02.420,0:03:03.880
with this adjustment, you can use the
0:03:03.880,0:03:03.890
0:03:03.890,0:03:06.010
target adjustment tool here. I actually
0:03:06.010,0:03:06.020
0:03:06.020,0:03:07.870
find that it's easier and more precise to
0:03:07.870,0:03:07.880
0:03:07.880,0:03:10.990
just use the sliders. There are four
0:03:10.990,0:03:11.000
0:03:11.000,0:03:13.930
rows in the chart; basically when you're
0:03:13.930,0:03:13.940
0:03:13.940,0:03:15.910
adjusting the hue, look at the "Hue" chart
0:03:15.910,0:03:15.920
0:03:15.920,0:03:18.400
here. When you're adjusting the
0:03:18.400,0:03:18.410
0:03:18.410,0:03:20.830
"Saturation", look at the "Saturation" chart
0:03:20.830,0:03:20.840
0:03:20.840,0:03:24.340
same thing with the "Lightness". This chart
0:03:24.340,0:03:24.350
0:03:24.350,0:03:25.960
lets you see exactly what color
0:03:25.960,0:03:25.970
0:03:25.970,0:03:28.660
adjustments you're making. The rainbow
0:03:28.660,0:03:28.670
0:03:28.670,0:03:30.910
grading appear as to ensure your results
0:03:30.910,0:03:30.920
0:03:30.920,0:03:34.990
are smooth and gradual. Now when you're
0:03:34.990,0:03:35.000
0:03:35.000,0:03:36.370
making color adjustments such as
0:03:36.370,0:03:36.380
0:03:36.380,0:03:38.470
shifting the hues, it's very hard to notice
0:03:38.470,0:03:38.480
0:03:38.480,0:03:40.120
the difference. So, that's why it's
0:03:40.120,0:03:40.130
0:03:40.130,0:03:41.680
important to look at the color chart
0:03:41.680,0:03:41.690
0:03:41.690,0:03:44.890
while you're making the adjustments. When
0:03:44.890,0:03:44.900
0:03:44.900,0:03:46.509
you're done you can delete the two layers
0:03:46.509,0:03:46.519
0:03:46.519,0:03:48.699
with the chart. And that's how you use
0:03:48.699,0:03:48.709
0:03:48.709,0:03:51.400
the tone and color chart in Photoshop. By
0:03:51.400,0:03:51.410
0:03:51.410,0:03:53.470
the way, if you want to export this as a
0:03:53.470,0:03:53.480
0:03:53.480,0:03:55.840
color lookup table or like to use
0:03:55.840,0:03:55.850
0:03:55.850,0:03:57.790
another software such as Adobe Premiere
0:03:57.790,0:03:57.800
0:03:57.800,0:03:59.860
or Adobe Media Encoder, you can just go
0:03:59.860,0:03:59.870
0:03:59.870,0:04:03.220
to "File" -> "Export" -> "Color Lookup Tables"
0:04:03.220,0:04:03.230
0:04:03.230,0:04:06.400
Let's are a great way to get the same
0:04:06.400,0:04:06.410
0:04:06.410,0:04:08.319
consistent look and other software if
0:04:08.319,0:04:08.329
0:04:08.329,0:04:09.370
they support it.
0:04:09.370,0:04:09.380
0:04:09.380,0:04:11.350
It's not supported in lightroom by the way,
0:04:11.350,0:04:11.360
0:04:11.360,0:04:15.699
to end the tutorial, here are some examples
0:04:15.699,0:04:15.709
0:04:15.709,0:04:17.529
of color grading affects made with this
0:04:17.529,0:04:17.539
0:04:17.539,0:04:56.260
technique.
0:04:56.260,0:04:56.270
0:04:56.270,0:04:58.210
Hey guys! Thanks for watching this video,
0:04:58.210,0:04:58.220
0:04:58.220,0:05:00.670
I apologize for rushing through it and
0:05:00.670,0:05:00.680
0:05:00.680,0:05:02.950
not going into too much detail. To
0:05:02.950,0:05:02.960
0:05:02.960,0:05:04.840
get this video done and uploading before
0:05:04.840,0:05:04.850
0:05:04.850,0:05:06.400
I sleep because I have really slow
0:05:06.400,0:05:06.410
0:05:06.410,0:05:08.470
internet so it probably takes about 3-4
0:05:08.470,0:05:08.480
0:05:08.480,0:05:11.470
hours for it to upload. Anyways if you
0:05:11.470,0:05:11.480
0:05:11.480,0:05:13.390
want to learn more about this chart then
0:05:13.390,0:05:13.400
0:05:13.400,0:05:15.010
check out my video on "How to use this
0:05:15.010,0:05:15.020
0:05:15.020,0:05:17.290
chart in Lightroom", it's pretty much the
0:05:17.290,0:05:17.300
0:05:17.300,0:05:19.660
same thing by I'm going into more detail and
0:05:19.660,0:05:19.670
0:05:19.670,0:05:22.450
as an example I use one of my favorite
0:05:22.450,0:05:22.460
0:05:22.460,0:05:24.730
photographers - Masashi Wakui
0:05:24.730,0:05:24.740
0:05:24.740,0:05:26.860
he takes amazing photos and his post
0:05:26.860,0:05:26.870
0:05:26.870,0:05:29.410
processing style is very unique. So, in
0:05:29.410,0:05:29.420
0:05:29.420,0:05:31.210
that video I show you how I replicated
0:05:31.210,0:05:31.220
0:05:31.220,0:05:33.490
one of his looks, not exactly the same
0:05:33.490,0:05:33.500
0:05:33.500,0:05:35.800
thing but very similar to it using the
0:05:35.800,0:05:35.810
0:05:35.810,0:05:38.590
same chart. It's a great way to learn
0:05:38.590,0:05:38.600
0:05:38.600,0:05:40.930
more about color grading and how to decode other
0:05:40.930,0:05:40.940
0:05:40.940,0:05:42.670
people's effects so if you're interested
0:05:42.670,0:05:42.680
0:05:42.680,0:05:44.500
in that, then click on the video on the
0:05:44.500,0:05:44.510
0:05:44.510,0:05:47.719
right to watch it. Anyways,
0:05:47.719,0:05:47.729
0:05:47.729,0:05:50.570
it's 4:20 am right now so I'm going to sleep.
0:05:50.570,0:05:50.580
0:05:50.580,0:05:51.589
I hope you guys have an awesome
0:05:51.589,0:05:51.599
0:05:51.599,0:05:53.600
day let me know what you think, any
0:05:53.600,0:05:53.610
0:05:53.610,0:05:55.670
comments and if you subscribe to my
0:05:55.670,0:05:55.680
0:05:55.680,0:05:57.260
channel, thank you so much I really
0:05:57.260,0:05:57.270
0:05:57.270,0:06:03.169
appreciate it.
Screenshots
Profiles
Profile 1
| Purpose | Tutorial (why) |
|---|---|
| Content | |
| Participants | nameless (f) model, nameless (m) model, Photoshop (m) geek, Audience |
| Form | Tutorial (how) |
| Time | |
| Place |
Profile 2
| Purpose | Tutorial |
|---|---|
| Content | Scene |
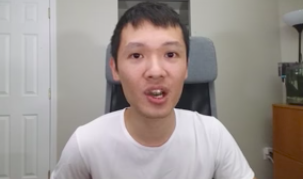
| Participants | Photoshop (m) geek |
| Form | Tutorial (how), Mid shot |
| Time | Real time |
| Place | Desktop |