Architectural Exterior Rendering PHOTOSHOP BREAKDOWN
Figuration: Tutorial
Description
➫Subscribe: http://bit.ly/2ddAwd2
Closed Captions Available
❐ TIMESTAMPS ❏
------------------------------------------
00:26 - 01. Import Render Files
01:06 - 02. Adding The Background
02:13 - 03. Texturing The Ground Plane
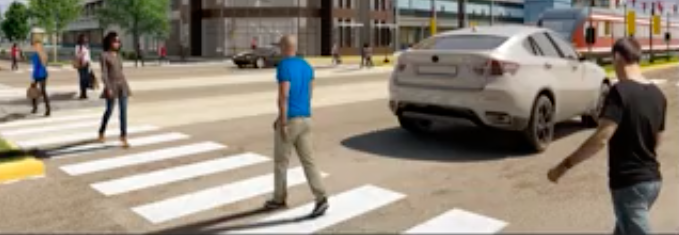
02:28 - 04. Populating Your Image with Entourage
02:59 - 05. Photoshop Effects
03:14 - 06. Final Edits using Plugins
❐ LINKS ❏
------------------------------------------
6 Tips for a Perfect Sky
• https://visualizingarchitecture.com/6-tips-for-a-perfect-sky/
Google Nik Collection
• https://www.google.com/nikcollection/
Photoshop Layer Management
• https://visualizingarchitecture.com/photoshop-layer-management/
❐ GET CONNECTED❏
------------------------------------------
➫ Website: http://www.archinspirations.com/
➫ Facebook: https://www.facebook.com/ArchInspirations/
➫ Instagram: https://www.instagram.com/architecture_inspirations/
➫ Twitter: https://twitter.com/arch_inspire
➫ Linkedin: https://www.linkedin.com/in/thegentleminh
❐ LAPTOP SPECS❏
------------------------------------------
LAPTOP: Asus GL502 GTX 1060, 16GB DDR4, 1B 7200 RPM HDD, Intel Core i7 6700HQ
➫ https://goo.gl/K8MrWV
SOLID STATE DRIVE:
Samsung 950 PRO Series - 256GB PCIe NVMe - M.2 Internal SSD (MZ-V5P256BW)
➫ https://goo.gl/twxMfQ
❐ DESKTOP SPECS❏
------------------------------------------
PROCESSOR:
Intel Core i7-4790K Processor
➫ https://goo.gl/fKFXYJ
MOTHER BOARD
Asus Motherboard Z97-PRO GAMER
➫ https://goo.gl/LqlQvO
GRAPHICS:
2 of Zotac Video Card GTX 970 ZT-90101-10P
➫ https://goo.gl/TU7hNC
RAM:
G.SKILL Ares Series 32GB (4 x 8GB)
➫ https://goo.gl/g2Wo5D
COOLER:
Corsair Hydro Series Extreme Performance Liquid CPU Cooler H100i
➫ https://goo.gl/y1PjxM
STORAGE:
Seagate Desktop 2TB 3.5-Inch HDD
➫ https://goo.gl/LJjVwm
Samsung 850 EVO 250GB 2.5-Inch SATA III Internal SSD
➫ https://goo.gl/IjnlNs
POWER:
EVGA SuperNOVA 750 G1 Power Supply
➫ https://goo.gl/ipu1bw
❐ MUSIC ❏
------------------------------------------
Background:
Tobu - Life [NCS Release]
• http://bit.ly/U93EJN
Tobu
• http://www.soundcloud.com/7obu
Outro:
Krys Talk - Fly Away (Ray Volpe Remix)
• http://bit.ly/2eZK2Tm
Krys Talk
• https://soundcloud.com/krystalkmusic
Ray Volpe
• http://www.soundcloud.com/rayvolpemusic
DISCLAIMER: This video and description contains affiliate links, which means that if you click on one of the product links, I’ll receive a small commission. This helps support the channel and allows us to continue to make videos like this. Thank you for the support!
Metadata
| Video ID | 261 | Youtube URL | Architectural Exterior Rendering PHOTOSHOP BREAKDOWN |
|---|---|
| Captions Available | Yes |
| Captions Downloadable | Yes |
| Playlists | |
| Duration | 00:04:24 |
| Definition | hd |
| Keywords | |
| License | youtube |
| Embeddable | Yes |
| Views | 7715 |
| Likes | 179 |
| Dislikes | 1 |
| Favourites | 0 |
| Comments | 36 |
| Created | 2017-05-04 1:00:44 PM |
| Updated | 2017-05-04 1:13:07 PM |
Captions
ASR: en
0:00:00.000,0:00:03.810
you know what is happening ladies and
0:00:01.530,0:00:05.790
gentlemen this is men from architecture
0:00:03.810,0:00:06.660
inspirations and the previous videos in
0:00:05.790,0:00:08.220
this series
0:00:06.660,0:00:10.500
you've seen me transferring a rabbit
0:00:08.220,0:00:13.710
model to sketchup then apply materials
0:00:10.500,0:00:15.630
and finally render it with vray today
0:00:13.710,0:00:18.000
I'm going to show you a breakdown of my
0:00:15.630,0:00:21.410
post production process in Photoshop
0:00:18.000,0:00:21.410
let's get started
0:00:24.560,0:00:30.029
number one import render files
0:00:28.170,0:00:32.279
the first thing I do is open photoshop
0:00:30.029,0:00:34.829
and import my files that I've saved
0:00:32.279,0:00:37.380
after the rendering this include the vp
0:00:34.829,0:00:40.590
channels and most importantly the render
0:00:37.380,0:00:42.059
that were used as the base image the vfp
0:00:40.590,0:00:44.280
channels can be anything that you've
0:00:42.059,0:00:46.289
chosen to export prior to your rendering
0:00:44.280,0:00:48.809
the most useful one for me is the
0:00:46.289,0:00:49.920
material ID which I have mentioned in
0:00:48.809,0:00:51.809
the last video
0:00:49.920,0:00:54.480
sometimes I also like to explore other
0:00:51.809,0:00:56.640
channels like the z-depth reflection and
0:00:54.480,0:00:58.949
refraction channels after importing the
0:00:56.640,0:01:01.230
render files as different layers only
0:00:58.949,0:01:03.629
leave the base image on and turn all of
0:01:01.230,0:01:04.949
the other vp channels off and save them
0:01:03.629,0:01:07.590
for later
0:01:04.949,0:01:09.570
number two adding the background there
0:01:07.590,0:01:12.210
are essentially two parts that make up
0:01:09.570,0:01:13.830
the background first is the sky and
0:01:12.210,0:01:16.770
second is the surrounding buildings
0:01:13.830,0:01:19.049
adding a sky to your rendering is one of
0:01:16.770,0:01:21.210
the easiest thing to do in Photoshop but
0:01:19.049,0:01:23.580
advise you not to overlook this part
0:01:21.210,0:01:25.320
because the sky really sets the mood for
0:01:23.580,0:01:27.450
the whole image if you want to know some
0:01:25.320,0:01:28.110
tips on choosing a perfect sky for your
0:01:27.450,0:01:30.299
image
0:01:28.110,0:01:31.890
Alex her craft wrote an amazing post on
0:01:30.299,0:01:33.420
his topic i'll put the link in the
0:01:31.890,0:01:35.340
description box below so you can learn
0:01:33.420,0:01:36.960
it from the master himself the second
0:01:35.340,0:01:39.030
part of the background is the
0:01:36.960,0:01:40.860
surrounding buildings which is just as
0:01:39.030,0:01:42.960
important because this will show the
0:01:40.860,0:01:45.930
context of the site without it the
0:01:42.960,0:01:48.780
viewer question well for the foxes place
0:01:45.930,0:01:52.170
is it on an island or is it is floating
0:01:48.780,0:01:54.600
in space adding background buildings is
0:01:52.170,0:01:56.939
necessary if you have empty spaces in
0:01:54.600,0:01:58.320
your rendering like I do in this one I
0:01:56.939,0:02:00.180
think model anything there because
0:01:58.320,0:02:02.189
sometimes it's just easier to add
0:02:00.180,0:02:03.930
surrounding buildings later in Photoshop
0:02:02.189,0:02:05.640
i usually don't spend a ton of town on
0:02:03.930,0:02:07.799
this it doesn't need to be perfect
0:02:05.640,0:02:09.869
because it's such a small part of the
0:02:07.799,0:02:12.360
image that most people don't even notice
0:02:09.869,0:02:13.319
the flaws number three texturing the
0:02:12.360,0:02:15.209
ground plane
0:02:13.319,0:02:18.450
the ground plan consists of well
0:02:15.209,0:02:20.519
anything that's on the ground like the
0:02:18.450,0:02:22.620
grass or additional texture that makes
0:02:20.519,0:02:24.989
your rendering looks more realistic such
0:02:22.620,0:02:26.879
as these textures that overlay on top of
0:02:24.989,0:02:28.920
the roads and curves number for
0:02:26.879,0:02:31.530
populating your image with entourage
0:02:28.920,0:02:33.629
adding trees cars and people to your
0:02:31.530,0:02:35.489
image is really important because it
0:02:33.629,0:02:36.359
really make the scenery more lively and
0:02:35.489,0:02:37.500
exciting
0:02:36.359,0:02:39.599
there are two ways to add these
0:02:37.500,0:02:41.250
ontological your rendering one is by
0:02:39.599,0:02:44.249
using 3d components of them in your
0:02:41.250,0:02:46.739
model and render it all together to its
0:02:44.249,0:02:48.870
to UT cutouts later in photoshop you can
0:02:46.739,0:02:50.669
always use a combination of both like
0:02:48.870,0:02:53.370
for this rendering here i found that
0:02:50.669,0:02:55.500
using three models of the cars and 2d
0:02:53.370,0:02:56.430
cutouts of the people and trees work
0:02:55.500,0:02:59.129
best for me
0:02:56.430,0:03:01.319
number five using Photoshop effects to
0:02:59.129,0:03:03.359
enhance your image now that you've got
0:03:01.319,0:03:05.099
the hard stuff out of the way it's not
0:03:03.359,0:03:07.650
to have some fun and add some sweet
0:03:05.099,0:03:11.669
effects of your image like fault have to
0:03:07.650,0:03:12.900
feel no ship motion blur blur fake lens
0:03:11.669,0:03:14.519
flare you name it
0:03:12.900,0:03:18.329
just add whatever feels right for you
0:03:14.519,0:03:20.340
number 6 final edits using plugins now
0:03:18.329,0:03:21.419
that your images complete finish it off
0:03:20.340,0:03:23.280
using plugins
0:03:21.419,0:03:25.500
google has an amazing plugin for
0:03:23.280,0:03:27.720
photoshop called google nik collection
0:03:25.500,0:03:30.389
used to cost money but now is completely
0:03:27.720,0:03:32.639
free so grab it while you can and use it
0:03:30.389,0:03:33.900
to make your rendering look awesome i'll
0:03:32.639,0:03:35.150
leave the link in the description box
0:03:33.900,0:03:38.069
below so you can try it out yourself
0:03:35.150,0:03:40.560
also leave a link of this article by
0:03:38.069,0:03:42.750
Alex in which he gives some amazing tips
0:03:40.560,0:03:44.729
on managing your layers in photoshop
0:03:42.750,0:03:46.500
this video was actually inspired by that
0:03:44.729,0:03:48.449
article so I got to give you tons of
0:03:46.500,0:03:50.129
credit for that and that's all I have
0:03:48.449,0:03:52.199
for today but that's not all i have to
0:03:50.129,0:03:53.909
say about this topic you know everything
0:03:52.199,0:03:55.919
that we just went through and create a
0:03:53.909,0:03:58.560
step-by-step tutorial for each of these
0:03:55.919,0:03:59.909
processes in the upcoming weeks so smash
0:03:58.560,0:04:02.310
that subscribe button if you want to see
0:03:59.909,0:04:05.239
more stay inspired guys and I will see
0:04:02.310,0:04:05.239
you next time
0:04:11.299,0:04:14.299
ok
standard: en
0:00:00.000,0:00:04.580
What is happening ladies and gentlemen, this is Minh from Architecture Inspirations.
0:00:04.580,0:00:09.160
In the previous videos of this series, you've seen me transferring a Revit model to Sketchup,
0:00:09.380,0:00:12.980
then apply materials and finally render it with Vray.
0:00:12.980,0:00:18.040
Today I'm gonna show you a breakdown of my post-production process in Photoshop.
0:00:18.320,0:00:19.600
Let's get started.
0:00:28.260,0:00:33.460
The first thing I do is open Photoshop and import my files that I've saved after the rendering.
0:00:33.460,0:00:39.480
This include the VFB Channels and most importantly the Raw render that I use as the base image.
0:00:39.480,0:00:44.560
The VFB channels can be anything that you've chosen to export prior to your rendering.
0:00:44.560,0:00:49.560
The most useful one for me is the Material ID which I've mentioned in the last video.
0:00:49.560,0:00:52.440
Sometimes I'd also like to export other channels
0:00:52.440,0:00:55.820
like the Z-depth, Reflection, and Refraction channels
0:00:55.820,0:00:58.720
After importing the render files as different layers,
0:00:58.720,0:01:00.420
I only leave the base image on
0:01:00.420,0:01:04.260
and turn all of the other VFB channels off and save them for later.
0:01:07.400,0:01:10.380
There are essentially two parts that make up background,
0:01:10.380,0:01:14.300
first is the sky, and second is the surrounding buildings.
0:01:14.300,0:01:18.660
Adding a sky to your rendering is one of the easiest thing to do in Photoshop,
0:01:18.660,0:01:24.440
but I advise you not to overlook this part because the sky really sets the mood for the whole image.
0:01:24.440,0:01:27.820
If you want to know some tips on choosing a perfect sky for your image,
0:01:27.820,0:01:30.700
Alex Hogrefe wrote an amazing post on this topic.
0:01:30.700,0:01:34.800
I'll put the link in the description box below so you can learn it from the master himself.
0:01:34.800,0:01:38.160
The second part of the background is the surrounding buildings,
0:01:38.160,0:01:41.980
which is just as important because this will show the context of the site.
0:01:41.980,0:01:44.100
Without it the viewer will question:
0:01:44.100,0:01:46.100
where the f*** does this take place?
0:01:46.560,0:01:47.600
is on an island?
0:01:47.680,0:01:49.760
or is it just floating in space?
0:01:49.760,0:01:56.620
Adding background buildings is necessary if you have empty spaces in your rendering like I do in this one.
0:01:56.620,0:02:02.200
I didn't model anything there because sometimes it's just easier to add surrounding buildings later in Photoshop
0:02:02.200,0:02:04.500
I usually don't spend a ton of time on this
0:02:04.500,0:02:06.180
it doesn't need to be perfect
0:02:06.180,0:02:10.620
because it's such a small part of the image that most people don't even notice the flaws.
0:02:12.560,0:02:16.800
The ground plane consists of well anything that's on the ground
0:02:16.800,0:02:22.220
Like the grass or additional texture that makes your rendering looks more realistic
0:02:22.220,0:02:26.040
such as these textures that I've overlay on top of the roads and curbs.
0:02:29.100,0:02:32.060
Adding trees, cars, and people to your image
0:02:32.060,0:02:36.300
is really important because it really make the scenery more lively and exciting.
0:02:36.300,0:02:39.020
There are two ways to add these entourage in your rendering,
0:02:39.020,0:02:43.480
One is by using 3D components of them in your model and render it altogether.
0:02:43.480,0:02:46.220
Two is to use 2D cutouts later in Photoshop.
0:02:46.220,0:02:48.320
You can always use a combination of both,
0:02:48.320,0:02:50.000
like for this rendering here,
0:02:50.040,0:02:56.280
I found that using 3D model of the cars and 2D cutouts of the people and trees worked best for me.
0:02:59.980,0:03:02.940
Now that you got the hard stuff out of the way,
0:03:02.940,0:03:06.280
It's time to have some fun and add some sweet effects to your image, like:
0:03:06.280,0:03:06.780
Fog
0:03:07.420,0:03:08.140
Depth of Field
0:03:08.520,0:03:09.240
Tilt shift
0:03:09.480,0:03:10.280
Motion Blur
0:03:10.760,0:03:11.320
Bloom effect
0:03:11.320,0:03:12.000
Lens Flare
0:03:12.000,0:03:12.640
You name it
0:03:12.900,0:03:14.800
just add whatever feels right for you.
0:03:17.240,0:03:21.320
Now that your image is complete, finish it off using plugins.
0:03:21.620,0:03:25.940
Google has a plugin for Photoshop called Google Nik Collection.
0:03:25.940,0:03:28.340
It used to cost money but is now completely free
0:03:28.340,0:03:32.340
so grab it while can and use it to make your rendering look f***ing awesome
0:03:32.340,0:03:35.560
I'll leave the link in the description box below so you can try it out yourself.
0:03:35.560,0:03:38.420
I'll also leave a link of this article by Alex,
0:03:38.420,0:03:42.880
in which he gives some amazing tips on managing your Layers in Photoshop.
0:03:42.880,0:03:47.380
This video was actually inspired by that article so I gotta give him tons of credits for that.
0:03:47.380,0:03:49.000
And that's all I have for today,
0:03:49.000,0:03:51.400
but that's not all that I have to say about this topic.
0:03:51.400,0:03:53.100
You know everything that we just went through,
0:03:53.100,0:03:58.000
I will create a more thorough step-by-step tutorial for each of these process in the upcoming weeks
0:03:58.000,0:04:00.460
so Smash that subscribe button if you want to see more.
0:04:00.460,0:04:02.520
Stay inspired guys, and I will see you,
0:04:02.680,0:04:03.600
next time.
Profiles
Profile 1
| Purpose | Tutorial (why) |
|---|---|
| Content | |
| Participants | |
| Form | Tutorial (how) |
| Time | |
| Place |
Profile 2
| Purpose | Tutorial |
|---|---|
| Content | Scene |
| Participants | Photoshop (m) geek |
| Form | Tutorial (how) |
| Time | Real time |
| Place | Desktop |
Profile 4
| Purpose | |
|---|---|
| Content | Scene |
| Participants | nameless (f) model, nameless (m) model, Photoshop (m) geek |
| Form | |
| Time | |
| Place |