Dilate the Pupils for Better Portraits
Figuration: Tutorial
Description
Does it look more appealing to you or is it not really that big of a deal. Let me know what you think by leaving a comment.
Links:
? Written Tutorial: https://dennystips.com/how-to-dilate-pupils-in-photoshop/
? Photoshop & Lightroom Products: https://sparklestock.com
? Photoshop Books: http://amzn.to/2fDsVtZ
Subscribe:
?https://youtube.com/dennystips?sub_confirmation=1
Follow Me:
? Website: https://dennystips.com/
? Instagram: https://instagram.com/dennystips/
? Facebook: http://facebook.com/dennystips
? Snapchat: dennystips
?Twitter: https://twitter.com/dennystips
?? Did you like/dislike this video? Please let me know in the comments below.
Metadata
| Video ID | 266 | Youtube URL | Dilate the Pupils for Better Portraits |
|---|---|
| Captions Available | Yes |
| Captions Downloadable | Yes |
| Playlists | |
| Duration | 00:09:35 |
| Definition | hd |
| Keywords | |
| License | youtube |
| Embeddable | Yes |
| Views | 1655 |
| Likes | 12 |
| Dislikes | 1 |
| Favourites | 0 |
| Comments | 3 |
| Created | 2017-05-04 1:00:44 PM |
| Updated | 2017-05-04 1:13:11 PM |
Captions
ASR: en
0:00:02.840,0:00:08.160
hello and welcome to this episode of
0:00:05.490,0:00:10.080
dennys tips today I want to teach you a
0:00:08.160,0:00:12.690
retouching technique that not a lot of
0:00:10.080,0:00:15.150
people pay attention to I'll be teaching
0:00:12.690,0:00:18.359
you how to enhance the eyes by enlarging
0:00:15.150,0:00:20.100
the kooples in Photoshop the pupil sites
0:00:18.359,0:00:22.650
can apparently make your subject more
0:00:20.100,0:00:24.810
appealing in some places like Corey and
0:00:22.650,0:00:26.519
Japan it's quite common to find people
0:00:24.810,0:00:29.220
buying fake contacts that make their
0:00:26.519,0:00:30.869
pupils look bigger there is also a study
0:00:29.220,0:00:32.940
done a long time ago where they showed
0:00:30.869,0:00:34.739
two sets of photos they both already
0:00:32.940,0:00:37.200
saying the stuff that one happy pupils
0:00:34.739,0:00:39.450
dilated people prefer to photo with the
0:00:37.200,0:00:42.540
dilated pupils and when they're asked
0:00:39.450,0:00:44.450
why they can't explain it there are a
0:00:42.540,0:00:46.860
lot of ways to retouch portraits
0:00:44.450,0:00:49.230
enlarging the pupils is just one of them
0:00:46.860,0:00:52.079
but sometimes the smallest part of your
0:00:49.230,0:00:53.699
photo will have the biggest impact so if
0:00:52.079,0:00:55.710
you're interested keep watching this
0:00:53.699,0:00:57.949
Photoshop tutorial and I'll show you how
0:00:55.710,0:00:57.949
it's done
0:01:04.010,0:01:08.820
for this tutorial you should be working
0:01:06.660,0:01:11.760
on a high-res photo where you can see me
0:01:08.820,0:01:13.440
details in the eyes so we're first going
0:01:11.760,0:01:15.540
to start by making a selection of the
0:01:13.440,0:01:18.300
pupil and then we're going to enlarge it
0:01:15.540,0:01:21.090
in the toolbar select the elliptical
0:01:18.300,0:01:23.520
marquee tool zoom in really close into
0:01:21.090,0:01:26.570
one I like this if you want to be able
0:01:23.520,0:01:29.550
to see all of the details while editing
0:01:26.570,0:01:31.710
to make a selection of the pupil drag
0:01:29.550,0:01:34.170
from the center of the pupil and if you
0:01:31.710,0:01:37.320
hold the alt or option key yo Drago from
0:01:34.170,0:01:38.910
the center like this then hold on to a
0:01:37.320,0:01:42.720
shift key which will give you a
0:01:38.910,0:01:44.729
perfectly round circle we have our
0:01:42.720,0:01:47.280
selection and to preview how it looks
0:01:44.729,0:01:48.690
let's fill it with white you can do it
0:01:47.280,0:01:50.310
quickly by pressing D on your keyboard
0:01:48.690,0:01:53.280
to reset the foreground and background
0:01:50.310,0:01:57.090
colors and then pressing ctrl or command
0:01:53.280,0:01:59.280
backspace to fill it with white the
0:01:57.090,0:02:01.890
edges look quite hard so let's undo the
0:01:59.280,0:02:04.200
fill by pressing ctrl or command Z then
0:02:01.890,0:02:06.990
press shift F 6 to bring up your feather
0:02:04.200,0:02:09.300
selection tool this lets you soften the
0:02:06.990,0:02:11.790
edges of your selection enter something
0:02:09.300,0:02:14.640
small sometimes even half a pixel is
0:02:11.790,0:02:17.610
good enough fill the selection again to
0:02:14.640,0:02:19.980
preview it and if it looks good we can
0:02:17.610,0:02:22.230
duplicate the layer before we begin
0:02:19.980,0:02:24.630
transforming it's a good idea to convert
0:02:22.230,0:02:26.370
the layer into a smart object so right
0:02:24.630,0:02:30.150
click on the layer then choose convert
0:02:26.370,0:02:32.820
to smart object press ctrl t or command
0:02:30.150,0:02:35.100
T on max to use the transform tool then
0:02:32.820,0:02:38.400
while holding alt and shift or option +
0:02:35.100,0:02:40.230
shift in largely pupils like this when
0:02:38.400,0:02:44.510
you're done press enter to apply the
0:02:40.230,0:02:46.769
transformation sumo and see how it looks
0:02:44.510,0:02:49.650
obviously mine looks way too big and
0:02:46.769,0:02:52.200
unnatural so I'm going to transform it
0:02:49.650,0:02:53.370
back down like this now usually when
0:02:52.200,0:02:55.320
you're transferring up and down with
0:02:53.370,0:02:58.019
this it's going to reduce the sharpness
0:02:55.320,0:03:00.000
but because this is a smart object you
0:02:58.019,0:03:01.950
can actually resize it as many times as
0:03:00.000,0:03:04.290
you like and you won't lose any image
0:03:01.950,0:03:05.880
quality and that's just one reason why
0:03:04.290,0:03:07.130
you should use Smart Objects whenever
0:03:05.880,0:03:09.590
you can
0:03:07.130,0:03:11.960
speaking of smart objects here's another
0:03:09.590,0:03:14.360
reason why you want to use it if we look
0:03:11.960,0:03:16.820
closely at the pupil it's blurry and the
0:03:14.360,0:03:18.860
noise detail became quite splotchy we
0:03:16.820,0:03:21.830
can fix this by adding some noise which
0:03:18.860,0:03:26.690
will artificially sharpen it to do this
0:03:21.830,0:03:28.790
go to filter noise add noise sumin set
0:03:26.690,0:03:32.270
you can see the details and then adjust
0:03:28.790,0:03:34.040
the noise like this do you want a noise
0:03:32.270,0:03:37.190
pattern that subtle and looks like
0:03:34.040,0:03:38.900
something natural out of your camera now
0:03:37.190,0:03:40.370
if your image is black and white you'll
0:03:38.900,0:03:42.530
want to check my dear monochromatic
0:03:40.370,0:03:45.080
option this basically just makes the
0:03:42.530,0:03:48.590
noise black and white otherwise just
0:03:45.080,0:03:50.270
click OK to apply to changes look in a
0:03:48.590,0:03:52.010
new layers panel you can see that
0:03:50.270,0:03:54.410
because we apply this filter on to a
0:03:52.010,0:03:57.260
smart object your filter became a smart
0:03:54.410,0:03:58.730
filter which is fully editable you can
0:03:57.260,0:04:00.790
double click back on your filter to
0:03:58.730,0:04:03.590
change these settings anytime you want
0:04:00.790,0:04:05.000
another feature of smart filters is that
0:04:03.590,0:04:06.980
you can double click here to bring up
0:04:05.000,0:04:09.260
the blending options and you can lower
0:04:06.980,0:04:12.290
the opacity from here so I'm going sent
0:04:09.260,0:04:14.150
mine to about fifty percent now the
0:04:12.290,0:04:16.430
noise that we add it has a very minimal
0:04:14.150,0:04:17.989
effectively overall image and when you
0:04:16.430,0:04:20.660
zoom out you probably won't even notice
0:04:17.989,0:04:21.920
the difference at all this is just a
0:04:20.660,0:04:23.990
technique that's catered towards
0:04:21.920,0:04:25.940
high-end retouches who care a lot about
0:04:23.990,0:04:27.740
image quality and maintaining the
0:04:25.940,0:04:31.190
consistent sharpness and noise level
0:04:27.740,0:04:33.290
throughout the entire photo anyways
0:04:31.190,0:04:34.850
right now d pupil looks fake it really
0:04:33.290,0:04:36.890
looks like someone just painted a dot
0:04:34.850,0:04:39.560
over it to make it look more realistic
0:04:36.890,0:04:41.840
we need to restore the reflections if
0:04:39.560,0:04:43.460
you look closely at the eyes here you'll
0:04:41.840,0:04:45.080
notice that your reflections and catch
0:04:43.460,0:04:48.800
light has been completely covered by our
0:04:45.080,0:04:50.600
fake pupil if we change a blinding go to
0:04:48.800,0:04:53.000
something like overlay you'll look
0:04:50.600,0:04:55.190
better but you also get this double poo
0:04:53.000,0:04:56.840
poo attract you can also see that the
0:04:55.190,0:04:59.390
reflection has a color that doesn't look
0:04:56.840,0:05:01.850
very real as well so we're not going to
0:04:59.390,0:05:03.800
use the overlay blending mode we're
0:05:01.850,0:05:07.310
going to mask it out with the blend if
0:05:03.800,0:05:10.310
settings right click on the layer then
0:05:07.310,0:05:12.850
choose blending options on the bottom
0:05:10.310,0:05:15.229
here you'll find the blend if settings
0:05:12.850,0:05:17.150
we're going to use the underlying layer
0:05:15.229,0:05:19.070
here and if we drag the white slider
0:05:17.150,0:05:21.320
towards the left you can see the
0:05:19.070,0:05:23.730
reflections coming back
0:05:21.320,0:05:26.250
right now the edges of the reflection
0:05:23.730,0:05:28.590
are quite hard so to soften it hold the
0:05:26.250,0:05:30.960
alt or option key then drag the white
0:05:28.590,0:05:33.870
slider towards the right the slider will
0:05:30.960,0:05:39.150
detach in half and you can fade out the
0:05:33.870,0:05:42.030
edges like this click OK to apply any
0:05:39.150,0:05:43.830
changes and we're done it looks much
0:05:42.030,0:05:47.100
more realistic once we restore your
0:05:43.830,0:05:48.630
reflections we're done with one eye now
0:05:47.100,0:05:50.160
it's time to work on the other eye I'm
0:05:48.630,0:05:52.440
going to go through this quickly because
0:05:50.160,0:05:53.700
you are in all these steps but along the
0:05:52.440,0:05:56.100
way you will learn some pretty useful
0:05:53.700,0:05:57.870
tips and tricks first I'm going to
0:05:56.100,0:06:00.480
select a background layer and make a
0:05:57.870,0:06:02.370
selection out of the pupil apply the
0:06:00.480,0:06:04.919
same feather setting by pressing shift
0:06:02.370,0:06:06.660
f6 the previous setting that we use
0:06:04.919,0:06:09.900
should still be here so we can just
0:06:06.660,0:06:12.450
click OK press ctrl or command J to
0:06:09.900,0:06:14.130
duplicate the layer convert it to a
0:06:12.450,0:06:15.990
smart object by right clicking on the
0:06:14.130,0:06:19.410
new layer and selecting convert to smart
0:06:15.990,0:06:22.020
object press ctrl or command key for the
0:06:19.410,0:06:27.150
transform tool resize it to about the
0:06:22.020,0:06:29.400
same size as the other pupil if d pupil
0:06:27.150,0:06:30.840
is extending past the eyelid you can fix
0:06:29.400,0:06:33.450
it by clicking on the add layer mask
0:06:30.840,0:06:35.669
button in the layers panel select the
0:06:33.450,0:06:37.080
eraser tool and if your foreground and
0:06:35.669,0:06:38.729
background colors are deep default black
0:06:37.080,0:06:41.220
and white it should paint your layer
0:06:38.729,0:06:43.140
with black now if you like to paint your
0:06:41.220,0:06:45.120
layer mask with the brush tool you'll
0:06:43.140,0:06:47.419
need to swap the colors by pressing X so
0:06:45.120,0:06:50.370
that black is your foreground color
0:06:47.419,0:06:52.590
anyways I want to erase very carefully
0:06:50.370,0:06:54.510
around here my brush hardness is set to
0:06:52.590,0:06:57.450
a hundred percent so that the edges look
0:06:54.510,0:06:58.919
hard and to soften it go to a properties
0:06:57.450,0:07:01.410
panel and then adjust the feather
0:06:58.919,0:07:03.570
setting compared to send you a feather
0:07:01.410,0:07:05.130
in your brush settings it's not that big
0:07:03.570,0:07:06.840
of a deal it's just good practice
0:07:05.130,0:07:10.039
because it's always easier to blur
0:07:06.840,0:07:12.210
something than it is to sharpen it back
0:07:10.039,0:07:14.190
next we're going to restore the noise
0:07:12.210,0:07:16.020
but first make sure that you've selected
0:07:14.190,0:07:18.180
back d layer by clicking on the layer
0:07:16.020,0:07:19.590
thumbnail otherwise if you have to lay
0:07:18.180,0:07:21.270
your math select it we're going to be
0:07:19.590,0:07:22.530
adding noise or layer mask and it looks
0:07:21.270,0:07:26.620
like you're doing nothing
0:07:22.530,0:07:28.419
go to filter noise add noise your
0:07:26.620,0:07:31.629
previous sudden should still be here so
0:07:28.419,0:07:33.940
just press ok in the layers panel double
0:07:31.629,0:07:36.849
click on this icon here to bring up the
0:07:33.940,0:07:38.970
blending options use the same opacity
0:07:36.849,0:07:42.120
setting that you use in the other pupil
0:07:38.970,0:07:44.050
for mine it was fifty percent and
0:07:42.120,0:07:46.240
finally we're going to restore your
0:07:44.050,0:07:48.280
reflections you can just copy and paste
0:07:46.240,0:07:50.379
a layer cell by right clicking on the
0:07:48.280,0:07:53.680
other layer and selecting copy layer
0:07:50.379,0:07:57.250
style right click back on the previous
0:07:53.680,0:08:00.460
layer then choose paste layer style the
0:07:57.250,0:08:02.139
reflection is restored and we're done so
0:08:00.460,0:08:04.719
there you go that's how you dial eight
0:08:02.139,0:08:07.030
pupils in Photoshop one thing to notice
0:08:04.719,0:08:09.490
here is that everything we did is not
0:08:07.030,0:08:12.520
just non-destructive it's fully edible
0:08:09.490,0:08:14.169
as well you can always go back to your
0:08:12.520,0:08:17.590
layers and change these settings to
0:08:14.169,0:08:21.129
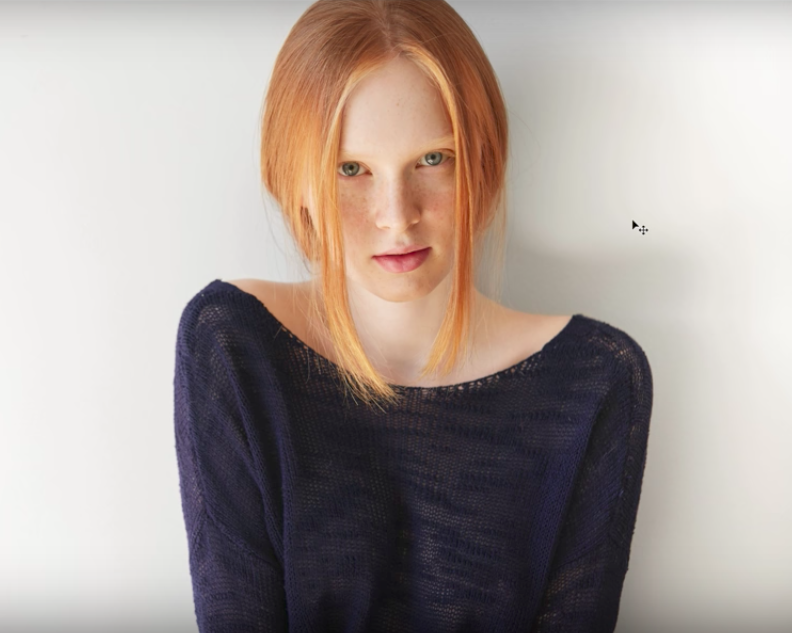
anything you want here's what the image
0:08:17.590,0:08:23.409
looks like before and after so what do
0:08:21.129,0:08:25.509
you think is it more appealing or is it
0:08:23.409,0:08:28.240
not that big of a deal maybe it's a
0:08:25.509,0:08:30.039
placebo effect anyways I want to know
0:08:28.240,0:08:32.580
what you guys think so let me know in
0:08:30.039,0:08:32.580
the comments below
0:08:42.279,0:08:46.430
you
0:08:44.080,0:08:48.190
guys thanks for watching this video if
0:08:46.430,0:08:50.480
you found it helpful hit the like button
0:08:48.190,0:08:52.490
also if you want to learn some more
0:08:50.480,0:08:53.870
portrait retouching techniques check out
0:08:52.490,0:08:56.300
this video that I've made a long time
0:08:53.870,0:08:57.920
ago on how to retouch skin in Photoshop
0:08:56.300,0:09:00.140
they're gonna learn techniques such as
0:08:57.920,0:09:02.860
using a yellow channel frequency
0:09:00.140,0:09:05.600
separation dodging and burning and more
0:09:02.860,0:09:07.580
anyways thanks again for watching guys I
0:09:05.600,0:09:08.900
hope you guys have an awesome day and if
0:09:07.580,0:09:11.740
you haven't already please hit the
0:09:08.900,0:09:11.740
subscribe button below
0:09:26.910,0:09:28.970
Oh
standard: en
0:00:03.560,0:00:05.480
Hello and welcome to this episode of
0:00:05.490,0:00:08.220
Denny's tips! Today I want to teach you a
0:00:08.220,0:00:10.080
retouching technique that not a lot of
0:00:10.080,0:00:12.690
people pay attention to. I'll be teaching
0:00:12.690,0:00:15.179
you how to enhance the eyes by enlarging
0:00:15.179,0:00:18.270
the pupils in Photoshop. The pupil size
0:00:18.270,0:00:20.070
can apparently make your subject more
0:00:20.070,0:00:22.619
appealing, in some places like Korea and
0:00:22.619,0:00:24.779
Japan. It's quite common to find people
0:00:24.779,0:00:26.460
buying fake contacts that make your
0:00:26.460,0:00:27.779
pupils look bigger.
0:00:27.779,0:00:29.910
There's also a study done a long time
0:00:29.910,0:00:31.590
ago where they show two sets of photos.
0:00:31.590,0:00:33.989
They both are the same stuff, except that one
0:00:33.989,0:00:36.660
have the pupils dilated. People prefer the
0:00:36.660,0:00:39.120
photo with the dilated pupils and when
0:00:39.120,0:00:42.000
they're asked why, they can't explain it.
0:00:42.000,0:00:43.620
There are a lot of ways to retouch
0:00:43.620,0:00:46.350
portraits; enlarging the pupils is just
0:00:46.350,0:00:48.809
one of them, but sometimes the smallest
0:00:48.809,0:00:50.460
part of your photo will have the biggest
0:00:50.460,0:00:53.039
impact. So, if you're interested
0:00:53.039,0:00:54.660
keep watching this photoshop tutorial
0:00:54.660,0:00:57.100
and I'll show you how it's done.
0:01:05.280,0:01:06.640
For this tutorial, you should be working
0:01:06.670,0:01:08.680
on a hi-res photo where you can see
0:01:08.680,0:01:11.740
details in the eyes. So, we're first going
0:01:11.740,0:01:13.420
to start by making a selection of the
0:01:13.420,0:01:15.550
pupil and then we're going to enlarge it.
0:01:15.550,0:01:18.310
In the toolbar, select the elliptical
0:01:18.310,0:01:21.070
marquee tool, zoom in really close into
0:01:21.070,0:01:23.890
one eye like this, you want to be able to see
0:01:23.890,0:01:27.729
all of the details while editing. To make
0:01:27.729,0:01:29.680
a selection of the pupil, drag from
0:01:29.680,0:01:31.900
the center of the pupil and if you hold
0:01:31.900,0:01:33.640
the "alt or option" key it'll drag
0:01:33.640,0:01:37.060
from the center like this, then hold on
0:01:37.060,0:01:38.979
to the "shift key" which will give you a
0:01:38.979,0:01:42.670
perfectly round circle. We have our
0:01:42.670,0:01:45.100
selection, and to preview how it looks
0:01:45.100,0:01:47.259
let's fill it with white. You can do it
0:01:47.259,0:01:48.640
quickly by pressing D on your keyboard,
0:01:48.640,0:01:50.290
to reset the foreground and background
0:01:50.290,0:01:53.259
colors and then pressing "ctrl or command"
0:01:53.259,0:01:57.100
backspace to fill it with white. The
0:01:57.100,0:01:58.479
edges look quite hard.
0:01:58.479,0:02:00.070
So, let's undo the filled by pressing
0:02:00.070,0:02:02.710
ctrl or command said then press shift F6
0:02:02.710,0:02:04.869
to bring up the feather selection tool.
0:02:04.869,0:02:07.510
This let's soften the edges of your
0:02:07.510,0:02:09.760
selection, enter something small
0:02:09.760,0:02:11.950
sometimes even half a pixel is good
0:02:11.950,0:02:14.620
enough. Fill this selection again to
0:02:14.620,0:02:17.560
preview it, and if it looks good we can
0:02:17.560,0:02:19.930
duplicate the layer. Before we begin
0:02:19.930,0:02:22.150
transforming it's a good idea to confer
0:02:22.150,0:02:24.580
to layer into a smart object. So, right
0:02:24.580,0:02:26.350
click on the layer then choose convert
0:02:26.350,0:02:30.160
to smart object - press ctrl T or command
0:02:30.160,0:02:32.860
T on macs to use the transform tool then
0:02:32.860,0:02:35.049
while holding alt and shift or option and
0:02:35.049,0:02:38.380
shift enlarge the pupils like this. When
0:02:38.380,0:02:40.209
you're done press enter to apply the
0:02:40.209,0:02:44.730
transformation. Zoom more and see how it looks,
0:02:44.730,0:02:46.800
obviously mine looks way too big and
0:02:46.800,0:02:49.620
unnatural so I'm going to transform it
0:02:49.620,0:02:51.299
back down like this.
0:02:51.299,0:02:53.010
Now, usually when you're transferring up
0:02:53.010,0:02:54.659
and down like this it's going to reduce
0:02:54.659,0:02:56.940
the sharpness but because this is a
0:02:56.940,0:02:59.129
smart object you can actually resize it
0:02:59.129,0:03:01.080
as many times as you like and you won't
0:03:01.080,0:03:03.540
lose any image quality and that's just
0:03:03.540,0:03:05.040
one reason why you should use Smart
0:03:05.040,0:03:06.750
Objects whenever you can.
0:03:06.750,0:03:09.420
Speaking of smart objects, here's another
0:03:09.420,0:03:11.970
reason why you want to use it; if we look
0:03:11.970,0:03:14.190
closely at the pupil it's blurry and the
0:03:14.190,0:03:16.829
noise detail became quite splotchy. We
0:03:16.829,0:03:18.840
can fix this by adding some noise which
0:03:18.840,0:03:21.810
will artificially sharpen it. To do this,
0:03:21.810,0:03:26.519
go to "Filter" - "Noise" -> "Add Noise" zoom in so
0:03:26.519,0:03:28.379
that you can see details and then
0:03:28.379,0:03:32.040
adjust the noise like this. You want a
0:03:32.040,0:03:34.019
noise pattern that subtle and looks like
0:03:34.019,0:03:37.230
something natural out of your camera. Now
0:03:37.230,0:03:38.940
if your image is black and white, you'll
0:03:38.940,0:03:40.920
want to check mark the monochromatic option.
0:03:40.920,0:03:42.810
This basically just makes me noise
0:03:42.810,0:03:45.599
black-and-white otherwise, just click OK
0:03:45.599,0:03:48.690
to apply the changes. Look into the new
0:03:48.690,0:03:50.669
layers panel you can see that because we
0:03:50.669,0:03:52.440
apply this filter onto a smart object,
0:03:52.440,0:03:55.290
your filter became a smart filter which
0:03:55.290,0:03:57.569
is fully editable. You can double click
0:03:57.569,0:03:59.099
back on the filter to change these
0:03:59.099,0:03:59.639
settings
0:03:59.639,0:04:02.370
anytime you want. Another feature of
0:04:02.370,0:04:04.049
Smart Filters is that you can double
0:04:04.049,0:04:05.430
click here to bring up the blending
0:04:05.430,0:04:07.260
options and you can lower the opacity
0:04:07.260,0:04:09.750
from here. So, I'm gonna sent mine to about
0:04:09.750,0:04:13.109
fifty percent. Now the noise that we added
0:04:13.109,0:04:15.150
has a very minimal effect to the overall
0:04:15.150,0:04:17.400
image. And when you zoom out you probably
0:04:17.400,0:04:18.959
won't even notice the difference at all.
0:04:18.959,0:04:21.510
This is just the techniques that's catered
0:04:21.510,0:04:23.700
towards high-end retouchers who care a lot
0:04:23.700,0:04:25.800
about image quality and maintaining
0:04:25.800,0:04:27.720
the consistent sharpness and noise level
0:04:27.720,0:04:30.200
throughout the entire photo.
0:04:30.200,0:04:32.480
Anyways, right now the pupil looks fake,
0:04:32.480,0:04:33.950
it really looks like someone just
0:04:33.950,0:04:36.260
painted a dot over it. To make it look
0:04:36.260,0:04:38.300
more realistic, we need to restore the
0:04:38.300,0:04:40.550
reflections. If you look closely at the
0:04:40.550,0:04:42.500
eyes here, you'll notice that your
0:04:42.500,0:04:43.970
reflections and catch light hasn't
0:04:43.970,0:04:47.780
completely covered by our fake pupil. If
0:04:47.780,0:04:49.070
we change the blending mode to something
0:04:49.070,0:04:51.830
like overlay, it'll look better but you
0:04:51.830,0:04:54.800
also get this double pupil effect you can also see
0:04:54.800,0:04:56.690
that the reflection has a color that doesn't
0:04:56.690,0:04:59.090
look very real as well. So we're not
0:04:59.090,0:05:00.560
going to use the overlay blending mode,
0:05:00.560,0:05:03.650
we're going to mask it out with a blend
0:05:03.650,0:05:06.620
if settings right click on the layer
0:05:06.620,0:05:09.920
then choose "blending options", on the
0:05:09.920,0:05:11.840
bottom here you'll find a "blend if"
0:05:11.840,0:05:13.700
settings.
0:05:13.700,0:05:15.290
We're going to use the underlying layer
0:05:15.290,0:05:17.120
here and if we drag the white slider
0:05:17.120,0:05:19.040
towards the left you can see the
0:05:19.040,0:05:22.610
reflections coming back. Right now, the
0:05:22.610,0:05:24.800
edges of the reflection are quite hard,
0:05:24.800,0:05:26.990
so, to soften it hold the alt or option
0:05:26.990,0:05:29.330
key then drag the white slider towards
0:05:29.330,0:05:30.170
the right.
0:05:30.170,0:05:33.140
The slider will detach in half and you
0:05:33.140,0:05:37.740
can fade out the edges like this
0:05:37.740,0:05:40.169
click OK to apply the changes and we're
0:05:40.169,0:05:43.229
done. It looks much more realistic once
0:05:43.229,0:05:46.169
we restore your reflections. We're done
0:05:46.169,0:05:47.849
with one eye now it's time to work on
0:05:47.849,0:05:49.740
the other eye. I'm going to go through this
0:05:49.740,0:05:51.960
quickly because you already know the steps but
0:05:51.960,0:05:53.520
along the way you'll learn some pretty
0:05:53.520,0:05:56.069
useful tips and tricks. First, I'm gonna
0:05:56.069,0:05:57.930
select background layer and make a
0:05:57.930,0:06:00.630
selection out of the pupil. Apply the
0:06:00.630,0:06:03.690
same feather settings by pressing shift + f6 the
0:06:03.690,0:06:05.340
previous setting that we used, should
0:06:05.340,0:06:07.169
still be here so we can just click OK.
0:06:07.169,0:06:10.680
Press ctrl or command J to duplicate the
0:06:10.680,0:06:13.409
layer, convert it into a smart object by
0:06:13.409,0:06:14.849
right clicking on the layer and
0:06:14.849,0:06:17.940
selecting convert to smart object press
0:06:17.940,0:06:20.220
ctrl or command T for the transform tool
0:06:20.220,0:06:22.919
resize it to about the same size as the
0:06:22.919,0:06:27.750
other pupil. If the pupil is extending
0:06:27.750,0:06:29.639
past the eyelid you can fix it by
0:06:29.639,0:06:31.560
clicking on the add layer mask button in
0:06:31.560,0:06:33.960
the layers panel, select the eraser tool
0:06:33.960,0:06:35.699
and if your foreground and background
0:06:35.699,0:06:38.039
colors are the default black-and-white it
0:06:38.039,0:06:40.380
should paint your layer with black. Now
0:06:40.380,0:06:42.180
if you like to paint your layer mask with the
0:06:42.180,0:06:43.800
brush tool you'll need to swap the
0:06:43.800,0:06:45.719
colors by pressing X or that black is
0:06:45.719,0:06:49.199
your foreground color. Anyways, I want to
0:06:49.199,0:06:51.449
erase very carefully around here. My
0:06:51.449,0:06:52.860
brush hardness is set to a hundred
0:06:52.860,0:06:55.620
percent so that the edges look hard and
0:06:55.620,0:06:58.139
to soften it go to properties panel and
0:06:58.139,0:07:00.659
then adjust the feather setting. Compared
0:07:00.659,0:07:02.070
to setting your feather in your brush
0:07:02.070,0:07:02.880
settings
0:07:02.880,0:07:04.680
it's not that big of a deal, it's just
0:07:04.680,0:07:06.509
good practice because it's always easier
0:07:06.509,0:07:08.069
to blur or something than it is to
0:07:08.069,0:07:09.389
sharpen it back.
0:07:09.389,0:07:12.300
Next we're going to restore the noise,
0:07:12.300,0:07:14.159
but first make sure that you've selected
0:07:14.159,0:07:16.020
back to layer by clicking on the layer
0:07:16.020,0:07:18.270
thumbnail, otherwise if you have the layer
0:07:18.270,0:07:19.770
mask selected, we're going to be adding
0:07:19.770,0:07:21.300
noise or layer masks and it looks like
0:07:21.300,0:07:23.370
you're doing nothing.
0:07:23.370,0:07:26.610
Go to filter noise add noise, your
0:07:26.610,0:07:28.289
previous settings should still be here so
0:07:28.289,0:07:30.690
just press ok. In the layers panel,
0:07:30.690,0:07:33.630
double-click on this icon here to bring
0:07:33.630,0:07:36.330
up the blending options, use the same
0:07:36.330,0:07:37.919
opacity setting that you use in the
0:07:37.919,0:07:40.889
other pupil. For mine, it was fifty
0:07:40.889,0:07:43.530
percent and finally we're going to
0:07:43.530,0:07:45.690
restore the reflections. You can just
0:07:45.690,0:07:47.460
copy and paste the layer style by
0:07:47.460,0:07:49.320
right-clicking on the other layer and
0:07:49.320,0:07:52.800
selecting copy layer style. Right click
0:07:52.800,0:07:54.630
back on the previous layer then choose
0:07:54.630,0:07:57.900
"paste layer style". The reflection is
0:07:57.900,0:07:59.370
restored and we're done.
0:07:59.370,0:08:01.860
So, there you go that's how you dialte
0:08:01.860,0:08:04.770
pupils in Photoshop. One thing to notice
0:08:04.770,0:08:06.990
here is that everything we did, is not
0:08:06.990,0:08:09.479
just non-destructive; it's fully edible
0:08:09.479,0:08:12.509
as well. You can always go back to the
0:08:12.509,0:08:14.159
layers and change these settings to
0:08:14.159,0:08:15.330
anything you want.
0:08:15.330,0:08:18.509
Here's what the image looks like before
0:08:18.509,0:08:19.650
and after,
0:08:19.650,0:08:22.529
so what do you think? Is it more appealing
0:08:22.529,0:08:24.750
or is it not that big of a deal?
0:08:24.750,0:08:27.750
Maybe it's a placebo effect, anyways, I
0:08:27.750,0:08:29.550
want to know what you guys think. So, let
0:08:29.550,0:08:44.010
me know in the comments below.
0:08:44.010,0:08:46.560
Guys, thanks for watching this video if
0:08:46.560,0:08:48.420
you found it helpful, hit the like button
0:08:48.420,0:08:50.430
also if you want to learn some more
0:08:50.430,0:08:52.110
portrait retouching techniques,
0:08:52.110,0:08:53.640
check out this video I made a long
0:08:53.640,0:08:55.830
time ago on how do we touch skin in
0:08:55.830,0:08:58.530
photoshop, there are more techniques such as using
0:08:58.530,0:09:00.630
yellow channel frequency separation,
0:09:00.630,0:09:03.870
dodging and burning and more. Anyways,
0:09:03.870,0:09:05.790
thanks again for watching guys I hope
0:09:05.790,0:09:07.680
you guys have an awesome day and if you
0:09:07.680,0:09:09.240
haven't already please hit the subscribe
0:09:09.240,0:09:14.720
button below!
Profiles
Profile 1
| Purpose | Tutorial (why) |
|---|---|
| Content | |
| Participants | nameless (f) model, Photoshop (m) geek |
| Form | Tutorial (how) |
| Time | |
| Place |
Profile 2
| Purpose | Tutorial |
|---|---|
| Content | Portrait |
| Participants | nameless (f) model, Photoshop (m) geek |
| Form | Tutorial (how), Mid shot |
| Time | Real time |
| Place | Desktop |
Profile 3
| Purpose | |
|---|---|
| Content | |
| Participants | |
| Form | |
| Time | |
| Place |
Profile 5
| Purpose | |
|---|---|
| Content | Portrait |
| Participants | |
| Form | |
| Time | |
| Place |