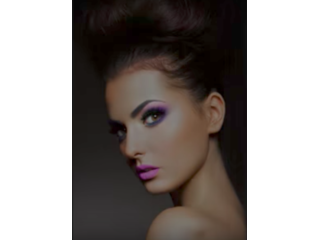
Photoshop Tutorial: How to Create an Elegant Text Portrait
Figuration: Tutorial
Description
Model & Font Download
• http://www.photoshoptutorials.tv/create-an-awesome-text-portrait-in-photoshop/
Become a YouTube partner today!
https://fullscreenmedia.co/creators/?ref=6lrxMZggMaN1u2V9N2-zrQ
Social Media Accountsꜜ
Facebook - https://goo.gl/hKT8ad
Twitter - https://goo.gl/TEKmxD
Instagram - https://goo.gl/uR07f5
First song:
Music Credit:
{Dance Dont Delay} by Twin Musicom (twinmusicom.org)
http://www.twinmusicom.org/
Audio Provided Byꜜ
https://www.youtube.com/audiolibrary
Metadata
| Video ID | 322 | Youtube URL | Photoshop Tutorial: How to Create an Elegant Text Portrait |
|---|---|
| Captions Available | Yes |
| Captions Downloadable | Yes |
| Playlists | |
| Duration | 00:10:16 |
| Definition | hd |
| Keywords | |
| License | youtube |
| Embeddable | Yes |
| Views | 35186 |
| Likes | 491 |
| Dislikes | 10 |
| Favourites | 0 |
| Comments | 68 |
| Created | 2017-05-04 1:00:45 PM |
| Updated | 2017-05-04 1:14:01 PM |
Captions
standard: en
1
00:00:10,866 --> 00:00:16,066
Lets start! Select the Quick Selection Tool. (W)
2
00:00:16,066 --> 00:00:20,266
Add to Selection.
3
00:00:20,266 --> 00:00:25,366
Carefully select the entire model.
4
00:00:25,766 --> 00:00:29,766
Be sure to take your time.
5
00:00:41,633 --> 00:00:45,633
When you're done. Head up to Select and Mask.
6
00:00:47,466 --> 00:00:50,666
There's a few parts that touch-ups.
7
00:00:50,666 --> 00:00:54,532
Select the Refine Edge Brush Tool.
8
00:00:54,533 --> 00:01:00,199
Only select the mode's eyelashes and hair.
9
00:01:02,966 --> 00:01:06,966
When done, Change the Output to: New Layer With Layer Mask.
10
00:01:07,700 --> 00:01:11,700
Then hit OK.
11
00:01:11,733 --> 00:01:17,599
Create a new adjustment layer - Solid Color.
12
00:01:17,600 --> 00:01:23,000
Make sure the color is black. Then hit OK.
13
00:01:23,033 --> 00:01:27,033
Click + Drag the solid color below the model layer.
14
00:01:27,233 --> 00:01:31,233
Select the model layer.
15
00:01:31,733 --> 00:01:38,299
Head up to Image - Mode. Make sure RGB and 8Bits/Channel is selected.
16
00:01:39,466 --> 00:01:43,466
Right click on our model layer.
17
00:01:43,466 --> 00:01:47,466
Convert to Smart Object.
18
00:01:48,800 --> 00:01:55,433
Head back up to Image > Adjustments > Black & White.
19
00:01:56,966 --> 00:02:00,966
Then hit OK.
20
00:02:01,033 --> 00:02:05,399
Then head up to Filter > Blur > Gaussian Blur.
21
00:02:07,466 --> 00:02:14,099
Blur Radius about 10 Pixels > Then OK.
22
00:02:16,866 --> 00:02:20,866
Next, head up to File > Save As.
23
00:02:21,700 --> 00:02:25,700
Save to your Desktop.
24
00:02:25,700 --> 00:02:29,600
I'm going to rename it to Displacement Map.
25
00:02:29,600 --> 00:02:33,600
Save the file type as a PSD file.
26
00:02:33,600 --> 00:02:38,833
Then hit Save.
27
00:02:39,266 --> 00:02:43,266
Hide the visibility of the Gaussian Blur Smart Filter.
28
00:02:44,633 --> 00:02:48,633
Head up to File > New.
29
00:02:50,600 --> 00:02:54,600
Width: 1280 Pixels | Height 720 Pixels.
30
00:02:55,466 --> 00:02:59,466
Make sure your background color is set to black.
31
00:02:59,666 --> 00:03:01,366
Then hit OK.
32
00:03:01,366 --> 00:03:04,299
Ok again.
33
00:03:05,900 --> 00:03:10,966
Select your Type Tool. (T) Or select it from the Toolbar.
34
00:03:12,966 --> 00:03:16,699
Gotham Bold font > DL in description.
35
00:03:16,700 --> 00:03:19,666
Size 200pt.
36
00:03:19,666 --> 00:03:22,932
Change the text color to white.
37
00:03:22,933 --> 00:03:27,466
Then > OK.
38
00:03:27,466 --> 00:03:31,732
I'm going to type ELEGANT for my first word.
39
00:03:31,733 --> 00:03:36,899
Use your Move Tool to position near the center.
40
00:03:36,933 --> 00:03:41,299
Select your Type Tool again.
41
00:03:41,366 --> 00:03:45,166
Type your second word. I will write INSPIRE.
42
00:03:45,166 --> 00:03:49,166
Use your Move Tool to position again.
43
00:03:49,166 --> 00:03:52,399
CTRL + T to select the text.
44
00:03:52,400 --> 00:03:56,400
Hold SHIFT while dragging a corner inwards to decrease size.
45
00:03:56,400 --> 00:04:01,133
Hit Enter to accept changes.
46
00:04:01,166 --> 00:04:05,166
Type your 3rd word. I will type CREATIVE.
47
00:04:05,166 --> 00:04:09,166
Use your Move Tool to position it.
48
00:04:09,200 --> 00:04:14,633
CTRL + T to select > Resize while holding SHIFT.
49
00:04:14,633 --> 00:04:18,633
Now that I've showed you how to resize + Position. I will speed the rest up.
50
00:04:24,033 --> 00:04:28,033
Take your time! :)
51
00:04:30,466 --> 00:04:33,532
Make sure your top layer is selected.
52
00:04:33,533 --> 00:04:36,866
Hold CTRL + SHIFT and click on the bottom text layer.
53
00:04:36,933 --> 00:04:39,399
This will select all text layers.
54
00:04:39,400 --> 00:04:42,433
CTRL + G to group selected layers.
55
00:04:42,433 --> 00:04:46,433
Right click > Merge Group.
56
00:04:47,133 --> 00:04:53,199
Select your Move Tool. Drag and drop onto our main project.
57
00:04:55,133 --> 00:04:58,566
Zoom in using your Zoom Tool. (Z)
58
00:04:58,566 --> 00:05:02,566
Head down to FX > Blending Options.
59
00:05:04,100 --> 00:05:08,100
Click on Drop Shadow.
60
00:05:08,833 --> 00:05:11,533
Blend Mode: Normal - Opacity 100%.
61
00:05:11,533 --> 00:05:15,533
Distance 0 px - Spread: 0% - Size 16 px
62
00:05:15,900 --> 00:05:19,233
Then hit OK.
63
00:05:19,233 --> 00:05:22,733
I'm going to rename this new layer to TEXT.
64
00:05:22,733 --> 00:05:28,099
Make sure your text layer is selected > CTRL + G to create a group.
65
00:05:28,100 --> 00:05:32,500
Since we'll be working with plenty of layers, it's more organized when grouped.
66
00:05:32,500 --> 00:05:34,433
Select the text layer.
67
00:05:34,433 --> 00:05:40,566
Select your Move Tool. (V) then position the first layer like so.
68
00:05:40,566 --> 00:05:44,566
CTRL + T to select. Resize as needed.
69
00:05:44,566 --> 00:05:46,899
Enter to accept changes.
70
00:05:46,900 --> 00:05:49,466
CTRL + J to duplicate the text layer.
71
00:05:49,466 --> 00:05:54,199
Move Tool (V) to position the text.
72
00:05:54,200 --> 00:05:56,700
CTRL + J to duplicate the text layer.
73
00:05:56,700 --> 00:06:00,700
Move Tool to position the text layer.
74
00:06:01,733 --> 00:06:05,733
CTRL + 0 to zoom back out.
75
00:06:06,366 --> 00:06:10,366
Now that I've showed you how to duplicate and position. I will speed this part up a tad.
76
00:06:14,400 --> 00:06:18,400
Close the group.
77
00:06:18,633 --> 00:06:23,399
Duplicate the group > CTRL + J.
78
00:06:23,433 --> 00:06:28,999
Select your Move Tool. (V) then bring it below our first text group.
79
00:06:29,066 --> 00:06:38,732
CTRL + J to duplicate > Move Tool to position.
80
00:06:41,466 --> 00:06:47,032
Once you're done. Hold ALT + SHIFT to select all the groups.
81
00:06:47,033 --> 00:06:51,033
Right click > Convert to Smart Object.
82
00:06:55,066 --> 00:07:01,832
I'm going to rename this layer > Text Small.
83
00:07:01,866 --> 00:07:05,866
Duplicate it > CTRL + J.
84
00:07:07,800 --> 00:07:11,800
Rename this to Text Sideways or something.
85
00:07:13,033 --> 00:07:17,033
CTRL + T to select our top layer (Text Sideways)
86
00:07:18,933 --> 00:07:22,466
Click the chain icon (Maintain Aspect Ratio)
87
00:07:22,466 --> 00:07:28,666
Right Click > Rotate Counter Clockwise.
88
00:07:28,666 --> 00:07:32,666
Increase the size of the text layer.
89
00:07:32,700 --> 00:07:35,733
You can rotate the text as well.
90
00:07:35,733 --> 00:07:39,733
When you're done. Hit Enter.
91
00:07:39,766 --> 00:07:43,766
Hold CTRL down and select the second text layer (Text Small)
92
00:07:43,766 --> 00:07:47,766
Right Click > Convert to Smart Object.
93
00:07:47,766 --> 00:07:54,532
Head up to Filter > Distort > Displace.
94
00:07:54,533 --> 00:07:58,533
Horizontal Scale 10 - Vertical Scale 10
95
00:07:58,566 --> 00:08:00,932
Stretch To Fit - Repeat Edge Pixels.
96
00:08:00,933 --> 00:08:02,899
Then hit OK.
97
00:08:02,900 --> 00:08:07,233
Double click on our Displacement Map we created earlier.
98
00:08:07,233 --> 00:08:12,166
As you can see > Small but important changes have been made.
99
00:08:12,200 --> 00:08:16,200
Select our model layer > Drag it to the top.
100
00:08:16,233 --> 00:08:20,233
Hold ALT + Click between the two layer to create a clipping mask.
101
00:08:20,333 --> 00:08:27,566
Change the Blending Mode to Multiply or Linear Burn.
102
00:08:27,600 --> 00:08:31,600
Linear burn shows the shadows much more.
103
00:08:31,633 --> 00:08:35,633
CTRL + Left click to make a selection of the model.
104
00:08:35,833 --> 00:08:39,499
Head down to our text layer + Select it.
105
00:08:39,500 --> 00:08:43,500
Then hit mask.
106
00:08:43,500 --> 00:08:48,766
I'm going to increase the background of our image.
107
00:08:48,766 --> 00:08:51,799
Select the Crop Tool. (C)
108
00:08:51,800 --> 00:08:55,800
Drag the left side outwards.
109
00:08:56,200 --> 00:09:00,200
Hit Enter when you're done.
110
00:09:01,000 --> 00:09:03,933
Double click on our color fill layer.
111
00:09:03,933 --> 00:09:06,366
I'm going to change it from black to dark gray.
112
00:09:06,366 --> 00:09:09,599
Then hit OK.
113
00:09:09,666 --> 00:09:12,832
Create a new layer.
114
00:09:12,833 --> 00:09:16,833
ALT + click between the two layer > Create a clipping mask.
115
00:09:17,400 --> 00:09:21,400
I'm going to rename this to "Hair Fix" or something.
116
00:09:23,433 --> 00:09:27,433
Change our foreground color to black.
117
00:09:27,466 --> 00:09:31,466
Select the Brush Tool. (B)
118
00:09:32,200 --> 00:09:36,200
Color over the model's hair.
119
00:09:37,100 --> 00:09:41,100
Next, I will show you how to brighten up the mode's face.
120
00:09:41,100 --> 00:09:43,833
Select the Model Layer.
121
00:09:43,833 --> 00:09:47,833
Select FX at the bottom > Blending Options.
122
00:09:50,233 --> 00:09:54,233
Hold ALT + drag the slider to the left.
123
00:09:55,566 --> 00:09:59,566
Hit OK when you're done.
Profiles
Profile 1
| Purpose | Tutorial (why) |
|---|---|
| Content | |
| Participants | nameless (f) model, Photoshop geek |
| Form | Tutorial (how) |
| Time | |
| Place |
Profile 2
| Purpose | Tutorial |
|---|---|
| Content | Portrait, Text |
| Participants | nameless (f) model, Photoshop geek |
| Form | Tutorial (how), music |
| Time | Real time |
| Place | Desktop |

