How to Add Photorealistic Puddles in Photoshop
Figuration: Tutorial
Description
Want to follow along using the same photo? It can be purchased here:
http://depositphotos.com/127414590/stock-photo-beautiful-bride-and-groom-stand.html?aff_id=14808
Links:
? Written Tutorial: https://dennystips.com/puddles-photoshop-tutorial/
? Photoshop & Lightroom Products: https://sparklestock.com
? Photoshop Books: http://amzn.to/2fDsVtZ
Subscribe:
? https://youtube.com/dennystips?sub_confirmation=1
Follow Me:
? Website: https://dennystips.com/
? Instagram: https://instagram.com/dennystips/
? Facebook: http://facebook.com/dennystips
?Twitter: https://twitter.com/dennystips
? Snapchat: dennystips
?? Did you like/dislike this video? Please let me know in the comments below.
Metadata
| Video ID | 336 | Youtube URL | How to Add Photorealistic Puddles in Photoshop |
|---|---|
| Captions Available | Yes |
| Captions Downloadable | Yes |
| Playlists | |
| Duration | 00:06:22 |
| Definition | hd |
| Keywords | |
| License | youtube |
| Embeddable | Yes |
| Views | 2714 |
| Likes | 44 |
| Dislikes | 1 |
| Favourites | 0 |
| Comments | 4 |
| Created | 2017-05-04 1:00:45 PM |
| Updated | 2017-05-04 1:14:15 PM |
Captions
ASR: en
0:00:02.810,0:00:07.589
hello and welcome to this episode of
0:00:05.160,0:00:08.970
Danny's death in this video you will
0:00:07.589,0:00:11.130
learn how to make your photos look more
0:00:08.970,0:00:13.290
dramatic by adding puddles in Photoshop
0:00:11.130,0:00:15.179
you'll start off by cutting and pasting
0:00:13.290,0:00:17.580
parts of your photo to create a fake
0:00:15.179,0:00:19.529
reflection then you'll paint and de
0:00:17.580,0:00:21.090
petal with a layer mask and tweak the
0:00:19.529,0:00:23.820
settings to make it look a bit more
0:00:21.090,0:00:25.410
realistic finally you'll finish it by
0:00:23.820,0:00:27.689
adding a subtle replaced activity
0:00:25.410,0:00:29.939
puddles and you're going to all of this
0:00:27.689,0:00:33.210
using non-destructive editing techniques
0:00:29.939,0:00:35.040
and with a very minimal set of layers so
0:00:33.210,0:00:36.120
if you're interested keep watching and
0:00:35.040,0:00:40.430
you'll learn how to add your own
0:00:36.120,0:00:40.430
realistic photos in Photoshop
0:00:44.130,0:00:48.200
[Music]
0:00:46.150,0:00:50.690
before you begin you'll need to choose
0:00:48.200,0:00:52.760
the right photo a photo on a cloudy day
0:00:50.690,0:00:55.430
or after a rainfall will work the best
0:00:52.760,0:00:56.990
for sunny photos it's a lot harder to
0:00:55.430,0:00:59.510
make the puddles look believable and
0:00:56.990,0:01:00.590
sometimes it just won't work so if this
0:00:59.510,0:01:02.660
is your first time following this
0:01:00.590,0:01:04.670
tutorial start off with a cloudy photo
0:01:02.660,0:01:06.560
like the one that we are using and by
0:01:04.670,0:01:08.030
the way we're using a stock photo so if
0:01:06.560,0:01:09.590
you want to follow along with the exact
0:01:08.030,0:01:11.210
same photo you can check the video
0:01:09.590,0:01:13.460
description below to find out where you
0:01:11.210,0:01:16.369
can buy this photo or you can just use
0:01:13.460,0:01:18.560
your own the first step is to create a
0:01:16.369,0:01:20.210
fake reflection by cutting pasting and
0:01:18.560,0:01:22.820
flipping different areas in the photo
0:01:20.210,0:01:23.869
let's start with this door here we can
0:01:22.820,0:01:26.540
make a selection of it with the
0:01:23.869,0:01:28.310
polygonal lasso tool here and simply
0:01:26.540,0:01:31.250
draw a selection around the door like
0:01:28.310,0:01:32.960
this by the way we only need to bottom
0:01:31.250,0:01:35.470
half of the door and the selection
0:01:32.960,0:01:37.820
doesn't need to be overly precise
0:01:35.470,0:01:40.100
duplicate the layer by pressing ctrl or
0:01:37.820,0:01:41.990
command J before we transform this layer
0:01:40.100,0:01:44.330
right click on new layer and then choose
0:01:41.990,0:01:46.600
convert to smart object this will let us
0:01:44.330,0:01:49.250
do a transformation non-destructively
0:01:46.600,0:01:51.440
next press ctrl or command T for you
0:01:49.250,0:01:53.710
transform tool then right click inside
0:01:51.440,0:01:56.900
of the box and select flip vertical
0:01:53.710,0:01:59.090
don't press ENTER yet position d layer
0:01:56.900,0:02:00.770
sweats on the bottom of the door it's
0:01:59.090,0:02:02.270
not going to match so we need to seal
0:02:00.770,0:02:05.270
the transformation by right clicking
0:02:02.270,0:02:07.400
inside the box and choosing skew now we
0:02:05.270,0:02:11.000
can drag to slide vertically to make it
0:02:07.400,0:02:12.440
a line with the door like this I'm going
0:02:11.000,0:02:14.120
to repeat this for the other door and
0:02:12.440,0:02:15.830
since it's essentially the same step
0:02:14.120,0:02:18.640
we're going fast forward this video to
0:02:15.830,0:02:18.640
save you some time
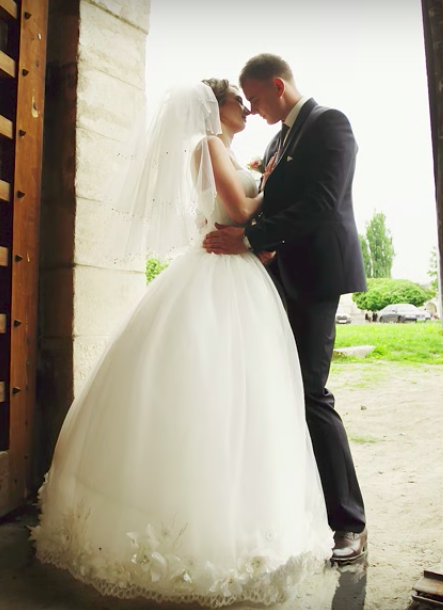
0:02:22.050,0:02:26.680
the last object to create a mirror of is
0:02:24.790,0:02:28.030
the bride and groom in the middle this
0:02:26.680,0:02:30.129
one's a little different because the
0:02:28.030,0:02:31.840
more complex shape the easiest way to
0:02:30.129,0:02:34.060
create a selection for this is to use
0:02:31.840,0:02:35.830
the quick selection tool with this tool
0:02:34.060,0:02:38.769
you can simply brush over the areas that
0:02:35.830,0:02:40.000
you want to select like this and if you
0:02:38.769,0:02:41.739
want to remove the area from the
0:02:40.000,0:02:43.660
selection you can do so by holding the
0:02:41.739,0:02:46.569
alt or option key and painting over the
0:02:43.660,0:02:48.340
areas that you want to remove once we
0:02:46.569,0:02:50.080
have this selection select back the
0:02:48.340,0:02:52.870
background layer and impress ctrl or
0:02:50.080,0:02:54.430
command J to duplicate it right click on
0:02:52.870,0:02:57.280
the layer and then choose convert to
0:02:54.430,0:03:00.099
smart object now press ctrl or command T
0:02:57.280,0:03:03.190
flip it vertically and in position it
0:03:00.099,0:03:05.230
below debride to transform this into a
0:03:03.190,0:03:07.840
curve you can right click and change
0:03:05.230,0:03:09.579
your transfer mode to warp now you can
0:03:07.840,0:03:16.690
simply drag downwards like this to make
0:03:09.579,0:03:19.349
a contour properly finally I'll repeat
0:03:16.690,0:03:19.349
this for the group
0:03:20.340,0:03:26.640
now we have a reflection and it looks
0:03:22.620,0:03:28.739
pretty good now that we're done creating
0:03:26.640,0:03:31.170
good reflection we can form the puddles
0:03:28.739,0:03:32.640
before we begin merge the layers by
0:03:31.170,0:03:34.440
selecting all of the reflection layers
0:03:32.640,0:03:36.750
and then right-click and choose convert
0:03:34.440,0:03:38.610
to smart object this is just a
0:03:36.750,0:03:41.099
non-destructive way to merge layers now
0:03:38.610,0:03:43.049
we can add an inverted layer mask by
0:03:41.099,0:03:44.840
holding alt or option and clicking on
0:03:43.049,0:03:47.700
this button here in the layers panel
0:03:44.840,0:03:49.890
select a brush tool and then use a large
0:03:47.700,0:03:52.200
soft brush like this step the brush
0:03:49.890,0:03:53.819
opacity to around fifty percent and then
0:03:52.200,0:04:05.190
paint over the areas that you want de
0:03:53.819,0:04:07.349
perros to appear in right now de patas
0:04:05.190,0:04:09.299
look like a mirror reflection to make it
0:04:07.349,0:04:12.180
look more realistic we need to do two
0:04:09.299,0:04:15.030
things number one reduce the opacity and
0:04:12.180,0:04:16.769
number two darken it a bit first let's
0:04:15.030,0:04:18.690
start in it by going to the adjustments
0:04:16.769,0:04:21.449
panel and adding the levels adjustment
0:04:18.690,0:04:23.760
layer here you can move the middle input
0:04:21.449,0:04:25.500
slider to darken the image like this to
0:04:23.760,0:04:28.110
make an only effective reflection layer
0:04:25.500,0:04:30.330
below click on this button here next
0:04:28.110,0:04:34.560
reduce the opacity to around fifty
0:04:30.330,0:04:36.810
percent before we finish here's a tip if
0:04:34.560,0:04:38.610
you want to blur the layer mask instead
0:04:36.810,0:04:40.139
of using the Gaussian blur filter you
0:04:38.610,0:04:42.240
can select the layer mask and then go
0:04:40.139,0:04:43.590
into your properties panel here you can
0:04:42.240,0:04:45.900
adjust the feather setting which will
0:04:43.590,0:04:48.060
blur delay or math it's the same thing
0:04:45.900,0:04:49.950
as a blur filter but it's better because
0:04:48.060,0:04:51.930
you can undo or change the settings at
0:04:49.950,0:04:54.389
any time
0:04:51.930,0:04:56.669
the last thing to do is to add a slight
0:04:54.389,0:05:00.630
ripple effect select a reflection layer
0:04:56.669,0:05:02.100
then go to filter distort wave play
0:05:00.630,0:05:03.720
around with the settings to get a subtle
0:05:02.100,0:05:05.910
ripple effect that matches the roughness
0:05:03.720,0:05:07.500
of the floor I like to start off by
0:05:05.910,0:05:09.870
sending scale to around twenty five
0:05:07.500,0:05:12.120
percent the preview image in this tool
0:05:09.870,0:05:14.039
is way too small so what I like to do
0:05:12.120,0:05:16.320
instead is just click OK to preview it
0:05:14.039,0:05:17.669
and then if it doesn't look good double
0:05:16.320,0:05:19.350
click on the smart filter a new layers
0:05:17.669,0:05:19.910
panel and you can edit the settings
0:05:19.350,0:05:33.679
again
0:05:19.910,0:05:33.679
[Music]
0:05:41.849,0:05:46.710
we're done here's how the image looks
0:05:44.169,0:05:55.400
like before and after
0:05:46.710,0:05:55.400
[Music]
0:06:01.889,0:06:06.060
hey thanks for watching this video now
0:06:04.469,0:06:07.979
it's just a quick way to add puddles in
0:06:06.060,0:06:09.719
Photoshop if you have any questions or
0:06:07.979,0:06:12.020
feedback let me know any comments below
0:06:09.719,0:06:13.860
I sighs something I wish it awesome day
0:06:12.020,0:06:18.139
subscribe to my channel if you haven't
0:06:13.860,0:06:18.139
already and I'll see you again next week
0:06:21.410,0:06:23.779
[Music]
standard: en
0:00:00.000,0:00:05.250
Hello and welcome to this episode of
0:00:05.250,0:00:07.890
Denny's tip. In this video you'll know how
0:00:07.890,0:00:09.480
to make your photos look more dramatic
0:00:09.480,0:00:12.000
by adding puddles in Photoshop. You'll
0:00:12.000,0:00:13.740
start off by cutting and pasting parts
0:00:13.740,0:00:15.780
of your photo to create fake reflection
0:00:15.780,0:00:18.359
and you'll paint in the puddle with a layer
0:00:18.359,0:00:20.369
mask and tweak the settings to make it
0:00:20.369,0:00:22.170
look a bit more realistic.
0:00:22.170,0:00:24.119
Finally, you'll finish it by adding a
0:00:24.119,0:00:26.580
subtle ripple effect in the puddles and
0:00:26.580,0:00:28.289
you're gonna do all of this using
0:00:28.289,0:00:30.660
non-destructive editing techniques and
0:00:30.660,0:00:33.300
with very minimal set of layers. So if
0:00:33.300,0:00:34.200
you're interested,
0:00:34.200,0:00:35.610
keep watching and you'll learn how to
0:00:35.610,0:00:37.739
add your own realistic puddles in
0:00:37.739,0:00:44.440
Photoshop.
0:00:44.440,0:00:48.219
Before you begin, you'll need to choose
0:00:48.219,0:00:50.680
the right photo. A photo on a cloudy day
0:00:50.680,0:00:53.649
or after rainfall will work the best, for
0:00:53.649,0:00:54.579
sunny photos,
0:00:54.579,0:00:56.019
it's a lot harder to make the puddles
0:00:56.019,0:00:58.120
look believable and sometimes it just
0:00:58.120,0:01:00.100
won't work. So, if this is you first time
0:01:00.100,0:01:02.079
following this tutorial, start off with a
0:01:02.079,0:01:03.489
cloudy photo like the one that we are
0:01:03.489,0:01:05.979
using. And by the way, we're using a stock
0:01:05.979,0:01:07.210
photo so if you want to follow along
0:01:07.210,0:01:09.250
with the exact same photo, you can check
0:01:09.250,0:01:10.960
the video description below to find out
0:01:10.960,0:01:13.090
where you can buy this photo. Or you can
0:01:13.090,0:01:16.000
just use your own, the first step is to
0:01:16.000,0:01:17.740
create a fake reflection by cutting,
0:01:17.740,0:01:19.869
pasting and flipping different areas in
0:01:19.869,0:01:20.770
the photo.
0:01:20.770,0:01:22.810
Let's start with this door here, we can
0:01:22.810,0:01:23.860
make a selection of it with the
0:01:23.860,0:01:26.530
"Polygonal Lasso tool" here and simply
0:01:26.530,0:01:28.270
draw a selection around the door like
0:01:28.270,0:01:31.210
this. By the way, we only need the bottom
0:01:31.210,0:01:32.950
half of the door and the selection
0:01:32.950,0:01:34.420
doesn't need to be overly precise.
0:01:34.420,0:01:37.780
Duplicate the layer by pressing "CTRL or
0:01:37.780,0:01:40.179
Command + J", before we transform this layer,
0:01:40.179,0:01:42.009
right click on the layer and then choose
0:01:42.009,0:01:44.319
convert to smart object. This will let us
0:01:44.319,0:01:46.149
do a transformation non-destructively
0:01:46.149,0:01:49.720
next, press "CTRL or command T for the transform
0:01:49.720,0:01:52.000
tool then right-click inside of the box
0:01:52.000,0:01:54.849
and select - flip vertical. Don't press
0:01:54.849,0:01:57.520
ENTER yet, position layer so it's on the
0:01:57.520,0:01:58.840
bottom of the door.
0:01:58.840,0:02:00.729
It's not gonna match so we need to skip
0:02:00.729,0:02:02.259
the transformation by right clicking
0:02:02.259,0:02:05.379
inside the box and choosing skew. Now we
0:02:05.379,0:02:07.360
can track the slide vertically to make a
0:02:07.360,0:02:10.899
line with the door like this, I'm going
0:02:10.899,0:02:12.580
to repeat this for the other door and
0:02:12.580,0:02:14.140
since it's essentially the same step,
0:02:14.140,0:02:15.849
we're going fast forward this video to
0:02:15.849,0:02:20.140
save you some time.
0:02:20.140,0:02:24.880
The last object to create a mirror is
0:02:24.880,0:02:26.500
the bride and groom in the middle,
0:02:26.500,0:02:27.580
this one's a little different because
0:02:27.580,0:02:30.069
the more complex shape the easiest way
0:02:30.069,0:02:31.840
to create a selection for this is to use
0:02:31.840,0:02:34.180
the quick selection tool. With this tool,
0:02:34.180,0:02:35.830
you can simply brush over the areas that
0:02:35.830,0:02:38.770
you want to select like this and if you
0:02:38.770,0:02:39.940
want to remove the area from the
0:02:39.940,0:02:41.890
selection, you can do so by holding "ALT
0:02:41.890,0:02:43.690
or option key" and painting over the
0:02:43.690,0:02:46.540
areas that you want to remove. Once we
0:02:46.540,0:02:48.310
have the selection, select back the
0:02:48.310,0:02:50.050
background layer and press "CTRL or
0:02:50.050,0:02:52.840
command J" to duplicate it. Right click on
0:02:52.840,0:02:54.400
the layer and then choose convert to
0:02:54.400,0:02:57.280
smart object, now press "CTRL or command T".
0:02:57.280,0:03:00.340
Flip it vertically and position it below
0:03:00.340,0:03:03.580
the bride to transform this into a curve
0:03:03.580,0:03:05.440
you can right-click and change it to
0:03:05.440,0:03:08.019
transfer mode to warp. Now you can simply
0:03:08.019,0:03:09.670
drag downwards like this to make it
0:03:09.670,0:03:12.940
contour properly.
0:03:12.940,0:03:20.870
Finally, I'll repeat this for the group.
0:03:20.870,0:03:22.640
Now we have a reflection and it looks
0:03:22.640,0:03:26.599
pretty good. Now that we're done creating
0:03:26.599,0:03:28.760
the reflection, we can form the puddles.
0:03:28.760,0:03:31.129
Before we begin, merge the layers by
0:03:31.129,0:03:32.750
selecting all of the reflection layers
0:03:32.750,0:03:34.430
and then right-click and choose convert
0:03:34.430,0:03:36.709
to smart object. This is just a
0:03:36.709,0:03:39.140
non-destructive way to merge layers. Now
0:03:39.140,0:03:41.060
we can add an inverted layer mask by
0:03:41.060,0:03:43.129
holding "ALT or Option" and click on this
0:03:43.129,0:03:45.860
button here, in the layers panel. Select
0:03:45.860,0:03:48.049
the brush tool, and then use a large soft
0:03:48.049,0:03:50.510
brush like this setting brush opacity to
0:03:50.510,0:03:52.670
around 50%, and then paint over
0:03:52.670,0:03:54.290
the areas that you want the puddles to
0:03:54.290,0:03:55.590
appear in.
0:04:04.960,0:04:06.540
Right now, the puddles look like they're mirror reflection
0:04:06.540,0:04:07.480
to make it look more
0:04:07.489,0:04:09.409
realistic, we need to do two things.
0:04:09.409,0:04:11.030
Number one,
0:04:11.030,0:04:13.459
reduce the opacity and number two, darken
0:04:13.459,0:04:16.010
a bit. First, let's start it by going to
0:04:16.010,0:04:17.840
the adjustments panel and adding the
0:04:17.840,0:04:20.539
levels adjustment layer. Here you can
0:04:20.539,0:04:21.949
move the middle input slider to
0:04:21.949,0:04:23.990
darken the image like this. To make it
0:04:23.990,0:04:25.760
only effective reflection layer below
0:04:25.760,0:04:28.490
click on this button here next
0:04:28.490,0:04:30.320
reduce the opacity to around fifty
0:04:30.320,0:04:34.970
percent. Before we finish, here's a tip if
0:04:34.970,0:04:36.889
you want a blur layer mask instead of
0:04:36.889,0:04:38.660
using the Gaussian blur filter. You can
0:04:38.660,0:04:40.130
select the layer mask and then go into
0:04:40.130,0:04:42.650
properties panel, here you can adjust the
0:04:42.650,0:04:44.090
feather setting which will blur the layer
0:04:44.090,0:04:46.520
mask. It's the same thing as a blur
0:04:46.520,0:04:48.349
filter but it's better because you can
0:04:48.349,0:04:51.710
undo or change the settings at any time.
0:04:51.710,0:04:54.410
The last thing to do is to add a slight
0:04:54.410,0:04:56.750
ripple effect. Select a reflection layer
0:04:56.750,0:05:00.620
then go to filter -> distort -> wave. Play
0:05:00.620,0:05:02.030
around with the settings to get a set of
0:05:02.030,0:05:03.830
ripple effect that matches the roughness of
0:05:03.830,0:05:04.940
the floor,
0:05:04.940,0:05:06.710
I like to start off by setting the scale to
0:05:06.710,0:05:09.140
around twenty five percent. The preview
0:05:09.140,0:05:11.120
image in this tool is way too small, so
0:05:11.120,0:05:13.190
what I like to do instead, is just click
0:05:13.190,0:05:15.230
OK to preview it and then if it doesn't
0:05:15.230,0:05:17.270
look good, double-click on the smart photo
0:05:17.270,0:05:19.070
in the layers panel and you can edit the
0:05:19.070,0:05:42.169
settings again.
0:05:42.169,0:05:44.210
We're done, here is how the image looks
0:05:44.210,0:06:02.160
like before and after.
0:06:02.160,0:06:04.470
Hey thanks for watching this video, now
0:06:04.470,0:06:06.090
which is a quick way to add photos in
0:06:06.090,0:06:07.890
Photoshop if you have any questions or
0:06:07.890,0:06:10.170
feedback let me know any comments below.
0:06:10.170,0:06:12.570
Aside from that, I wish you an awesome day.
0:06:12.570,0:06:13.890
Subscribe to my channel if you haven't
0:06:13.890,0:06:26.779
already and I'll see you again next week.
Screenshots
Profiles
Profile 1
| Purpose | Tutorial (why) |
|---|---|
| Content | |
| Participants | nameless (f) model, nameless (m) model, Photoshop (m) geek |
| Form | Tutorial (how) |
| Time | |
| Place |
Profile 2
| Purpose | Tutorial |
|---|---|
| Content | Portrait, Scene |
| Participants | nameless (f) model, nameless (m) model, Photoshop (m) geek |
| Form | Tutorial (how), Mid shot |
| Time | Real time |
| Place | Desktop, Home |
Profile 4
| Purpose | |
|---|---|
| Content | Portrait |
| Participants | |
| Form | |
| Time | |
| Place |