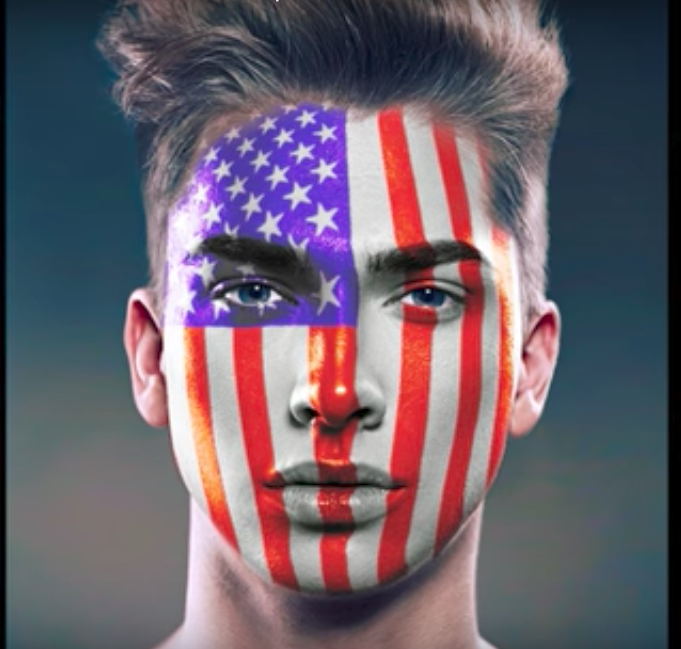
Photoshop Tutorial: FACE PAINT! How to Paint Graphics onto a Face.
Figuration: Tutorial
Description
Photo provided by http://www.shutterstock.com
High-quality, royalty-free stock images
Image ID: 266682860
Royalty-Free Music provided by http://www.beatsuite.com
High quality, copyright-free music for YouTube.
Music track: "Race"
Blue Lightning TV Channel:
https://www.youtube.com/user/bluelightningtv
My Website:
http://www.bluelightningtv.com/
Become a Patron to Blue Lightning TV:
https://www.patreon.com/bluelightningtv
For a limited time, get 20% off Photoshop CC + Lightroom + 20 GB all together for $7.99/month p/month!:
http://goo.gl/QFznn7
Facebook:
https://goo.gl/fHLJsh
Tumblr:
http://bluelightningtv.tumblr.com/
Twitter:
https://twitter.com/bluelightningtv
Google+:
https://plus.google.com/u/0/+MartyGeller
Pinterest:
https://www.pinterest.com/bluelightningtv/
LinkedIn:
www.linkedin.com/in/martygeller
Metadata
| Video ID | 42 | Youtube URL | Photoshop Tutorial: FACE PAINT! How to Paint Graphics onto a Face. |
|---|---|
| Captions Available | Yes |
| Captions Downloadable | Yes |
| Playlists | |
| Duration | 00:08:33 |
| Definition | hd |
| Keywords | |
| License | youtube |
| Embeddable | Yes |
| Views | 727115 |
| Likes | 8217 |
| Dislikes | 169 |
| Favourites | 0 |
| Comments | 513 |
| Created | 2017-05-04 1:00:42 PM |
| Updated | 2017-05-04 1:09:57 PM |
Captions
ASR: en
0:00:08.790,0:00:14.070
hi this is Marty from Blue Lightning TV
0:00:11.820,0:00:17.550
I'm going to show you how to paint
0:00:14.070,0:00:20.460
images onto someone's face this effect
0:00:17.550,0:00:25.050
works great for flags and sports team
0:00:20.460,0:00:27.540
logos before we begin I want to mention
0:00:25.050,0:00:29.250
that this tutorial utilizes features
0:00:27.540,0:00:31.800
from Adobe's current version of
0:00:29.250,0:00:34.620
Photoshop that's included in the Adobe
0:00:31.800,0:00:36.899
Creative Cloud photography plan for a
0:00:34.620,0:00:39.780
limited time my viewers can receive a
0:00:36.899,0:00:43.290
20% discount when you subscribe or
0:00:39.780,0:00:45.840
upgrade to this plan it's only $7.99 per
0:00:43.290,0:00:48.780
month click the link in my video's
0:00:45.840,0:00:50.640
description to get the discount open an
0:00:48.780,0:00:53.040
image of someone you'd like to use for
0:00:50.640,0:00:55.590
this project it's best if your subject
0:00:53.040,0:00:57.690
is facing directly into the camera I
0:00:55.590,0:01:01.290
downloaded this image from
0:00:57.690,0:01:03.000
shutterstock.com also find the graphic
0:01:01.290,0:01:05.850
that you'd like to paint onto the face
0:01:03.000,0:01:08.790
for this example I'll use the New York
0:01:05.850,0:01:10.829
Mets logo the first thing we'll do is to
0:01:08.790,0:01:13.130
convert your subject into a smart object
0:01:10.829,0:01:15.870
so we can modify it non-destructively
0:01:13.130,0:01:18.240
it'll also allow us to replace the
0:01:15.870,0:01:22.110
subject at any time without having to
0:01:18.240,0:01:24.080
redo all the effects click the icon at
0:01:22.110,0:01:28.670
the upper right of the layers panel and
0:01:24.080,0:01:28.670
click convert to smart object
0:01:30.010,0:01:34.970
open back the list and click duplicate
0:01:33.490,0:01:38.360
layer
0:01:34.970,0:01:45.689
open the flyout document list and click
0:01:38.360,0:01:48.450
new type in displacement then click OK
0:01:45.689,0:01:50.789
this duplicate layer will be used as a
0:01:48.450,0:01:53.689
displacement map which will warp the
0:01:50.789,0:01:57.710
graphic around the contours of the face
0:01:53.689,0:01:57.710
go to filter blur
0:01:58.000,0:02:03.670
and Gaussian blur upload three pixels
0:02:01.660,0:02:05.230
however you may want to adjust this
0:02:03.670,0:02:08.380
amount depending on the size and
0:02:05.230,0:02:11.290
resolution of your image blur your image
0:02:08.380,0:02:13.629
approximately this much
0:02:11.290,0:02:17.800
click the adjustment layer icon and
0:02:13.629,0:02:19.810
click black/white
0:02:17.800,0:02:22.050
this removes all the color from your
0:02:19.810,0:02:22.050
image
0:02:22.080,0:02:28.970
to file and save as
0:02:25.800,0:02:28.970
save it to your desktop
0:02:29.709,0:02:33.000
a PSD file
0:02:33.210,0:02:39.210
save
0:02:34.990,0:02:39.210
if you see this message click okay
0:02:39.620,0:02:45.349
click the X on the right up
0:02:41.930,0:02:47.209
the displacement file to close it next
0:02:45.349,0:02:49.099
we'll make a selection around the face
0:02:47.209,0:02:51.319
of your subject there are many ways to
0:02:49.099,0:02:53.720
do this and your method should depend on
0:02:51.319,0:02:56.510
the characteristics of your image for
0:02:53.720,0:02:59.540
this example I'll use the quick
0:02:56.510,0:03:02.450
selection tool with the radius of 10
0:02:59.540,0:03:04.189
pixels if you're using this tool as well
0:03:02.450,0:03:06.439
you may want to adjust the radius amount
0:03:04.189,0:03:08.080
depending on your images size and
0:03:06.439,0:03:10.900
resolution
0:03:08.080,0:03:14.230
drag your tool of your subjects face but
0:03:10.900,0:03:17.950
not the ears and neck to remove areas
0:03:14.230,0:03:21.720
press and hold alt or option as you drag
0:03:17.950,0:03:21.720
your tool over those areas
0:03:23.990,0:03:30.700
click the refine edge button or go to
0:03:26.900,0:03:34.599
select and refine edge
0:03:30.700,0:03:36.560
check smart radius and brush over the
0:03:34.599,0:03:38.780
hairline
0:03:36.560,0:03:42.050
smart radius automatically adapts the
0:03:38.780,0:03:45.190
radius to the image edges
0:03:42.050,0:03:48.190
I'll put it as a layer mask and click
0:03:45.190,0:03:48.190
okay
0:03:49.080,0:03:55.760
click the adjustment layer icon and
0:03:51.450,0:03:55.760
click black/white
0:03:56.340,0:04:02.130
drag the face layer mask over the top
0:03:59.190,0:04:05.390
layer mask to replace it if you see this
0:04:02.130,0:04:05.390
message click yes
0:04:07.550,0:04:12.860
to see the color of the eyes we need to
0:04:10.400,0:04:16.040
reveal them through the layer mask first
0:04:12.860,0:04:21.100
zoom into the eyes by pressing Z on your
0:04:16.040,0:04:21.100
keyboard and drag the tool over the eyes
0:04:21.970,0:04:28.600
open your brush tool
0:04:25.450,0:04:29.650
and brush picker will take care of the
0:04:28.600,0:04:32.380
size in a moment
0:04:29.650,0:04:35.100
make sure the hardness is 0% and the
0:04:32.380,0:04:39.390
opacity and flow are a hundred percent
0:04:35.100,0:04:39.390
then press Enter or return
0:04:39.820,0:04:44.830
to make your brush bigger or smaller
0:04:41.920,0:04:47.230
press the right or left bracket key on
0:04:44.830,0:04:50.670
your keyboard brush inside both eyes to
0:04:47.230,0:04:50.670
reveal their colors
0:04:50.780,0:04:57.139
to fit your image back onto your screen
0:04:53.030,0:04:59.699
press ctrl or command 0
0:04:57.139,0:05:01.690
open a graphic that you like to paint on
0:04:59.699,0:05:06.270
to the face
0:05:01.690,0:05:06.270
convert it into a smart object
0:05:07.020,0:05:12.630
press v2 open your move tool and drag
0:05:09.840,0:05:15.120
the graphic onto the tab of your subject
0:05:12.630,0:05:18.900
without releasing your mouse or pen drag
0:05:15.120,0:05:21.380
it down onto the image and release to
0:05:18.900,0:05:25.500
see your subject under it
0:05:21.380,0:05:28.740
reduce the graphics opacity
0:05:25.500,0:05:32.700
to resize it open your transform tool by
0:05:28.740,0:05:35.250
pressing ctrl or command T go to a
0:05:32.700,0:05:38.010
corner and when you see a diagonal
0:05:35.250,0:05:40.800
double-arrow press and hold alt or
0:05:38.010,0:05:44.220
option + shift as you drag the transform
0:05:40.800,0:05:46.500
to a size smaller than the face drag it
0:05:44.220,0:05:49.800
to the center and if you need to adjust
0:05:46.500,0:05:52.560
its size so it sits approximately
0:05:49.800,0:05:54.800
between the cheekbones then press Enter
0:05:52.560,0:05:54.800
or return
0:05:55.279,0:06:04.220
go to filter distort and pinch
0:06:01.730,0:06:07.100
zoom out of its preview window so you
0:06:04.220,0:06:08.990
can see your entire graphic drag the
0:06:07.100,0:06:10.670
amount to approximate the amount of
0:06:08.990,0:06:14.150
curve of your subjects face
0:06:10.670,0:06:17.500
for this example I'll make it minus 78
0:06:14.150,0:06:17.500
and click OK
0:06:17.860,0:06:22.960
let's finesse it shape more so it sits
0:06:20.590,0:06:25.800
comfortably over the face open your
0:06:22.960,0:06:25.800
transform tool
0:06:25.960,0:06:29.500
see this message it's essentially
0:06:27.699,0:06:31.569
telling us that the bulging effect of
0:06:29.500,0:06:34.389
our graphic will be temporarily turned
0:06:31.569,0:06:36.319
off as we use the transform tool click
0:06:34.389,0:06:38.850
OK
0:06:36.319,0:06:41.340
make it smaller
0:06:38.850,0:06:43.410
go to the middle of the side and when
0:06:41.340,0:06:46.620
you see a horizontal double-arrow press
0:06:43.410,0:06:50.900
and hold alt or option + shift as you
0:06:46.620,0:06:53.130
drag it in then press Enter or return
0:06:50.900,0:06:56.330
continue to adjust it until you're happy
0:06:53.130,0:06:56.330
with its size and shape
0:06:56.570,0:07:05.080
make its opacity 50% and change its
0:07:00.980,0:07:05.080
blend mode to color burn
0:07:05.510,0:07:09.930
next we'll wrap it around the
0:07:07.840,0:07:16.139
Torres at the face
0:07:09.930,0:07:18.919
go to filter distort and displace make
0:07:16.139,0:07:22.520
the horizontal and vertical scales 5
0:07:18.919,0:07:25.760
stretch to fit and repeat edge pixels
0:07:22.520,0:07:28.750
then click OK
0:07:25.760,0:07:32.240
on the desktop click the displacement
0:07:28.750,0:07:35.380
PSD file that you saved earlier then
0:07:32.240,0:07:35.380
click open
0:07:35.889,0:07:40.870
next we'll high the areas of the graphic
0:07:38.500,0:07:42.939
that extend past our subjects face as
0:07:40.870,0:07:46.330
well as reveal the eyes through the
0:07:42.939,0:07:48.909
graphic to do this press and hold alt or
0:07:46.330,0:07:52.539
option as you drag a copy of the face
0:07:48.909,0:07:56.699
layer mask next to the graphic click the
0:07:52.539,0:07:59.770
adjustment layer icon and click vibrance
0:07:56.699,0:08:02.469
to confine the vibrance adjustment layer
0:07:59.770,0:08:05.139
to just the graphic on the face drag a
0:08:02.469,0:08:08.379
copy of the face layer mask on top of
0:08:05.139,0:08:12.270
the vibrance layer mask as before click
0:08:08.379,0:08:12.270
yes to replace the layer mask
0:08:13.230,0:08:19.950
click the vibrance icon and drag the
0:08:16.710,0:08:23.600
vibrance slider to a hundred and make
0:08:19.950,0:08:23.600
the saturation 20
0:08:24.720,0:08:30.990
this is Marty from Blue Lightning TV
0:08:27.849,0:08:30.990
thanks for watching
standard: en
0:00:09.260,0:00:14.960
Hi. This is Marty from Blue Lightning TV.
I'm going to show you how to paint images
0:00:14.960,0:00:21.280
onto someone's face! This effect works great
for flags and sports team logos!
0:00:23.020,0:00:26.320
Before we begin, I want to mention that this tutorial
0:00:26.320,0:00:29.920
utilizes features from Adobe's current version of Photoshop
0:00:29.920,0:00:34.000
that's included in the Adobe Creative Cloud Photography Plan.
0:00:34.460,0:00:41.200
For a limited time, my viewers can receive a 20% discount when you subscribe or upgrade to this plan.
0:00:41.540,0:00:47.860
It's only $7.99 per month! Click the link in my video's description to get the discount.
0:00:48.360,0:00:51.360
Open an image of someone you'd like to use for this project.
0:00:51.780,0:00:54.440
It's best your subject is facing directly
0:00:54.440,0:01:01.379
into the camera. I downloaded this image from
Shutterstock.com. Also, find an graphic that
0:01:01.379,0:01:07.059
you'd like to paint onto the face. For this
example, I'll use the New York Mets logo.
0:01:07.300,0:01:12.320
The first thing we'll do is to convert your
subject into a Smart Object, so we can modify
0:01:12.320,0:01:17.800
it nondestructively. It'll also allows us
to replace the subject at any time without
0:01:17.800,0:01:23.280
having to redo all the effects. Click the
icon at the upper, right of the the Layers
0:01:23.280,0:01:27.560
panel and click "Convert to Smart Object".
0:01:30.340,0:01:34.200
Open back the list and click "Duplicate Layer".
0:01:35.540,0:01:44.720
Open the fly-out Document list and click,
"New". Type in "Displacement". Then, click OK.
0:01:46.160,0:01:51.380
This duplicate layer will be used as a
"displacement map", which will warp the graphic
0:01:51.390,0:02:02.080
around the contours of the face. Go to Filter,
Blur and Gaussian Blur. I'll blur it 3 pixels,
0:02:02.080,0:02:06.700
however, you may want to adjust this amount
depending on the size and resolution of your
0:02:06.700,0:02:14.730
image. Blur your image approximately this
much. Click the Adjustment layer icon and
0:02:14.730,0:02:24.910
click "Black White". This removes all the
color from your image. Go to File and "Save As".
0:02:26.260,0:02:34.100
Save it to your Desktop as a Photoshop
PSD file and click "Save".
0:02:35.180,0:02:37.500
If you see this message, click OK.
0:02:39.980,0:02:44.100
Click the "x" on the right
of the tab of the Displacement file to close it.
0:02:44.780,0:02:49.099
Next, we'll make a selection around the
face of your subject. There are many ways
0:02:49.099,0:02:54.019
to do this and your method should depend on
the characteristics of your image. For this
0:02:54.019,0:03:01.370
example, I'll use the Quick Selection Tool
with a radius of 10 pixels. If you're using
0:03:01.370,0:03:05.769
this tool, as well, you may want to adjust
the radius amount depending on your image's
0:03:05.769,0:03:12.809
size and resolution. Drag your tool over your
subject's face, but not the ears and neck.
0:03:13.280,0:03:20.320
To remove areas, press and hold Alt or Option
as you drag your tool over those areas.
0:03:24.360,0:03:34.180
Click the Refine Edge button or go to Select and
Refine Edge. Check Smart Radius and brush
0:03:34.189,0:03:40.829
over the hairline. Smart Radius automatically
adapts the radius to the image edges.
0:03:42.460,0:03:46.640
Output it as a "Layer Mask" and click OK.
0:03:49.560,0:03:54.040
Click the Adjustment Layer icon and click "Black White".
0:03:56.860,0:04:04.100
Drag the face layer mask over the top layer
mask to replace it. If you see this message, click "Yes".
0:04:08.100,0:04:12.600
To see the color of the eyes,
we need to reveal them through the layer mask.
0:04:12.609,0:04:19.629
First, zoom into the eyes by pressing "z"
on your keyboard and drag the tool over the eyes.
0:04:22.360,0:04:29.680
Open your Brush Tool and Brush Picker.
We'll take care of the size in a moment.
0:04:29.980,0:04:38.140
Make sure the Hardness is 0% and the Opacity and
Flow are 100%. Then, press Enter or Return.
0:04:40.160,0:04:45.760
To make your brush bigger or smaller, press
the right or left bracket key on your keyboard.
0:04:46.020,0:04:49.020
Brush inside both eyes to reveal their colors.
0:04:51.280,0:04:55.700
To fit your image back onto your screen, press Ctrl or Cmd + 0.
0:04:57.760,0:05:00.920
Open a graphic that you'd like to paint onto the face.
0:05:02.140,0:05:04.360
Convert it into a Smart Object.
0:05:07.440,0:05:11.880
Press "v" to open your Move
Tool and drag the graphic onto the tab of
0:05:11.889,0:05:17.460
your subject. Without releasing your computer
mouse or pen, drag it down onto the image
0:05:17.460,0:05:23.840
and release. To see your subject under it,
reduce the graphic's opacity.
0:05:25.960,0:05:31.260
To resize it, open your Transform Tool by pressing Ctrl
or Cmd + T.
0:05:32.240,0:05:34.960
Go to a corner and when you see
0:05:34.960,0:05:41.150
a diagonal, double-arrow, press and hold Alt
or Option + Shift as you drag the Transform
0:05:41.150,0:05:47.210
to a size smaller than the face. Drag it to
the center and if you need to, adjust its
0:05:47.210,0:05:53.590
size, so it sits approximately between the
cheekbones. Then, press Enter or Return.
0:05:55.760,0:06:06.040
Go to Filter, Distort and Pinch. Zoom out of
its Preview window, so you can see your entire graphic.
0:06:06.580,0:06:11.479
Drag the Amount to approximate the
amount of curve of your subject's face. For
0:06:11.479,0:06:15.899
this example, I'll make it minus 78 and click OK.
0:06:18.340,0:06:22.180
Let's finesse its shape more, so it sits comfortably over the face.
0:06:22.500,0:06:27.659
Open your Transform
Tool and when you see this message, it's essentially
0:06:27.659,0:06:32.139
telling us that the bulging effect of our
graphic will be be temporarily turned off
0:06:32.139,0:06:41.210
as we use the Transform Tool. Click OK. Make
it smaller, go to the middle of the side and
0:06:41.210,0:06:47.150
when you see a horizontal, double-arrow, press
and hold Alt or Option + Shift as you drag
0:06:47.150,0:06:54.890
it in. Then, press Enter or Return. Continue
to adjust it until your happy with its size and shape.
0:06:57.080,0:07:03.540
Make its opacity: 50% and change
its Blend Mode to "Color Burn".
0:07:05.900,0:07:09.060
Next, we'll wrap it around the contours of the face.
0:07:10.400,0:07:16.240
Go to Filter, Distort and Displace. Make the
0:07:16.240,0:07:24.780
Horizontal and Vertical scales: 5, "Stretch
to Fit" and Repeat Edge Pixels". Then, click OK.
0:07:26.320,0:07:33.820
On your Desktop, click the "Displacement"
PSD file that your saved earlier. Then, click "Open".
0:07:36.260,0:07:41.520
Next, hide the areas of the graphic
that extend past our subject's face, as well
0:07:41.520,0:07:47.680
as, reveal the eyes through the graphic. To
do this, press and hold Alt or Option as you
0:07:47.680,0:07:54.550
drag a copy of the face layer mask next to
the graphic. Click the Adjustment Layer icon
0:07:54.550,0:08:01.219
and click "Vibrance". To confine the Vibrance
adjustment layer to just the graphic on the
0:08:01.219,0:08:07.960
face, drag a copy of the face layer mask on
top of the vibrance layer mask. As before,
0:08:07.960,0:08:10.640
click, "Yes" to replace the Layer Mask.
0:08:13.860,0:08:21.820
Click the Vibrance icon and drag the Vibrance slider to 100 and make the Saturation 20.
0:08:25.600,0:08:29.100
This is Marty from Blue Lightning TV. Thanks for watching!
standard: es
0:00:09.260,0:00:14.960
Hola. Soy Marty del BlueLightning TV.
Voy a mostrar cómo pintar imágenes
0:00:14.960,0:00:21.280
en la cara de alguien! Este efecto funciona muy bien
con banderas y logotipos de equipos de deportes!
0:00:23.020,0:00:26.320
Antes de empezar, quiero mencionar que este tutorial
0:00:26.320,0:00:29.920
Utiliza funciones de la versión actual de Adobe Photoshop
0:00:29.920,0:00:34.000
que están incluídos en el Plan de Fotografía de Adobe Creative Cloud.
0:00:34.460,0:00:41.200
Mis espectadores pueden recibir un 20% de descuento por tiempo limitado, al suscribirse o actualizarse a este plan.
0:00:41.540,0:00:47.860
Por sólo $ 7.99 al mes! Haga clic en el enlace en la descripción de mi vídeo para obtener el descuento.
0:00:48.360,0:00:51.360
Abra una imagen de alguien que desea utilizar para este proyecto.
0:00:51.780,0:00:54.440
Lo mejor es que el modelo este de frente. Viendo directamente
0:00:54.440,0:01:01.379
a la cámara. He descargado esta imagen desde
Shutterstock.com. Además, encontrará un gráfico que
0:01:01.379,0:01:07.059
desea pintar sobre la cara. Para esto
ejemplo, voy a utilizar el logotipo de los New York Mets.
0:01:07.300,0:01:12.320
Lo primero que vamos a hacer es convertir su
sujeto en un objeto inteligente, por lo que podemos modificar
0:01:12.320,0:01:17.800
que no destructiva. También nos permite va
para reemplazar el objeto en cualquier momento sin
0:01:17.800,0:01:23.280
tener que rehacer todos los efectos. Haga clic en el
icono en la parte superior derecha de las Capas
0:01:23.280,0:01:27.560
panel y haga clic en "Convertir en objeto inteligente".
0:01:30.340,0:01:34.200
Abrir de nuevo la lista y haga clic en "Duplicar capa".
0:01:35.540,0:01:44.720
Abra la lista de documentos mosca de salida y hacer clic,
"Nuevo". El tipo de "desplazamiento". A continuación, haga clic en Aceptar.
0:01:46.160,0:01:51.380
Esta capa duplicado se utilizará como una
"Mapa de desplazamiento", que se tuerza el gráfico
0:01:51.390,0:02:02.080
alrededor de los contornos de la cara. Ir a Filtro,
Blur y desenfoque gaussiano. Voy a desenfoque 3 píxeles,
0:02:02.080,0:02:06.700
Sin embargo, es posible que desee ajustar esta cantidad
dependiendo del tamaño y la resolución de su
0:02:06.700,0:02:14.730
imagen. Desdibujar su imagen en alrededor de este
mucho. Haga clic en el icono de la capa de ajuste y
0:02:14.730,0:02:24.910
haga clic en "Negro Blanco". Esto elimina todo el
de color con la imagen. Ir a Archivo y "Guardar como".
0:02:26.260,0:02:34.100
Guárdelo en su escritorio como Photoshop
PSD archivo y haga clic en "Guardar".
0:02:35.180,0:02:37.500
Si ve este mensaje, haga clic en Aceptar.
0:02:39.980,0:02:44.100
Haga clic en la "X" a la derecha
de la pestaña del archivo de Desplazamiento para cerrarla.
0:02:44.780,0:02:49.099
A continuación, vamos a hacer una selección alrededor del
cara de su objetivo. Hay muchas maneras
0:02:49.099,0:02:54.019
para hacer esto y su método debe depender
las características de la imagen. Para esto
0:02:54.019,0:03:01.370
ejemplo, voy a utilizar la herramienta de selección rápida
con un radio de 10 píxeles. Si utilizas
0:03:01.370,0:03:05.769
esta herramienta, además, es posible que desee ajustar
la cantidad radio en función de su imagen de
0:03:05.769,0:03:12.809
tamaño y resolución. Arrastre la herramienta sobre su
la cara del sujeto, pero no las orejas y el cuello.
0:03:13.280,0:03:20.320
Para eliminar áreas, mantenga pulsada la tecla Alt u Opción
mientras arrastra su herramienta sobre esas áreas.
0:03:24.360,0:03:34.180
Haga clic en el botón de definición de bordes o vaya a Seleccionar y
Perfeccionar borde. Compruebe inteligente Radio y cepillo
0:03:34.189,0:03:40.829
sobre la línea del cabello. Radio inteligente de forma automática
adapta el área para los bordes de la imagen.
0:03:42.460,0:03:46.640
Salida como una "máscara de capa" y haga clic en OK.
0:03:49.560,0:03:54.040
Haga clic en el icono de la capa de ajuste y haga clic en "Negro Blanco".
0:03:56.860,0:04:04.100
Arrastre la capa de máscara sobre la cara de la capa superior
enmascarar para reemplazarlo. Si ve este mensaje, haga clic en "Sí".
0:04:08.100,0:04:12.600
Para ver el color de los ojos,
tenemos que revelar a través de la máscara de capa.
0:04:12.609,0:04:19.629
En primer lugar, hacer zoom en los ojos pulsando "z"
en el teclado y arrastrar la herramienta sobre los ojos.
0:04:22.360,0:04:29.680
Abre la herramienta Cepillo y recogedor.
Nosotros nos ocuparemos del tamaño en un momento.
0:04:29.980,0:04:38.140
Asegúrese de que la dureza es 0% y la opacidad y
Flujo es el 100%. A continuación, pulse Intro o Retorno.
0:04:40.160,0:04:45.760
Para continuar con su cepillo más grande o más pequeño, pulse
la clave de soporte derecha o izquierda en el teclado.
0:04:46.020,0:04:49.020
Cepillar el interior de ambos ojos para revelar sus colores.
0:04:51.280,0:04:55.700
Para adaptarse a su imagen de nuevo en su pantalla, pulse Ctrl o Cmd + 0.
0:04:57.760,0:05:00.920
Abrir un gráfico que desea pintar sobre la cara.
0:05:02.140,0:05:04.360
Convertirlo en un objeto inteligente.
0:05:07.440,0:05:11.880
Pulse la tecla "v" para abrir su movimiento
Herramienta y arrastrar el gráfico en la pestaña de
0:05:11.889,0:05:17.460
tu asunto. Sin soltar el ordenador
ratón o la pluma, arrastre hacia abajo sobre la imagen
0:05:17.460,0:05:23.840
y liberar. Para ver el sujeto en virtud del mismo,
reducir la opacidad de la gráfica.
0:05:25.960,0:05:31.260
Para cambiar su tamaño, abra su herramienta de transformación pulsando Ctrl
o Cmd + T.
0:05:32.240,0:05:34.960
Ir a una esquina y cuando vea
0:05:34.960,0:05:41.150
una diagonal, de doble flecha, mantenga pulsada la tecla Alt
u Opción + Mayúsculas mientras arrastra la Transformación
0:05:41.150,0:05:47.210
a un tamaño más pequeño que la cara. Arrastrarlo a
el centro y si es necesario, ajustar su
0:05:47.210,0:05:53.590
tamaño, por lo que se encuentra aproximadamente entre el
pómulos. A continuación, pulse Intro o Retorno.
0:05:55.760,0:06:06.040
Ir a Filtro, Distorsión y Pinch. Alejamiento de
su ventana de vista previa, para que pueda ver todo el gráfico.
0:06:06.580,0:06:11.479
Arrastre la cantidad a aproximar la
grado de curvatura de la cara del sujeto. por
0:06:11.479,0:06:15.899
este ejemplo, voy a hacer lo menos 78 y haga clic en OK.
0:06:18.340,0:06:22.180
Vamos a Finesse su forma más, por lo que se sienta cómodamente sobre la cara.
0:06:22.500,0:06:27.659
Abra su Transform
Herramienta y cuando vea este mensaje, que es esencialmente
0:06:27.659,0:06:32.139
que nos dice que el efecto de nuestra abultada
gráfico será apagarse temporalmente
0:06:32.139,0:06:41.210
ya que utilizamos la herramienta de transformación. Haga clic en Aceptar. Hacer
más pequeño, ir al centro de la parte y
0:06:41.210,0:06:47.150
cuando vea una horizontal, de doble flecha, pulse
y mantenga la tecla Alt u Opción + Mayúsculas mientras arrastra
0:06:47.150,0:06:54.890
en. A continuación, pulse Intro o Retorno. Continuar
para ajustarlo hasta su feliz con su tamaño y forma.
0:06:57.080,0:07:03.540
Hacer su opacidad: 50% y el cambio
su modo de fusión a "Color Burn".
0:07:05.900,0:07:09.060
A continuación, vamos a lo envuelve alrededor de los contornos de la cara.
0:07:10.400,0:07:16.240
Ir a Filtro, Distorsión y desplazar. Hacer el
0:07:16.240,0:07:24.780
Horizontal y vertical de las escalas: 5, "Stretch
hasta ajustar "y Repetir píxeles de borde". A continuación, haga clic en Aceptar.
0:07:26.320,0:07:33.820
En el escritorio, haga clic en el "desplazamiento"
archivo PSD que su guardados anteriormente. A continuación, haga clic en "Abrir".
0:07:36.260,0:07:41.520
A continuación, ocultar las áreas del gráfico
que se extienden más allá de la cara de nuestra materia, y también
0:07:41.520,0:07:47.680
como, revelar los ojos a través de la gráfica. A
ello, mantenga pulsada la tecla Alt u Opción mientras
0:07:47.680,0:07:54.550
arrastrar una copia de la máscara de capa cara al lado
el gráfico. Haga clic en el icono de la capa de ajuste
0:07:54.550,0:08:01.219
y haga clic en "Intensidad". Para limitar la Intensidad
capa de ajuste para simplemente el gráfico de la
0:08:01.219,0:08:07.960
cara, arrastre una copia de la máscara de capa en la cara
la parte superior de la máscara de capa viveza. Como antes,
0:08:07.960,0:08:10.640
Haga clic en "Sí" para reemplazar la máscara de capa.
0:08:13.860,0:08:21.820
Haga clic en el icono de Intensidad y arrastre el control deslizante Intensidad a 100 y hacer que la saturación 20.
0:08:25.600,0:08:29.100
Se trata de Marty del Rayo Azul TV. ¡Gracias por ver!
standard: pt
0:00:09.260,0:00:14.960
Oi. Este é Marty da TV Blue Lightning.
Vou mostrar-lhe como pintar imagens
0:00:14.960,0:00:21.280
no rosto de alguém! Este efeito funciona muito bem
para bandeiras e logotipos de equipes de esportes!
0:00:23.020,0:00:26.320
Antes de começar, gostaria de mencionar que este tutorial
0:00:26.320,0:00:29.920
utiliza recursos da versão atual do Adobe Photoshop
0:00:29.920,0:00:34.000
que está incluído no Plano Fotografia Adobe Creative Cloud.
0:00:34.460,0:00:41.200
Por um tempo limitado meus telespectadores podem receber um desconto de 20% quando se inscreverem ou atualizarem para este plano.
0:00:41.540,0:00:47.860
É apenas US $ 7,99 por mês! Clique no link na descrição do meu vídeo para obter o desconto.
0:00:48.360,0:00:51.360
Abra uma imagem de alguém que você gostaria de usar para este projeto.
0:00:51.780,0:00:54.440
É melhor que a pessoa esteja olhando diretamente
0:00:54.440,0:01:01.379
para a câmera. Eu baixei esta imagem de
Shutterstock.com. Além disso, encontreum gráfico que
0:01:01.379,0:01:07.059
você gostaria de pintar sobre o rosto. Para este
exemplo vou usar o logotipo do New York Mets.
0:01:07.300,0:01:12.320
A primeira coisa que vamos fazer é converter a
figura em um objeto inteligente, para que possamos modificar
0:01:12.320,0:01:17.800
de forma não destrutiva. Vai também nos permitir substituir a imagem a qualquer momento, sem
0:01:17.800,0:01:23.280
ter que refazer todos os efeitos. Clique no
ícone na parte superior direita do Painel de Camadas
0:01:23.280,0:01:27.560
e clique em "Converter em Objeto Inteligente".
0:01:30.340,0:01:34.200
Abra novamente a lista e clique em "Duplicar Camada".
0:01:35.540,0:01:44.720
Abra a lista suspensa Documento e clique
"Novo". Digite "Displacement". Em seguida, clique em OK.
0:01:46.160,0:01:51.380
Esta camada duplicada vai ser utilizada como um
"Mapa de deslocamento", que irá deformar o gráfico
0:01:51.390,0:02:02.080
em torno dos contornos da face. Vá para Filtro,
Desfoque e Desfoque Gaussiano. Vou desfocar 3 pixels,
0:02:02.080,0:02:06.700
no entanto, você pode querer ajustar esta quantidade dependendo do tamanho e da resolução da sua imagem.
0:02:06.700,0:02:14.730
Desfoque sua imagem aproximadamente esta quantidade. Clique no ícone de Ajuste de Camada e
0:02:14.730,0:02:24.910
clique em "Preto-e-Branco". Isso remove todos as
cores da sua imagem. Vá em Arquivo e "Salvar como".
0:02:26.260,0:02:34.100
Salve em sua área de trabalho como um arquivo Photoshop PSD e clique em "Salvar".
0:02:35.180,0:02:37.500
Se aparecer esta mensagem, clique em OK.
0:02:39.980,0:02:44.100
Clique no botão "X" à direita
da aba do arquivo "Displacement" para o fechar.
0:02:44.780,0:02:49.099
A seguir vamos fazer uma seleção em torno da face da sua figura. Existem muitas maneiras
0:02:49.099,0:02:54.019
para fazer isso e o seu método deve depender das características de sua imagem. Para este
0:02:54.019,0:03:01.370
exemplo, vou usar a ferramenta de seleção rápida com um raio de 10 pixels. Se você estiver usando
0:03:01.370,0:03:05.769
esta ferramenta também, você pode querer ajustar a quantidade de raio dependendo do tamanho e da resulução
0:03:05.769,0:03:12.809
da sua imagem. Arraste a ferramenta sobre o rosto da sua foto, mas não nas orelhas e no pescoço.
0:03:13.280,0:03:20.320
Para remover áreas pressione e segure a tecla Alt ou Option enquanto arrasta a ferramenta sobre essas áreas.
0:03:24.360,0:03:34.180
Clique no botão Refinar Aresta ou vá em Selecionar e Refinar Aresta. Marque Raio Inteligente e pincele
0:03:34.189,0:03:40.829
ao redor da linha do cabelo. O Raio Inteligente automaticamente adapta o raio para as bordas da imagem.
0:03:42.460,0:03:46.640
Em "Saída Para" escolha "Máscara de Camada" e clique em OK.
0:03:49.560,0:03:54.040
Clique no ícone de Ajuste de Camada e clique em
"Preto-e-Branco".
0:03:56.860,0:04:04.100
Arraste a máscara de camada da face para a camada superior para substituí-la. Se aparecer esta mensagem, clique em "Sim".
0:04:08.100,0:04:12.600
Para ver a cor dos olhos, precisamos revelá-los através da máscara de camada.
0:04:12.609,0:04:19.629
Primeiro, aumente o zoom para os olhos pressionando a tecla "Z" no teclado e arraste a ferramenta sobre os olhos.
0:04:22.360,0:04:29.680
Abra sua Ferramenta Pincel e o Seletor de Pincel. Nós vamos cuidar do tamanho em um momento.
0:04:29.980,0:04:38.140
Certifique-se que a dureza é 0%, a opacidade e o Fluxo sejam 100%. Em seguida pressione Enter ou Return.
0:04:40.160,0:04:45.760
Para fazer o seu pincel maior ou menor, pressione a tecla colchete direito ou esquerdo do teclado.
0:04:46.020,0:04:49.020
Pincele dentro de ambos os olhos para revelar suas cores.
0:04:51.280,0:04:55.700
Para ajustar sua imagem de volta para sua tela, pressione Ctrl ou Cmd + 0.
0:04:57.760,0:05:00.920
Abra um gráfico que você gostaria de pintar sobre o rosto.
0:05:02.140,0:05:04.360
Converta-o em um objeto inteligente.
0:05:07.440,0:05:11.880
Pressione "V" para abrir a sua Ferramenta Mover e arraste o gráfico para a aba do
0:05:11.889,0:05:17.460
rosto. Sem soltar o seu mouse ou caneta, arraste-o para baixo na imagem
0:05:17.460,0:05:23.840
e solte. Para ver o rosto sob ele, reduza a opacidade do gráfico.
0:05:25.960,0:05:31.260
Para redimensioná-lo, abra a Ferramenta Transformação Livre, pressionando Ctrl
ou Cmd + T.
0:05:32.240,0:05:34.960
Vá para um canto e quando você estiver vendo
0:05:34.960,0:05:41.150
uma seta dupla diagonal, pressione e segure a tecla Alt ou Option + Shift enquanto arrasta a Ferramenta Transformação Livre
0:05:41.150,0:05:47.210
para um tamanho menor do que a face. Arraste-o para o centro e se for necessário, ajuste o seu
0:05:47.210,0:05:53.590
tamanho, de modo que ele fique aproximadamente entre as maçãs do rosto. Em seguida, pressione Enter ou Return.
0:05:55.760,0:06:06.040
Vá para Filtro, Distorção e Sucção. Diminua o Zoom da sua janela de visualização, assim você pode ver todo o seu gráfico.
0:06:06.580,0:06:11.479
Arraste o controle de Intensidade para aproximar à quantidade de curva do rosto da sua foto.
0:06:11.479,0:06:15.899
Para este exemplo, eu vou escolher "-78" e clicar em OK.
0:06:18.340,0:06:22.180
Vamos refinar mais sua forma e assentá-la confortavelmente sobre o rosto.
0:06:22.500,0:06:27.659
Abra sua Ferramenta Transformação Livre e quando aparecer esta mensagem, é essencialmente
0:06:27.659,0:06:32.139
para nos dizer que o efeito abaulamento do nosso gráfico será temporariamente desligado
0:06:32.139,0:06:41.210
quando nós usamos a Ferramenta Transformação Livre. Clique em OK. Faça-a menor, vá para a metade do lado e
0:06:41.210,0:06:47.150
quando aparecer uma seta dupla horizontal pressione e segure a tecla Alt ou Option + Shift enquanto arrasta
0:06:47.150,0:06:54.890
Em seguida, pressione Enter ou Return. Continue o ajuste até que esteja satisfeito com seu tamanho e forma.
0:06:57.080,0:07:03.540
Defina a opacidade: 50% e troque
o Modo de Mesclagem para "Superexposição de Cores".
0:07:05.900,0:07:09.060
A seguir vamos envolvê-la em torno dos contornos do rosto.
0:07:10.400,0:07:16.240
Vá para Filtro, Distorção e Deslocar. Faça as
0:07:16.240,0:07:24.780
escalas Horizontal e Vertical: 5, "Ajustar ao Tamanho" e "Repetir Pixels da Aresta". Em seguida, clique em OK.
0:07:26.320,0:07:33.820
Em sua área de trabalho, clique no arquivo "Displacement" PSD que você salvou anteriormente. Em seguida, clique em "Abrir".
0:07:36.260,0:07:41.520
Em seguida, esconda as áreas do gráfico
que se estendem atrás do rosto da nossa foto,
0:07:41.520,0:07:47.680
também como revelar os olhos através do gráfico. Para fazer isso, pressione e segure a tecla Alt ou Option enquanto
0:07:47.680,0:07:54.550
arrasta uma cópia da máscara de camada do rosto para o lado do gráfico. Clique no ícone de Ajuste de Camada
0:07:54.550,0:08:01.219
e clique em "Vibratilidade". Para limitar o ajuste de vibratilidade da camada para apenas o gráfico no
0:08:01.219,0:08:07.960
rosto, arraste uma cópia da máscara de camada do rosto para topo da máscara de camada "Vibratilidade". Como antes,
0:08:07.960,0:08:10.640
clique "Sim" para substituir a Máscara de Camada.
0:08:13.860,0:08:21.820
Clique no ícone de Vibratilidade e arraste o controle deslizante Vibratilidade para 100 e faça a Saturação 20.
0:08:25.600,0:08:29.100
Este é Marty da TV Blue Lightning.
Obrigado por assistir!
Profiles
Profile 1
| Purpose | Tutorial (why) |
|---|---|
| Content | |
| Participants | nameless (m) model, Photoshop (m) geek, Audience |
| Form | Tutorial (how) |
| Time | |
| Place |
Profile 2
| Purpose | Tutorial |
|---|---|
| Content | Portrait |
| Participants | nameless (m) model, Photoshop (m) geek |
| Form | Tutorial (how) |
| Time | Real time |
| Place | Desktop |
Profile 4
| Purpose | |
|---|---|
| Content | Portrait |
| Participants | |
| Form | |
| Time | |
| Place |