How to Make Eyes Sparkle in Photoshop
Figuration: Tutorial
Description
Lightening up the eyes helps grab the attention of the viewer towards the portrait and hence it forms a very essential but often ignored part of portrait photography retouching.
Metadata
| Video ID | 510 | Youtube URL | How to Make Eyes Sparkle in Photoshop |
|---|---|
| Captions Available | No |
| Captions Downloadable | Yes |
| Playlists | |
| Duration | 00:07:00 |
| Definition | hd |
| Keywords | |
| License | youtube |
| Embeddable | Yes |
| Views | 837 |
| Likes | 48 |
| Dislikes | 0 |
| Favourites | 0 |
| Comments | 6 |
| Created | 2017-05-04 1:00:47 PM |
| Updated | 2017-05-04 1:15:07 PM |
Captions
ASR: en
0:00:00.000,0:00:03.929
in this video we gonna learn how to make
0:00:01.800,0:00:06.720
your eyes sparkle by adding a catch
0:00:03.929,0:00:09.030
light besides it also adds depth to your
0:00:06.720,0:00:18.930
eyes so are you ready well be waiting
0:00:09.030,0:00:20.400
for them let's get started before we
0:00:18.930,0:00:22.980
begin I gotta tell you something up
0:00:20.400,0:00:25.170
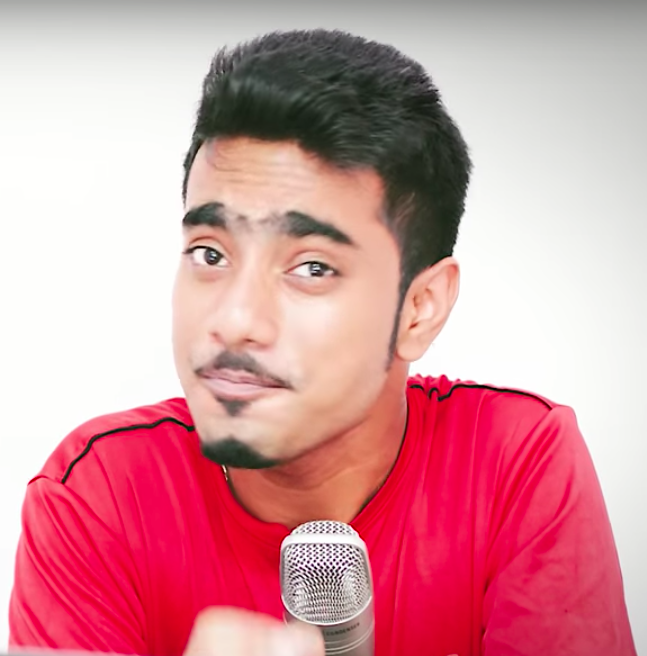
front if the subjects I already has a
0:00:22.980,0:00:27.000
cache light you don't need to add it
0:00:25.170,0:00:29.310
makes no sense to do it for example in
0:00:27.000,0:00:32.640
this image as you can see it already has
0:00:29.310,0:00:34.500
the light of the softbox so you don't
0:00:32.640,0:00:36.510
need to do it so let's get started with
0:00:34.500,0:00:39.450
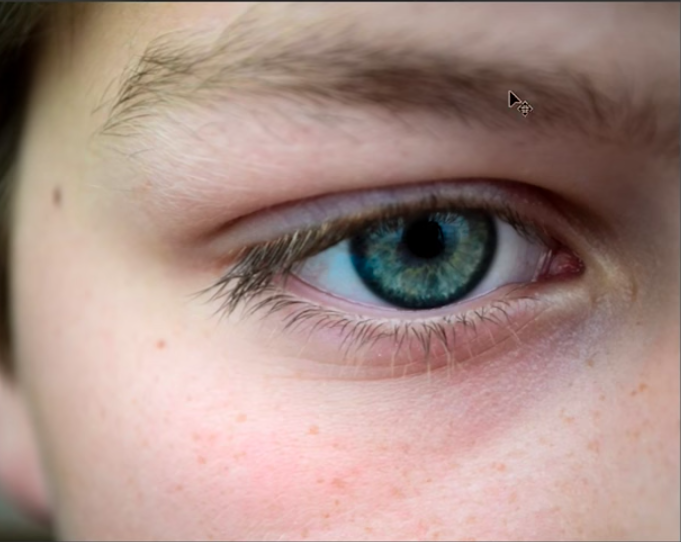
an example today so today we're going to
0:00:36.510,0:00:40.800
add catch light to this I so the first
0:00:39.450,0:00:44.040
thing that you need to do you need to
0:00:40.800,0:00:46.079
determine the source of light varies the
0:00:44.040,0:00:49.230
light coming from and what is the source
0:00:46.079,0:00:51.840
of light number one determine what is
0:00:49.230,0:00:55.620
the source of light so in this case as
0:00:51.840,0:00:58.379
it seems it's the Sun so what's the
0:00:55.620,0:01:01.829
shape of the source of light circum if
0:00:58.379,0:01:05.309
the source of light was a softbox or it
0:01:01.829,0:01:08.909
was a special kind of LED or even a
0:01:05.309,0:01:11.010
light ring so the cache light would also
0:01:08.909,0:01:12.930
have been of the same shape hence in
0:01:11.010,0:01:15.590
this case the shape of the source of
0:01:12.930,0:01:19.229
light is circled determined number to
0:01:15.590,0:01:20.700
determine the direction of light so
0:01:19.229,0:01:22.049
various the light coming from is it
0:01:20.700,0:01:23.759
coming from the left is it coming from
0:01:22.049,0:01:25.619
the light is it coming from top bottom
0:01:23.759,0:01:28.200
vers the lights coming from and to
0:01:25.619,0:01:29.759
determine that determine the shadows in
0:01:28.200,0:01:31.590
this case as you can see the shadows are
0:01:29.759,0:01:33.540
on the left side of his face also at the
0:01:31.590,0:01:35.340
same time the light a little bit of
0:01:33.540,0:01:37.979
light is coming from the right hand side
0:01:35.340,0:01:39.900
straight up on his eyes so this conveys
0:01:37.979,0:01:42.420
that the light is coming from the right
0:01:39.900,0:01:45.090
top of the image so let's remember that
0:01:42.420,0:01:47.640
number one source of light the Sun which
0:01:45.090,0:01:51.780
is round number two direction of light
0:01:47.640,0:01:53.759
right top okay so keep that in mind now
0:01:51.780,0:01:56.219
time to create the cache light create a
0:01:53.759,0:01:58.079
new layer and make a selection with the
0:01:56.219,0:02:00.479
circle with the elliptical marquee tool
0:01:58.079,0:02:03.780
selected elliptical marquee tool and the
0:02:00.479,0:02:06.840
shortcut to which is M okay and then
0:02:03.780,0:02:08.759
create a tiny circle here see guys catch
0:02:06.840,0:02:11.250
lights are small they are not as big as
0:02:08.759,0:02:12.510
this they're small okay so once you're
0:02:11.250,0:02:15.799
satisfied with the size of the
0:02:12.510,0:02:18.180
present hold spacebar to move it
0:02:15.799,0:02:20.670
remember this shortcut when you're
0:02:18.180,0:02:21.989
making a circle with a selection or any
0:02:20.670,0:02:23.370
other selection if you want to move the
0:02:21.989,0:02:26.370
selection while you're still holding
0:02:23.370,0:02:28.920
your mouse press and hold spacebar and
0:02:26.370,0:02:31.799
you can move it okay so in this case I
0:02:28.920,0:02:34.500
think it should be this small around
0:02:31.799,0:02:37.470
here and that's pretty okay you can also
0:02:34.500,0:02:39.930
press and hold shift to make sure it's a
0:02:37.470,0:02:41.670
totally a circle and in this case you
0:02:39.930,0:02:44.430
can do that because son is completely
0:02:41.670,0:02:47.459
circle so again press shift to move
0:02:44.430,0:02:49.620
there you go now this position is pretty
0:02:47.459,0:02:53.519
good you can make it a little smaller
0:02:49.620,0:02:54.840
and leave it now fill it with white so
0:02:53.519,0:02:57.180
make sure the foreground color is white
0:02:54.840,0:02:59.190
if it's black press X to toggle between
0:02:57.180,0:03:01.799
foreground and background colour if it's
0:02:59.190,0:03:06.239
some other color press B and then press
0:03:01.799,0:03:08.459
X okay now to fill it press alt or
0:03:06.239,0:03:10.769
option + backspace okay if you're using
0:03:08.459,0:03:12.450
Mac it be optional back into the
0:03:10.769,0:03:15.599
backspace as I said alt or option or
0:03:12.450,0:03:17.549
backspace and if you still cannot do it
0:03:15.599,0:03:19.139
use the paint bucket tool to fill it
0:03:17.549,0:03:21.569
with white now once you have filled it
0:03:19.139,0:03:23.099
with white ctrl D command D if you're
0:03:21.569,0:03:25.829
using Mac's to dis select it and then
0:03:23.099,0:03:29.579
let's add a Gaussian blur go to filter
0:03:25.829,0:03:33.120
blur Gaussian blur okay now keep the
0:03:29.579,0:03:35.280
values to somewhere around I cannot tell
0:03:33.120,0:03:37.500
you the absolute values give the values
0:03:35.280,0:03:41.329
what you feel right should be the blur
0:03:37.500,0:03:45.870
of a catch light so in this case I think
0:03:41.329,0:03:48.269
it's too much maybe 10 or 15 what about
0:03:45.870,0:03:51.840
15 15 is not bad 15 is looking great
0:03:48.269,0:03:53.579
click OK now make a copy of this one to
0:03:51.840,0:03:57.840
make a copy of this one present hold alt
0:03:53.579,0:04:01.530
or option and place the copy right up to
0:03:57.840,0:04:04.680
the opposite of this and on the iris
0:04:01.530,0:04:07.470
actually this is pretty good awesome now
0:04:04.680,0:04:10.879
we need to blur it a little bit more we
0:04:07.470,0:04:13.409
would go to flirt filter filter and blur
0:04:10.879,0:04:15.359
Gaussian blur whatever was the blur
0:04:13.409,0:04:20.459
value of this one double it up so if it
0:04:15.359,0:04:22.770
was 15 keep it 30 do it ok now
0:04:20.459,0:04:25.139
let's move it a little bit you can move
0:04:22.770,0:04:27.180
this too now when you move this one you
0:04:25.139,0:04:29.160
can't move this one you this one is
0:04:27.180,0:04:31.770
moving why because this layer is
0:04:29.160,0:04:33.900
selected if you want to move this check
0:04:31.770,0:04:35.910
auto select and this automatically
0:04:33.900,0:04:39.060
selects layers a pod depending upon
0:04:35.910,0:04:41.039
which object you click on and sometimes
0:04:39.060,0:04:42.539
it's a good thing and sometimes it's not
0:04:41.039,0:04:44.370
a good thing if the objects are
0:04:42.539,0:04:46.830
overlapping each other then you might
0:04:44.370,0:04:49.740
want to check it off okay so i usually
0:04:46.830,0:04:51.569
keep it checked off and this is a
0:04:49.740,0:04:55.470
perfect position this is also a good
0:04:51.569,0:04:56.970
position now let's group both of them so
0:04:55.470,0:04:58.560
select both of them press and hold ctrl
0:04:56.970,0:05:01.380
or command and sailors select both of
0:04:58.560,0:05:03.210
them press ctrl or command G this groups
0:05:01.380,0:05:06.000
both of them now this is looking good
0:05:03.210,0:05:09.930
but it needs to be as it is modified so
0:05:06.000,0:05:12.900
change the blend mode to overlay okay
0:05:09.930,0:05:14.940
now it's looking good but the brightness
0:05:12.900,0:05:17.490
of the couch line is gone so all you
0:05:14.940,0:05:18.720
need to do also there's one demerit of
0:05:17.490,0:05:21.569
it if you change the blend mode to
0:05:18.720,0:05:23.280
overlay the cash light just goes off
0:05:21.569,0:05:25.099
from the dark areas because if you
0:05:23.280,0:05:28.229
remember from my blend mode tutorial
0:05:25.099,0:05:31.050
overlay darkens everything that is dark
0:05:28.229,0:05:34.199
brightens everything that is bright so
0:05:31.050,0:05:36.479
it goes off from the dark areas so you
0:05:34.199,0:05:39.120
need to make a copy of this group okay
0:05:36.479,0:05:41.219
and decrease the opacity quite a bit and
0:05:39.120,0:05:44.880
change the blend mode from overlay to
0:05:41.219,0:05:47.849
pass through or normal ok so this
0:05:44.880,0:05:52.039
applies to the dark areas also now you
0:05:47.849,0:05:54.690
can adjust it according to your liking
0:05:52.039,0:05:55.949
there you go so let's zoom out quite a
0:05:54.690,0:05:58.500
bit and let's look at the before and
0:05:55.949,0:06:00.719
after so let's make a group of both of
0:05:58.500,0:06:02.159
these groups so this is the before this
0:06:00.719,0:06:04.500
is the after if you want to brighten it
0:06:02.159,0:06:07.710
up even more you can always go ahead and
0:06:04.500,0:06:11.479
make a copy as group one make a copy of
0:06:07.710,0:06:13.320
group 1 not group two ok and you can
0:06:11.479,0:06:17.729
increase or decrease the opacity
0:06:13.320,0:06:19.469
according to your want 35 is fine for
0:06:17.729,0:06:21.659
this one so let's look at the before and
0:06:19.469,0:06:23.009
after so this before this is the after
0:06:21.659,0:06:24.719
so that's pretty much it for this video
0:06:23.009,0:06:25.979
hope you enjoyed it and if you did make
0:06:24.719,0:06:27.270
sure you give the like and also don't
0:06:25.979,0:06:27.729
forget to subscribe and not just
0:06:27.270,0:06:29.680
subscribe
0:06:27.729,0:06:32.050
click on that bell button to that used
0:06:29.680,0:06:33.789
to miss any future tutorials I'll see
0:06:32.050,0:06:35.979
you as my life until then stay tuned and
0:06:33.789,0:06:39.059
make sure that you keep creating also
0:06:35.979,0:06:39.059
thank you for watching
0:06:48.040,0:06:51.160
[Music]
0:06:57.889,0:06:59.949
I
Screenshots


Profiles
Profile 1
| Purpose | Tutorial |
|---|---|
| Content | Portrait |
| Participants | nameless (f) model, nameless (m) model, Photoshop (m) geek |
| Form | Tutorial (how), Mid shot, screen grab, split-screen |
| Time | |
| Place |