Photoshop Tutorial: How to Make a 3D, Pop-Out Photo Effect
Figuration: Tutorial
Description
Tutorial: Quick selection & refine edge tools: http://www.youtube.com/watch?v=jI-9Mr7cLBY
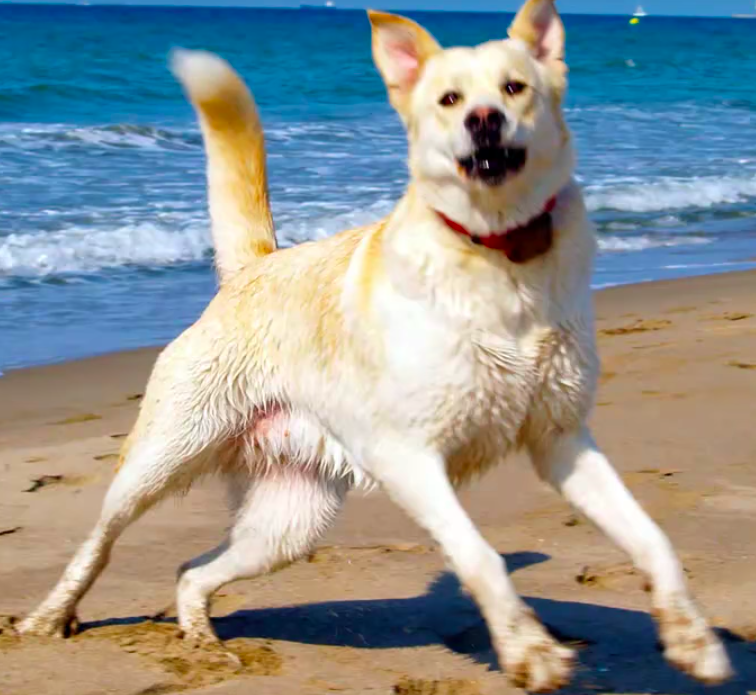
Dog photo:
http://goo.gl/AfjkhB
Subscribe to Blue Lightning TV!:
http://goo.gl/HEpuJ4
Website:
http://www.bluelightningtv.com/
For a limited time, get 20% OFF Photoshop CC + Lightroom CC + more all together for only $7.99/month:
http://goo.gl/QFznn7
Become a Patron to Blue Lightning TV:
https://www.patreon.com/bluelightningtv
Facebook:
https://goo.gl/fHLJsh
Twitter:
https://twitter.com/bluelightningtv
Metadata
| Video ID | 587 | Youtube URL | Photoshop Tutorial: How to Make a 3D, Pop-Out Photo Effect |
|---|---|
| Captions Available | No |
| Captions Downloadable | Yes |
| Playlists | |
| Duration | 00:04:56 |
| Definition | hd |
| Keywords | |
| License | youtube |
| Embeddable | Yes |
| Views | 1508338 |
| Likes | 8292 |
| Dislikes | 256 |
| Favourites | 0 |
| Comments | 794 |
| Created | 2017-05-04 1:00:48 PM |
| Updated | 2017-05-04 1:15:36 PM |
Captions
ASR: en
0:00:07.400,0:00:13.080
hi this is Marty from Blue Lightning TV
0:00:10.559,0:00:15.929
I'm going to show you a quick and easy
0:00:13.080,0:00:18.990
way to make any object person or thing
0:00:15.929,0:00:21.810
pop out of its photo giving it a kind of
0:00:18.990,0:00:25.109
three-dimensional effect this document
0:00:21.810,0:00:29.160
is 1280 by 720 pixels with a resolution
0:00:25.109,0:00:31.890
of 72 pixels per inch let's make two
0:00:29.160,0:00:37.440
copies of this background to do it press
0:00:31.890,0:00:40.230
ctrl or command J twice click on the new
0:00:37.440,0:00:42.270
layer icon to make a new layer and then
0:00:40.230,0:00:44.789
click on it and drag it below the top
0:00:42.270,0:00:46.860
layer click on the background layer to
0:00:44.789,0:00:50.460
make it active we're going to fill it
0:00:46.860,0:00:54.840
with black since black is our foreground
0:00:50.460,0:00:58.410
color press alt or option + delete click
0:00:54.840,0:01:00.539
on layer 2 we'll rename it frame click
0:00:58.410,0:01:03.600
off the eyeball on the top layer to hide
0:01:00.539,0:01:06.510
it call up your rectangular marquee tool
0:01:03.600,0:01:08.970
and click on the bottom left of your
0:01:06.510,0:01:10.979
document and drag out a rectangle that
0:01:08.970,0:01:16.070
ends below the top of the subject you're
0:01:10.979,0:01:18.630
going to pop out go to edit and Stroke
0:01:16.070,0:01:21.600
the stroke will give our rectangle a
0:01:18.630,0:01:23.640
simple border I'm choosing 12 pixels for
0:01:21.600,0:01:26.369
this photo depending on the size and
0:01:23.640,0:01:28.680
resolution of your photo you may want to
0:01:26.369,0:01:32.189
adjust this number the higher the number
0:01:28.680,0:01:34.500
the wider the border will be click
0:01:32.189,0:01:37.140
inside and make sure the color is white
0:01:34.500,0:01:39.869
if the color isn't white click on the
0:01:37.140,0:01:43.470
color box and when this window opens
0:01:39.869,0:01:46.560
choose white and click OK then click OK
0:01:43.470,0:01:48.990
in the stroke window as you can see the
0:01:46.560,0:01:51.630
stroke instantly creates a 12 pixel
0:01:48.990,0:01:53.759
white border inside the selection we can
0:01:51.630,0:01:57.899
delete the selection now by pressing
0:01:53.759,0:02:01.439
ctrl or command D go to edit transform
0:01:57.899,0:02:04.229
and perspective click on a top corner
0:02:01.439,0:02:06.689
and drag it in the perspective transform
0:02:04.229,0:02:09.830
moves both corners at the same time
0:02:06.689,0:02:13.330
click on a bottom corner and drag it out
0:02:09.830,0:02:15.190
then press Enter or return to accept it
0:02:13.330,0:02:17.140
I'd like to move the top of the
0:02:15.190,0:02:19.870
rectangle down a bit so I'll call up the
0:02:17.140,0:02:23.500
transform tool again press ctrl or
0:02:19.870,0:02:26.770
command T and go to the top middle click
0:02:23.500,0:02:29.980
and drag it down and then press Enter or
0:02:26.770,0:02:32.890
return go to the frame layer and press
0:02:29.980,0:02:35.520
ctrl or command as you click on it this
0:02:32.890,0:02:37.960
will make a selection of the frame shape
0:02:35.520,0:02:41.860
will invert the selection by pressing
0:02:37.960,0:02:45.340
ctrl shift I or command shift I press Q
0:02:41.860,0:02:48.070
to make it into a quickmask call up your
0:02:45.340,0:02:49.750
paint bucket tool and click anywhere
0:02:48.070,0:02:53.080
outside the quickmask
0:02:49.750,0:02:55.360
the paint bucket fills the rest press Q
0:02:53.080,0:02:58.180
again to change the quick mask back into
0:02:55.360,0:03:00.880
a selection click on layer 1 to make it
0:02:58.180,0:03:02.980
active and click on the layer mask this
0:03:00.880,0:03:05.010
makes the selection of the inside of the
0:03:02.980,0:03:07.630
rectangular frame into a layer mask
0:03:05.010,0:03:09.670
click the eyeball back on the top layer
0:03:07.630,0:03:12.010
to make it visible and click on the
0:03:09.670,0:03:14.230
layer to make it active we're ready to
0:03:12.010,0:03:16.270
make a selection of our dog so we can
0:03:14.230,0:03:18.280
pop it out from the background there are
0:03:16.270,0:03:20.410
many ways to do this and you should use
0:03:18.280,0:03:22.600
whatever method you find the easiest and
0:03:20.410,0:03:25.380
most effective to make a selection of
0:03:22.600,0:03:28.239
your subject for this example I'll use
0:03:25.380,0:03:31.360
cs5 s quick selection and refine edge
0:03:28.239,0:03:33.580
tools I did an in-depth tutorial on this
0:03:31.360,0:03:36.430
which I'll include the link to in this
0:03:33.580,0:03:38.860
video's description area I'm dragging my
0:03:36.430,0:03:42.190
cursor inside the area I want to select
0:03:38.860,0:03:47.020
to subtract the selection press alt or
0:03:42.190,0:03:49.870
option + then drag inside go to select
0:03:47.020,0:03:50.800
and refine edge the refine edge window
0:03:49.870,0:03:52.570
will open
0:03:50.800,0:03:54.760
there are many view modes from which you
0:03:52.570,0:03:57.630
can choose however for this example I'll
0:03:54.760,0:04:02.380
choose this mode click smart radius and
0:03:57.630,0:04:05.860
click the refine radius tool increase
0:04:02.380,0:04:08.170
the radius a bit and click OK click the
0:04:05.860,0:04:11.110
layer mask icon to make a layer mask of
0:04:08.170,0:04:12.970
the selection in this example the top of
0:04:11.110,0:04:15.640
our dog is revealed through the layer
0:04:12.970,0:04:17.799
mask click on the background to make it
0:04:15.640,0:04:20.830
active let's fill it with a black to
0:04:17.799,0:04:22.960
white linear gradient call up your
0:04:20.830,0:04:25.539
gradient tool and make sure the linear
0:04:22.960,0:04:26.920
gradient icon is highlighted if the
0:04:25.539,0:04:29.230
black to white gradient
0:04:26.920,0:04:31.780
is not in this thumbnail click on it to
0:04:29.230,0:04:34.240
open the gradient editor then click on
0:04:31.780,0:04:36.250
the black to white box and click OK
0:04:34.240,0:04:38.950
go to the top edge of your document
0:04:36.250,0:04:42.030
press shift and drag down a vertical
0:04:38.950,0:04:44.890
line to the bottom and then release
0:04:42.030,0:04:47.320
using these simple techniques you can
0:04:44.890,0:04:49.960
make anything seem to come alive and pop
0:04:47.320,0:04:51.010
out of its photo this is Marty from Blue
0:04:49.960,0:04:54.000
Lightning TV
0:04:51.010,0:04:54.000
thanks for watching
Profiles
Profile 1
| Purpose | Tutorial |
|---|---|
| Content | Portrait |
| Participants | Photoshop (m) geek, Animal |
| Form | Tutorial (how), screen grab |
| Time | |
| Place |