Photoshop Tutorial: How to Make a PORTRAIT made only of TEXT!
Figuration: Tutorial
Description
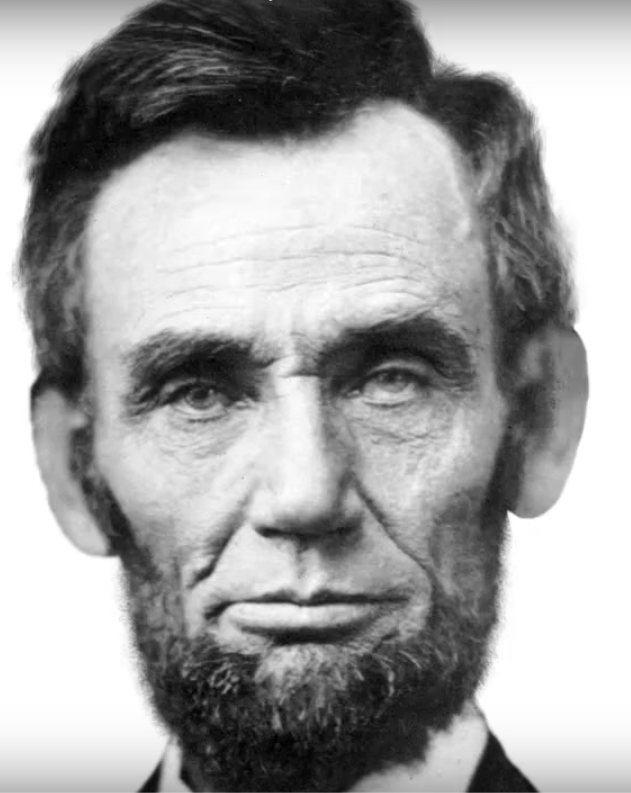
Lincoln face file:
http://bltvfiles.com/files/Lincoln.gif
Revised tutorial:
https://www.youtube.com/watch?v=FatJUqlTqr4
Subscribe to Blue Lightning TV!:
http://goo.gl/HEpuJ4
Website:
http://www.bluelightningtv.com/
For a limited time, get 20% OFF Photoshop CC + Lightroom CC + more all together for only $7.99/month:
http://goo.gl/QFznn7
Become a Patron to Blue Lightning TV:
https://www.patreon.com/bluelightningtv
Facebook:
https://goo.gl/fHLJsh
Twitter:
https://twitter.com/bluelightningtv
Metadata
| Video ID | 596 | Youtube URL | Photoshop Tutorial: How to Make a PORTRAIT made only of TEXT! |
|---|---|
| Captions Available | No |
| Captions Downloadable | Yes |
| Playlists | |
| Duration | 00:08:48 |
| Definition | hd |
| Keywords | |
| License | youtube |
| Embeddable | Yes |
| Views | 1274699 |
| Likes | 8859 |
| Dislikes | 191 |
| Favourites | 0 |
| Comments | 643 |
| Created | 2017-05-04 1:00:48 PM |
| Updated | 2017-05-04 1:15:39 PM |
Captions
ASR: en
0:00:07.790,0:00:13.230
hi this is Marty from Blue Lightning TV
0:00:10.620,0:00:15.210
i'm going to show you what i think is
0:00:13.230,0:00:17.820
the best way to make a portrait out of
0:00:15.210,0:00:19.980
texts all the examples I've seen on the
0:00:17.820,0:00:23.970
internet just grey out the words in the
0:00:19.980,0:00:25.830
mid tones like this version however in
0:00:23.970,0:00:28.859
this image all the words are black
0:00:25.830,0:00:31.500
including in the mid tone areas and not
0:00:28.859,0:00:34.410
only that you can also mix fonts and
0:00:31.500,0:00:37.590
sizes while maintaining all the correct
0:00:34.410,0:00:42.090
tonal values of the portrait I'm even
0:00:37.590,0:00:44.550
going to show you how to add color so
0:00:42.090,0:00:48.000
let's begin the image size i'm working
0:00:44.550,0:00:51.840
on is 800 x 800 pixels with a resolution
0:00:48.000,0:00:54.449
of 300 pixels per inch if you're
0:00:51.840,0:00:56.760
starting with a color photo desaturate
0:00:54.449,0:00:58.980
the color by pressing control you or
0:00:56.760,0:01:01.920
command you on a mac when the
0:00:58.980,0:01:05.299
hue/saturation window opens just slide
0:01:01.920,0:01:08.610
the saturation 20 then you're good to go
0:01:05.299,0:01:10.890
this text effect generally works best
0:01:08.610,0:01:12.600
with white around the portrait so I
0:01:10.890,0:01:14.970
would make a selection around the head
0:01:12.600,0:01:17.340
cut it out from its background and place
0:01:14.970,0:01:19.650
it on its own layer I won't be covering
0:01:17.340,0:01:22.500
the steps to do that in this tutorial in
0:01:19.650,0:01:24.420
order to save time the first thing we'll
0:01:22.500,0:01:27.150
do is go to select and choose color
0:01:24.420,0:01:29.159
range the color range window will open
0:01:27.150,0:01:33.360
click on the arrow next to sample colors
0:01:29.159,0:01:36.210
and choose shadows press ok and then
0:01:33.360,0:01:38.220
click on the new layer icon we want to
0:01:36.210,0:01:40.640
fill the selection with black so press
0:01:38.220,0:01:46.380
Alt Delete or option delete on a Mac
0:01:40.640,0:01:48.750
will rename this layer shadows now click
0:01:46.380,0:01:51.810
on the photo of aid to make it active
0:01:48.750,0:01:55.829
and then go back to select and choose
0:01:51.810,0:01:59.189
color range again this time choose
0:01:55.829,0:02:02.939
mid-tones click on the new layer icon
0:01:59.189,0:02:04.920
and then press Alt Delete or option to
0:02:02.939,0:02:09.800
lead on a Mac to fill the new layer with
0:02:04.920,0:02:12.420
black will rename this layer mid-tones
0:02:09.800,0:02:16.800
we're going to start setting our type
0:02:12.420,0:02:20.459
so hide the ABE layers and click on the
0:02:16.800,0:02:22.290
bottom layer to make it active we're
0:02:20.459,0:02:24.150
going to make a text block which
0:02:22.290,0:02:27.780
confines the text to an area we
0:02:24.150,0:02:29.790
determine so click on the text button go
0:02:27.780,0:02:32.239
up to one corner of our document and
0:02:29.790,0:02:35.819
click down with your mouse or pen and
0:02:32.239,0:02:38.040
drag down to the opposite corner by
0:02:35.819,0:02:41.280
doing this we're telling Photoshop to
0:02:38.040,0:02:44.340
fill this entire area with our text in
0:02:41.280,0:02:46.769
the example we're doing today I'll be
0:02:44.340,0:02:50.100
filling the area with a bunch of jumbled
0:02:46.769,0:02:53.549
texts this kind of text is called lorem
0:02:50.100,0:02:57.299
ipsum I'm using a website that generates
0:02:53.549,0:03:01.140
this kind of text so I'll open up my
0:02:57.299,0:03:06.180
browser and I've already typed in the
0:03:01.140,0:03:08.370
address of course you can always create
0:03:06.180,0:03:10.560
your own block of meaningful texts that
0:03:08.370,0:03:13.260
associates the person in your portrait
0:03:10.560,0:03:17.430
you just have to type in your text
0:03:13.260,0:03:19.500
inside the text block in the words field
0:03:17.430,0:03:23.130
I'm going to type in two thousand and
0:03:19.500,0:03:26.609
click generate then I'll click on the
0:03:23.130,0:03:30.269
select all button then press ctrl C or
0:03:26.609,0:03:33.180
command C on a Mac to copy the text to
0:03:30.269,0:03:36.120
choose your font and size open your text
0:03:33.180,0:03:38.910
dialog box you should choose a font that
0:03:36.120,0:03:41.579
has at least two different weights for
0:03:38.910,0:03:44.940
my shadow layer i'm using arial black at
0:03:41.579,0:03:47.640
a four point size in the paragraphs tab
0:03:44.940,0:03:51.359
click on the last box which ensures the
0:03:47.640,0:03:53.340
text to be justified on both sides click
0:03:51.359,0:03:56.190
anywhere inside the text box and press
0:03:53.340,0:03:59.250
ctrl v or command V on a Mac to paste
0:03:56.190,0:04:01.290
the text in to accept it press on the
0:03:59.250,0:04:05.670
little arrow at the top or just press
0:04:01.290,0:04:09.930
Enter or return on a Mac will rename
0:04:05.670,0:04:11.579
this text block shadows will make a copy
0:04:09.930,0:04:14.310
of it so we'll drag it to the new layer
0:04:11.579,0:04:16.859
icon then we'll hide the bottom text
0:04:14.310,0:04:18.180
block by pressing on the eyeball we're
0:04:16.859,0:04:21.150
going to choose our text for the
0:04:18.180,0:04:22.770
mid-tones now because mid-tones are
0:04:21.150,0:04:25.500
lighter than shadows
0:04:22.770,0:04:32.220
we'll choose Arial regular since it's a
0:04:25.500,0:04:37.129
lighter weight than Arial black will
0:04:32.220,0:04:37.129
rename our mid-tone text block mid-tone
0:04:37.220,0:04:42.530
since we don't need the photo of Abe
0:04:39.479,0:04:45.270
anymore we'll move it down to the bottom
0:04:42.530,0:04:47.639
will press the eyeball back on the
0:04:45.270,0:04:50.490
mid-tone portrait and will hide the
0:04:47.639,0:04:53.250
mid-tone text will click back on the
0:04:50.490,0:04:56.729
midtown portrait to make it active press
0:04:53.250,0:04:59.490
ctrl or command a and then ctrl or
0:04:56.729,0:05:01.740
command C to copy it we're going to
0:04:59.490,0:05:04.440
apply the mid-tone portrait to the
0:05:01.740,0:05:06.030
mid-tone text press on the eyeball of
0:05:04.440,0:05:09.900
the mid-tone portrait to hide it and
0:05:06.030,0:05:12.750
then make the mid-tone text active click
0:05:09.900,0:05:15.780
on the layer mask icon and then hold
0:05:12.750,0:05:18.810
down on alt or option on a Mac and click
0:05:15.780,0:05:22.469
on the layer mask press ctrl-v or
0:05:18.810,0:05:26.099
command V on a Mac to paste the mid-tone
0:05:22.469,0:05:27.960
portrait on to the layer mask will get
0:05:26.099,0:05:30.719
rid of the selection press ctrl or
0:05:27.960,0:05:33.539
command D we need to invert the layer
0:05:30.719,0:05:36.560
mask so press ctrl I or command I on a
0:05:33.539,0:05:40.139
Mac now this is where the magic begins
0:05:36.560,0:05:42.150
once you press on the eyeball you can
0:05:40.139,0:05:44.159
now see the text through the white areas
0:05:42.150,0:05:47.400
of its layer mask which are the
0:05:44.159,0:05:49.310
mid-tones of Abe's portrait we're going
0:05:47.400,0:05:52.110
to repeat the process for the shadows
0:05:49.310,0:05:55.020
make the shadows layer of Abe's portrait
0:05:52.110,0:05:58.909
active press ctrl or command a to select
0:05:55.020,0:06:02.849
it and then ctrl or command C to copy it
0:05:58.909,0:06:05.699
hide the layer and then click on the
0:06:02.849,0:06:07.620
shadows text will make a layer mask for
0:06:05.699,0:06:10.469
this text block so click on the layer
0:06:07.620,0:06:13.469
mask button and then press and hold alt
0:06:10.469,0:06:16.680
or option on a Mac as you click on the
0:06:13.469,0:06:19.009
layer mask to paste the shadow areas of
0:06:16.680,0:06:23.099
Abe's portrait into this layer mask
0:06:19.009,0:06:24.900
press ctrl or command V press ctrl or
0:06:23.099,0:06:27.569
command D to get rid of the selection
0:06:24.900,0:06:31.080
once again we need to invert the layer
0:06:27.569,0:06:34.289
mask to do this press ctrl I or command
0:06:31.080,0:06:36.060
I on a Mac once you make the text
0:06:34.289,0:06:38.610
visible by pressing on the I
0:06:36.060,0:06:43.169
you'll be able to see the shadows as
0:06:38.610,0:06:47.820
text so what we have are two separate
0:06:43.169,0:06:50.070
live fully editable text layers and we
0:06:47.820,0:06:53.280
can change each of them independently of
0:06:50.070,0:06:56.400
each other we can change any aspect of
0:06:53.280,0:06:58.350
the text including the font itself for
0:06:56.400,0:07:02.010
example let's just change the point size
0:06:58.350,0:07:04.350
26 points instantly we see the text
0:07:02.010,0:07:07.410
block reflect that change I'll press
0:07:04.350,0:07:11.550
ctrl Z to undo it will click on the
0:07:07.410,0:07:13.350
mid-tone text block to change that will
0:07:11.550,0:07:17.520
go to the character box and change the
0:07:13.350,0:07:19.800
point size from 4 points 23 the
0:07:17.520,0:07:22.979
mid-tones appear a bit lighter now since
0:07:19.800,0:07:24.840
we reduce the size of the font i'm going
0:07:22.979,0:07:27.180
to show you now how you can add color to
0:07:24.840,0:07:30.240
your portrait we need to take a
0:07:27.180,0:07:34.620
composite snapshot of abe as we see him
0:07:30.240,0:07:37.380
so press ctrl shift alt e' or command
0:07:34.620,0:07:42.270
shift option key on a Mac to place them
0:07:37.380,0:07:45.180
on a new layer press B for your brush
0:07:42.270,0:07:48.630
tool and then go to mode where you'll
0:07:45.180,0:07:50.640
change it from normal to color click on
0:07:48.630,0:07:55.710
the foreground color box and let's
0:07:50.640,0:07:57.720
choose red using color mode will allow
0:07:55.710,0:08:00.260
you to change black to any color you
0:07:57.720,0:08:02.850
want without affecting the white areas
0:08:00.260,0:08:05.310
you could also change the colors of the
0:08:02.850,0:08:08.310
portrait by using gradients click on the
0:08:05.310,0:08:10.380
gradient button on the left then click
0:08:08.310,0:08:14.250
on the gradient box at the top and that
0:08:10.380,0:08:16.889
will open up the gradient editor let's
0:08:14.250,0:08:19.080
choose this ultra colourful gradient so
0:08:16.889,0:08:21.330
you can see that all colors will show up
0:08:19.080,0:08:25.680
perfectly as long as they're in color
0:08:21.330,0:08:28.500
mode if it's on any other mode go up to
0:08:25.680,0:08:30.510
mode and change it to color with your
0:08:28.500,0:08:33.719
mouse or pen go to the top of the image
0:08:30.510,0:08:37.529
click down drag it to the bottom of the
0:08:33.719,0:08:40.110
image and release have fun making your
0:08:37.529,0:08:42.450
own portraits made up of texts that you
0:08:40.110,0:08:46.850
write this is Marty from Blue Lightning
0:08:42.450,0:08:46.850
TV thanks for watching

Profiles
Profile 1
| Purpose | Tutorial |
|---|---|
| Content | Portrait, Text |
| Participants | Photoshop (m) geek, Celebrity (m) |
| Form | Tutorial (how), screen grab |
| Time | |
| Place |