Photoshop Tutorial: How to Make a 3D, Pop-Out Card from a Photo
Figuration: Tutorial
Description
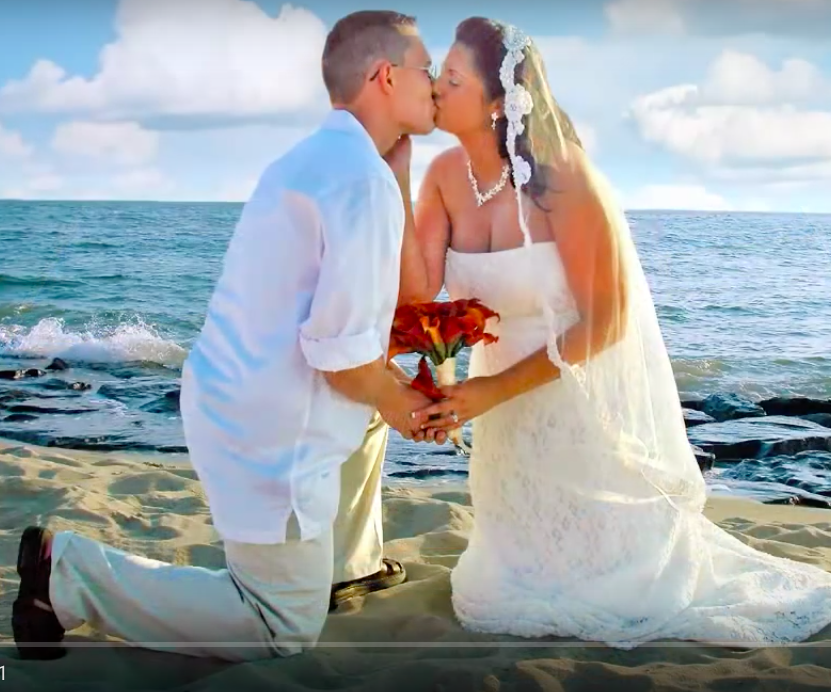
Bride & groom photo:
http://goo.gl/zAUhl6
Subscribe to Blue Lightning TV!:
http://goo.gl/HEpuJ4
Website:
http://www.bluelightningtv.com/
Get up to 20% off Photoshop + Lightroom! Only $7.99 p/month:
http://goo.gl/QFznn7
Facebook:
https://goo.gl/fHLJsh
Twitter:
https://twitter.com/bluelightningtv
Metadata
| Video ID | 95 | Youtube URL | Photoshop Tutorial: How to Make a 3D, Pop-Out Card from a Photo |
|---|---|
| Captions Available | Yes |
| Captions Downloadable | Yes |
| Playlists | |
| Duration | 00:13:12 |
| Definition | hd |
| Keywords | |
| License | youtube |
| Embeddable | Yes |
| Views | 280164 |
| Likes | 1468 |
| Dislikes | 42 |
| Favourites | 0 |
| Comments | 186 |
| Created | 2017-05-04 1:00:42 PM |
| Updated | 2017-05-04 1:10:42 PM |
Captions
ASR: en
0:00:07.490,0:00:14.250
hi this is Marty from Blue Lightning TV
0:00:10.260,0:00:16.640
in 2012 I did a tutorial showing how to
0:00:14.250,0:00:20.369
make a subject pop out of its photo
0:00:16.640,0:00:22.410
creating a 3d effect due to its
0:00:20.369,0:00:25.680
popularity we'll take it one step
0:00:22.410,0:00:29.730
further by creating the look of a 3d
0:00:25.680,0:00:32.520
pop-out style card open a photo you'd
0:00:29.730,0:00:35.070
like to use it's best if the subject is
0:00:32.520,0:00:37.710
centered and in the foreground keep in
0:00:35.070,0:00:41.430
mind since every photograph is different
0:00:37.710,0:00:44.700
the results can and will vary the size
0:00:41.430,0:00:48.140
of this document is 1500 by 1000 pixels
0:00:44.700,0:00:51.600
and a resolution of 150 pixels per inch
0:00:48.140,0:00:55.340
press ctrl or command a to select the
0:00:51.600,0:01:01.890
entire photo and then go to select and
0:00:55.340,0:01:03.570
save selection click OK to save it we
0:01:01.890,0:01:05.760
need to make a selection around the
0:01:03.570,0:01:08.430
subjects so we can cut them out from
0:01:05.760,0:01:11.490
their background for this example I'll
0:01:08.430,0:01:15.180
use the quick selection tool with a
0:01:11.490,0:01:19.350
radius of 10 pixels click and drag over
0:01:15.180,0:01:22.530
your subjects to remove areas of the
0:01:19.350,0:01:25.710
selection press and hold alt on a PC or
0:01:22.530,0:01:29.400
option on a Mac and drag over those
0:01:25.710,0:01:31.950
areas once you have your selection press
0:01:29.400,0:01:34.650
Q on your keyboard to make it into a
0:01:31.950,0:01:37.890
quick mask if you need to retouch any
0:01:34.650,0:01:40.430
areas just use your brush tool press Q
0:01:37.890,0:01:44.009
again to make it back into a selection
0:01:40.430,0:01:46.320
press ctrl or command J to cut the
0:01:44.009,0:01:49.619
subjects from their background and copy
0:01:46.320,0:01:53.189
them to their own layer go to image and
0:01:49.619,0:01:55.740
canvas size change the inches to present
0:01:53.189,0:01:58.829
and make the width and the height a
0:01:55.740,0:02:00.600
hundred and thirty percent each make the
0:01:58.829,0:02:05.009
canvas extension any color you'd like
0:02:00.600,0:02:09.950
and click OK to fit the entire document
0:02:05.009,0:02:12.540
on your screen press ctrl or command 0
0:02:09.950,0:02:16.570
make your background active
0:02:12.540,0:02:20.200
open your channels panel go to alpha 1
0:02:16.570,0:02:23.680
and control click it on a PC or command
0:02:20.200,0:02:26.260
click it on a Mac this makes the channel
0:02:23.680,0:02:29.710
into a selection open back up your
0:02:26.260,0:02:32.920
layers panel and press ctrl or command J
0:02:29.710,0:02:36.190
to cut and copy the photo make the
0:02:32.920,0:02:40.300
background active again and open your
0:02:36.190,0:02:43.390
gradient tool click on the gradient bar
0:02:40.300,0:02:45.700
to open the gradient editor click on the
0:02:43.390,0:02:50.410
third box which is the black to white
0:02:45.700,0:02:52.750
gradient then click OK go to the middle
0:02:50.410,0:02:55.660
of your photo and press and hold shift
0:02:52.750,0:03:00.220
as you drag down to the bottom of your
0:02:55.660,0:03:02.470
document then release next we need to
0:03:00.220,0:03:05.350
retouch the background and remove the
0:03:02.470,0:03:09.820
subjects from it we'll use content aware
0:03:05.350,0:03:13.780
fill but first make layer two active go
0:03:09.820,0:03:17.130
to layer 1 and control or command click
0:03:13.780,0:03:20.290
it to make a selection of its shape
0:03:17.130,0:03:25.060
click off the eyeball of layer 1 to hide
0:03:20.290,0:03:27.760
it go to select modify and expand for
0:03:25.060,0:03:30.160
this example I'll expand it by 2 pixels
0:03:27.760,0:03:32.740
for your photo you may want to
0:03:30.160,0:03:39.540
experiment with different amounts go to
0:03:32.740,0:03:42.400
edit fill and content-aware instantly
0:03:39.540,0:03:44.800
content-aware fills the selection with
0:03:42.400,0:03:49.000
your background to delete the selection
0:03:44.800,0:03:52.000
press ctrl or command D content-aware
0:03:49.000,0:03:54.730
fill isn't perfect but it does do most
0:03:52.000,0:03:56.830
of the heavy lifting keep in mind your
0:03:54.730,0:03:59.290
subjects will ultimately cover most of
0:03:56.830,0:04:02.320
this area after we angle and fold the
0:03:59.290,0:04:05.020
card however i would like to retouch
0:04:02.320,0:04:08.470
some of the glaring inconsistencies so
0:04:05.020,0:04:10.660
I'll use my clone stamp tool I covered
0:04:08.470,0:04:14.260
how to use the stamp tool in many of my
0:04:10.660,0:04:17.470
tutorials next we'll create a white
0:04:14.260,0:04:22.419
border click on the new layer icon to
0:04:17.470,0:04:25.660
make a new layer will name it border go
0:04:22.419,0:04:29.110
to layer 2 and press ctrl or command
0:04:25.660,0:04:33.880
to make a selection of its shape go to
0:04:29.110,0:04:42.100
edit and Stroke make the width 20 pixels
0:04:33.880,0:04:45.730
and the color is white delete the
0:04:42.100,0:04:49.300
selection and press ctrl or command T to
0:04:45.730,0:04:52.780
open your transform tool go to a bottom
0:04:49.300,0:04:57.040
corner and press and hold ctrl shift alt
0:04:52.780,0:05:00.010
on a PC or command shift option on a Mac
0:04:57.040,0:05:01.990
and drag it out until the corners are
0:05:00.010,0:05:06.010
fairly close to the edges of your
0:05:01.990,0:05:10.300
document go to a top corner and using
0:05:06.010,0:05:12.760
the same keystrokes drag it in go to the
0:05:10.300,0:05:16.690
top middle point and press and hold
0:05:12.760,0:05:20.140
shift as you drag it down then press
0:05:16.690,0:05:22.960
Enter or return next we'll high the
0:05:20.140,0:05:25.480
image that's outside the border and use
0:05:22.960,0:05:29.680
content aware fill to fill in the empty
0:05:25.480,0:05:31.600
areas inside the border control click or
0:05:29.680,0:05:33.670
command click on the thumbnail of the
0:05:31.600,0:05:38.940
border to make a selection of its shape
0:05:33.670,0:05:43.780
and press Q to make it into a quick mask
0:05:38.940,0:05:46.270
open your paint bucket tool and invert
0:05:43.780,0:05:49.210
the foreground and background colors by
0:05:46.270,0:05:52.680
pressing X on your keyboard or by
0:05:49.210,0:05:55.330
clicking on this small double box icon
0:05:52.680,0:05:57.940
click outside the border to delete the
0:05:55.330,0:06:01.660
quick mask leaving just the inside
0:05:57.940,0:06:05.169
intact press Q again to make the quick
0:06:01.660,0:06:10.000
mask back into a selection and invert it
0:06:05.169,0:06:13.000
by pressing ctrl or command shift I make
0:06:10.000,0:06:15.580
your card active and click on the layer
0:06:13.000,0:06:19.960
mask icon to make a layer mask of the
0:06:15.580,0:06:22.690
selection next to the card next we'll
0:06:19.960,0:06:25.419
fill in the corners make your card
0:06:22.690,0:06:29.680
active and open your rectangular marquee
0:06:25.419,0:06:34.810
tool draw a rectangle over the empty
0:06:29.680,0:06:37.300
area and go to edit and fill fill it
0:06:34.810,0:06:41.199
with content aware
0:06:37.300,0:06:44.550
and delete the selection repeat the
0:06:41.199,0:06:47.110
steps to fill in the right corner click
0:06:44.550,0:06:50.289
off the eyeball of the background to
0:06:47.110,0:06:53.680
hide the layer make a composite snapshot
0:06:50.289,0:06:57.060
of your image which will place above the
0:06:53.680,0:07:01.080
border make the border layer active and
0:06:57.060,0:07:06.250
press ctrl shift alt e' on a PC or
0:07:01.080,0:07:08.470
command shift option e on a mac now that
0:07:06.250,0:07:14.139
we have the composite snapshot we can
0:07:08.470,0:07:16.960
Trash the layers that comprised it make
0:07:14.139,0:07:20.139
your background visible go to view and
0:07:16.960,0:07:23.650
make sure rulers and snap are checked if
0:07:20.139,0:07:27.520
they're not just click on them open your
0:07:23.650,0:07:30.580
transform tool go to the left ruler and
0:07:27.520,0:07:32.620
drag out a guideline to the center it'll
0:07:30.580,0:07:35.050
snap in place because we have snapped
0:07:32.620,0:07:38.830
checked if you don't see your guideline
0:07:35.050,0:07:43.000
press ctrl or command H press Enter or
0:07:38.830,0:07:47.169
return open your rectangular marquee
0:07:43.000,0:07:50.710
tool and drag out a rectangle across the
0:07:47.169,0:07:53.469
left half of your document cut the left
0:07:50.710,0:07:57.430
half of the card and copy it to its own
0:07:53.469,0:07:59.830
layer make the full card active and drag
0:07:57.430,0:08:03.729
a rectangle across the right half of
0:07:59.830,0:08:09.129
your document cut and copy the right
0:08:03.729,0:08:11.979
half and hide the full card next will
0:08:09.129,0:08:13.750
skew up both sides of the card to make
0:08:11.979,0:08:18.039
it look like it's been folded and then
0:08:13.750,0:08:20.800
opened open your transform tool go to
0:08:18.039,0:08:24.129
the middle right and press and hold ctrl
0:08:20.800,0:08:26.710
or command + Shift + drag it up to an
0:08:24.129,0:08:31.690
angle you like then press Enter or
0:08:26.710,0:08:34.419
return go to the top ruler and drag down
0:08:31.690,0:08:37.810
a guide line until it snaps to the top
0:08:34.419,0:08:42.969
corner of the card make the left half
0:08:37.810,0:08:45.790
active open your transform tool use the
0:08:42.969,0:08:48.130
same key strokes as before and drag it
0:08:45.790,0:08:51.160
up until the top corner touches the
0:08:48.130,0:08:55.149
guideline then press Enter or return
0:08:51.160,0:08:57.670
and hide the guidelines we're going to
0:08:55.149,0:09:01.449
make the left page slightly darker and
0:08:57.670,0:09:04.360
then add a soft shadow under the entire
0:09:01.449,0:09:09.670
card click on the adjustment layer icon
0:09:04.360,0:09:12.459
and choose levels click on the clip to
0:09:09.670,0:09:14.829
layer icon to restrict the adjustment
0:09:12.459,0:09:18.910
layer to effect only the one layer
0:09:14.829,0:09:26.319
beneath it in the right output level box
0:09:18.910,0:09:28.449
type in 220 ctrl-click or command click
0:09:26.319,0:09:31.420
on the thumbnail of the full card to
0:09:28.449,0:09:34.449
make a selection of its shape make the
0:09:31.420,0:09:40.439
layer active and make a new layer above
0:09:34.449,0:09:45.839
it will name it shadow go to select
0:09:40.439,0:09:49.209
modify and feather feather it 10 pixels
0:09:45.839,0:09:52.029
we'll fill it with black and since black
0:09:49.209,0:09:55.060
is the foreground color press alt or
0:09:52.029,0:09:58.630
option + delete then delete the
0:09:55.060,0:10:02.800
selection reduce the shadows opacity to
0:09:58.630,0:10:05.199
thirty percent since shadows tend to be
0:10:02.800,0:10:08.110
a bit darker the closer they are to the
0:10:05.199,0:10:11.949
subject we'll make a copy of the shadow
0:10:08.110,0:10:15.639
and click on the layer mask icon to make
0:10:11.949,0:10:18.819
a layer mask next to the copy open your
0:10:15.639,0:10:21.730
brush tool increase the size to a
0:10:18.819,0:10:26.199
thousand pixels and keep the hardness at
0:10:21.730,0:10:30.579
0% brush once over the outer halves of
0:10:26.199,0:10:35.319
the shadow make your subject visible and
0:10:30.579,0:10:38.589
active open your move tool and drag your
0:10:35.319,0:10:42.399
subject up to a position where its base
0:10:38.589,0:10:44.439
fits naturally on the background next
0:10:42.399,0:10:47.769
we'll cast the shadows of the subjects
0:10:44.439,0:10:52.329
onto the card make a selection of its
0:10:47.769,0:10:54.670
shape and make a new layer below it by
0:10:52.329,0:10:58.990
control clicking or command clicking on
0:10:54.670,0:11:03.410
the new layer icon go to select modify
0:10:58.990,0:11:06.869
and feather feather at 10 pixels
0:11:03.410,0:11:09.929
fill it with black and delete the
0:11:06.869,0:11:13.019
selection change the blend mode to
0:11:09.929,0:11:15.509
multiply and decrease the opacity to
0:11:13.019,0:11:20.600
thirty percent then press Enter or
0:11:15.509,0:11:24.360
return make the guidelines visible and
0:11:20.600,0:11:26.939
open your rectangular marquee tool drag
0:11:24.360,0:11:31.369
a rectangle across the left half of your
0:11:26.939,0:11:36.059
document and cut and copy the left half
0:11:31.369,0:11:40.920
make the full shadow active and drag a
0:11:36.059,0:11:44.519
rectangle across the right half cut and
0:11:40.920,0:11:48.540
copy the right half and hide the
0:11:44.519,0:11:51.869
guidelines open your transform tool go
0:11:48.540,0:11:56.490
to the top middle press ctrl or command
0:11:51.869,0:11:58.740
+ Shift + drag it to the right go to the
0:11:56.490,0:12:01.889
bottom middle and using the same
0:11:58.740,0:12:04.339
keystrokes drag it to the left so the
0:12:01.889,0:12:09.149
shadow is directly under your subject
0:12:04.339,0:12:17.339
then press Enter or return make the left
0:12:09.149,0:12:19.110
shadow active and repeat the steps the
0:12:17.339,0:12:21.569
last step is to make the top of your
0:12:19.110,0:12:23.639
subject a bit brighter to make it look
0:12:21.569,0:12:28.019
like it's reflecting light off its
0:12:23.639,0:12:30.869
surface make the subject active and make
0:12:28.019,0:12:34.199
a selection of its shape make a layer
0:12:30.869,0:12:37.499
mask of the selection and make the
0:12:34.199,0:12:42.240
subject active again open your brush
0:12:37.499,0:12:45.389
tool and make the size 400 pixels make
0:12:42.240,0:12:48.360
the blend mode linear dodge and the
0:12:45.389,0:12:52.049
opacity ten percent then press Enter or
0:12:48.360,0:12:55.889
return invert the foreground and
0:12:52.049,0:12:58.579
background colors brush once over the
0:12:55.889,0:13:01.619
top of your subject at a downward angle
0:12:58.579,0:13:05.399
have fun transforming one of your photos
0:13:01.619,0:13:07.740
into a 3d pop-out card this is Marty
0:13:05.399,0:13:09.769
from Blue Lightning TV thanks for
0:13:07.740,0:13:09.769
watching
standard: en
0:00:00.080,0:00:05.310
0:00:05.310,0:00:10.870
Hi. This is Marty from Blue Lightning TV.
0:00:10.870,0:00:15.339
In 2012, I did tutorial showing how to
make a subject
0:00:15.339,0:00:18.600
pop out of its photo creating a 3D effect.
0:00:18.600,0:00:23.529
Due to its popularity, we'll take
it one step further
0:00:23.529,0:00:27.560
by creating the look up a 3D,
pop out-style card.
0:00:27.560,0:00:30.640
Open a photo you'd like to use.
0:00:30.640,0:00:34.370
It's best if the subject is centered and
in the foreground.
0:00:34.370,0:00:39.239
Keep in mind, since every photograph is
different, the results can
0:00:39.239,0:00:42.460
and will vary. The size of this document
0:00:42.460,0:00:48.180
is 1500 by 1000 pixels and a resolution
of 150 pixels per inch.
0:00:48.180,0:00:52.780
Press Ctrl or Cmd + A
to select the entire photo
0:00:52.780,0:00:57.219
and then go to "Select" and "Save Selection".
0:00:57.219,0:01:00.449
Click OK to save it.
0:01:00.449,0:01:04.430
We need to make a selection around the
subjects,
0:01:04.430,0:01:08.439
so we can cut them out from their background. For this example,
0:01:08.439,0:01:12.150
I'll use the Quick Selection Tool
with a Radius
0:01:12.150,0:01:16.570
of 10 pixels.
Cick and drag over your subjects
0:01:16.570,0:01:20.180
to remove areas of the selection.
0:01:20.180,0:01:24.380
Press and hold Alt on a PC or Opt on a Mac
0:01:24.380,0:01:28.950
and drag over those areas.
Once you have your selection,
0:01:28.950,0:01:32.939
press Q on your keyboard to make it into a
Quickmask.
0:01:32.939,0:01:36.939
If you need to retouch any areas,
just use your Brush Tool.
0:01:36.939,0:01:40.360
Press Q again to make it back into a selection.
0:01:40.360,0:01:45.770
Press Ctrl or Cmd + J to cut the
subjects from their background
0:01:45.770,0:01:48.960
and copy them to their own layer.
Go to
0:01:48.960,0:01:53.490
"Image" and "Canvas Size".
Change the Inches to Percent
0:01:53.490,0:01:57.170
and make the Width and the Height
130% each.
0:01:57.170,0:02:01.119
Make the Canvas Extension
any color you'd like
0:02:01.119,0:02:06.180
and click OK.
To fit the entire document on your screen,
0:02:06.180,0:02:12.300
press Ctrl or Cmd + 0.
Make your Background active.
0:02:12.300,0:02:16.849
Open your Channels panel, go to "Alpha 1"
0:02:16.849,0:02:21.290
and Ctrl-click it on a PC or Cmd-click it
0:02:21.290,0:02:24.930
on a Mac.
This makes the channel into a selection.
0:02:24.930,0:02:28.770
Open back up your Layers panel and press
0:02:28.770,0:02:31.860
Ctrl or Cmd + J to cut and copy the photo.
0:02:31.860,0:02:37.220
Make the Background active again and
open you're Gradient Tool.
0:02:37.220,0:02:40.660
Click on the Gradient bar
0:02:40.660,0:02:44.540
to open the Gradient Editor.
Click on the third box,
0:02:44.540,0:02:48.050
which is the "Black to White" gradient.
Then, click OK.
0:02:48.050,0:02:51.379
Go to the middle of your photo
0:02:51.379,0:02:55.569
and press and hold, Shift
as you drag down to the bottom
0:02:55.569,0:02:59.680
of your document. Then, release. Next,
0:02:59.680,0:03:04.560
we need to retouch the background and
remove the subjects from it. We'll use
0:03:04.560,0:03:06.150
Content-Aware Fill.
0:03:06.150,0:03:09.360
But first, make Layer 2 active,
0:03:09.360,0:03:12.860
go to Layer 1 and Ctrl or
0:03:12.860,0:03:16.319
Cmd-click it to make a selection of its shape.
0:03:16.319,0:03:22.090
Click off the eyeball of Layer 1 to hide it.
Go to "Select",
0:03:22.090,0:03:26.000
"Modify" and "Expand". For this example,
0:03:26.000,0:03:29.450
I'll expand it by 2 pixels. For your photo,
0:03:29.450,0:03:33.049
you may want to experiment with
different amounts. Go to
0:03:33.049,0:03:36.640
"Edit", "Fill" and "Content-Aware".
0:03:36.640,0:03:39.650
Instantly,
0:03:39.650,0:03:43.400
Content-Aware fills the selection with
your background.
0:03:43.400,0:03:47.519
To delete the selection,
press Ctrl or Cmd + D.
0:03:47.519,0:03:50.709
Content-Aware Fill isn't perfect,
0:03:50.709,0:03:54.530
but it does do most of the heavy lifting.
Keep in mind,
0:03:54.530,0:03:57.739
your subjects will ultimately cover most
of this area
0:03:57.739,0:04:01.080
after we angle and fold the card. However,
0:04:01.080,0:04:04.769
I would like to retouch some of the
glaring inconsistencies,
0:04:04.769,0:04:07.900
so I'll use my "Clone Stamp Tool".
0:04:07.900,0:04:12.519
I covered how to use the Stamp Tool in many
of my tutorials.
0:04:12.519,0:04:15.849
Next, we'll create a white border.
0:04:15.849,0:04:19.780
Click on the New Layer icon
to make a new layer.
0:04:19.780,0:04:23.830
We'll name it, "Border". Go to Layer 2
0:04:23.830,0:04:27.060
and press Ctrl or Cmd to make a selection
0:04:27.060,0:04:30.180
of its shape. Go to "Edit"
0:04:30.180,0:04:35.090
and "Stroke". Make the Width, 20 pixels
0:04:35.090,0:04:41.639
and the color is white.
0:04:41.639,0:04:45.550
Delete the selection
and press Ctrl or Cmd + T.
0:04:45.550,0:04:50.280
To open your Transform Tool,
go to a bottom corner
0:04:50.280,0:04:54.139
and press and hold Ctrl + Shift + Alt on a PC
0:04:54.139,0:04:57.500
or Cmd + Shift + Opt on a Mac
0:04:57.500,0:05:01.380
and drag out until the corners are
fairly close to the
0:05:01.380,0:05:05.460
edges of your document.
Go to a top corner
0:05:05.460,0:05:09.789
and using the same keystrokes, drag it in.
0:05:09.789,0:05:13.350
Go to the top, middle point
and press and hold
0:05:13.350,0:05:16.449
Shift as you drag it down. Then,
0:05:16.449,0:05:19.740
press Enter or Return. Next,
0:05:19.740,0:05:24.669
we'll hide the image that's outside the border and use Content-Aware Fill
0:05:24.669,0:05:28.650
to fill in the empty areas inside the border.
0:05:28.650,0:05:32.229
Ctrl-click or Cmd-click on the
thumbnail of the border
0:05:32.229,0:05:36.139
to make selection of its shape and press Q
0:05:36.139,0:05:39.590
to make it into a quickmask.
0:05:39.590,0:05:43.130
Open your Paint Bucket Tool
0:05:43.130,0:05:46.900
and invert the foreground and background colors by pressing
0:05:46.900,0:05:51.169
"x" on your keyboard or by clicking on
the small, double-box icon.
0:05:51.169,0:05:54.780
Click outside the border
0:05:54.780,0:05:59.539
to delete the quickmask leaving just
the inside intact.
0:05:59.539,0:06:04.120
Press Q again to make the quickmask
back into a selection
0:06:04.120,0:06:08.060
and invert it by pressing
Ctrl or Cmd + Shift + I.
0:06:08.060,0:06:12.169
Make your card active
0:06:12.169,0:06:16.440
and click on the Layer Mask icon to make
a layer mask of the selection
0:06:16.440,0:06:19.770
next to the card. Next,
0:06:19.770,0:06:23.830
we'll fill in the corners.
Make your card active
0:06:23.830,0:06:27.460
and open you're Rectangular Marquee Tool.
0:06:27.460,0:06:30.960
Draw a rectangle over the empty area
0:06:30.960,0:06:34.350
and go to "Edit" and "Fill"
0:06:34.350,0:06:38.370
Fill it with Content-Aware
0:06:38.370,0:06:45.130
and delete the selection. Repeat the
steps to fill in the right corner.
0:06:45.130,0:06:49.270
Click of the eyeball of the background
to hide the layer.
0:06:49.270,0:06:53.310
Make a composite snapshot of you're image which we'll place
0:06:53.310,0:06:56.479
above the border. Make the Border layer
0:06:56.479,0:06:59.650
active and press Ctrl + Shift + Alt + E
0:06:59.650,0:07:03.120
on a PC or Cmd + Shift + Opt + E
0:07:03.120,0:07:08.139
on a Mac.
Now that we have a composite snapshot,
0:07:08.139,0:07:13.870
we can trash the layers that comprised it.
0:07:13.870,0:07:17.349
Make your background visible, go to "View"
0:07:17.349,0:07:20.370
and make sure "Rulers" and "Snap"
are checked.
0:07:20.370,0:07:26.169
If they're not, just click on them.
Open your Transform Tool,
0:07:26.169,0:07:30.099
go to the left ruler and drag out a
guideline to the center.
0:07:30.099,0:07:33.680
It'll snap in place because we have
"Snap" checked.
0:07:33.680,0:07:36.910
If you don't see your guideline,
press Ctrl or Cmd + H.
0:07:36.910,0:07:41.610
Press Enter or Return.
0:07:41.610,0:07:44.860
Open the Rectangular Marquee Tool
0:07:44.860,0:07:50.050
and drag out a rectangle across the left
half of your document.
0:07:50.050,0:07:54.699
Cut the left half of the card
and copy it to its own layer.
0:07:54.699,0:07:58.389
Make the full card active
and drag a rectangle
0:07:58.389,0:08:02.509
across the right half of your document.
0:08:02.509,0:08:05.550
Cut and copy the right half
0:08:05.550,0:08:08.960
and hide the full card. Next,
0:08:08.960,0:08:13.580
we'll skew up both sides of the card to
make it look like it's been folded and
0:08:13.580,0:08:15.090
then opened.
0:08:15.090,0:08:19.550
Open you Transform Tool,
go to the middle, right
0:08:19.550,0:08:23.009
and press and hold Ctrl or Cmd + Shift
0:08:23.009,0:08:26.370
and drag it up to an angle you like.
Then, press
0:08:26.370,0:08:29.460
Enter or Return.
0:08:29.460,0:08:32.969
Go to the top ruler and drag down a guideline
0:08:32.969,0:08:36.700
until it snaps to the top corner of the card.
0:08:36.700,0:08:42.519
Make the left half active,
open your Transform Tool,
0:08:42.519,0:08:45.890
use the same keystrokes as before
and drag it
0:08:45.890,0:08:49.240
up until the top corner touches the guideline.
0:08:49.240,0:08:54.500
Then, press Enter or Return
and hide the guidelines.
0:08:54.500,0:08:57.950
We're going to make the left page slightly darker
0:08:57.950,0:09:02.990
and then and a soft shadow
under the entire card.
0:09:02.990,0:09:06.190
Click on the Adjustment Layer icon
and choose
0:09:06.190,0:09:09.430
"Levels". Click on the Clip-to-Layer icon
0:09:09.430,0:09:13.100
to restrict the Adjustment Layer
0:09:13.100,0:09:16.610
to effect only the one layer beneath it.
0:09:16.610,0:09:20.240
In the right Output Level box, type in
0:09:20.240,0:09:24.279
220
0:09:24.279,0:09:28.220
Ctrl-click or Cmd-click on the
thumbnail of the full card
0:09:28.220,0:09:31.779
to make a selection of its shape.
Make the layer
0:09:31.779,0:09:35.940
active and make a new layer above it.
0:09:35.940,0:09:39.300
We'll name it "Shadow".
0:09:39.300,0:09:43.410
Go to "Select", "Modify" and "Feather".
0:09:43.410,0:09:46.540
Feather it 10 pixels.
0:09:46.540,0:09:51.130
We'll fill it with black and since black
is the foreground color,
0:09:51.130,0:09:54.209
press Alt or Opt + Delete.
0:09:54.209,0:10:00.790
Then, delete the selection. Reduce the
Shadow's opacity to 30%.
0:10:00.790,0:10:03.930
Since shadows tend to be a bit darker
0:10:03.930,0:10:07.600
the closer they are to the subject,
we'll make a copy
0:10:07.600,0:10:10.790
of the Shadow and click on the Layer Mask
0:10:10.790,0:10:15.140
icon to make a layer mask next to the copy.
0:10:15.140,0:10:20.550
Open your Brush tool, increase the size
to 1000 pixels
0:10:20.550,0:10:23.839
and keep the Hardness at 0%.
0:10:23.839,0:10:28.709
Brush once over the outer halves of the
shadow.
0:10:28.709,0:10:32.720
Make your subject visible and active.
0:10:32.720,0:10:36.110
Open your Move Tool and drag your subject
0:10:36.110,0:10:40.140
up to a position where its base fits naturally
0:10:40.140,0:10:44.829
on the background. Next, we'll cast the shadows of the subjects
0:10:44.829,0:10:50.410
onto the card.
Make a selection of its shape
0:10:50.410,0:10:53.600
and make a new layer below it by Ctrl-clicking
0:10:53.600,0:10:56.870
or Cmd-clicking on the new layer icon.
0:10:56.870,0:11:01.010
Go to "Select", "Modify" and "Feather".
0:11:01.010,0:11:04.160
Feather it 10 pixels.
0:11:04.160,0:11:08.850
Fill it with black and delete the selection.
0:11:08.850,0:11:14.459
Change the blend mode to Multiply
and decrease the Opacity to 30%.
0:11:14.459,0:11:17.500
Then, press Enter or Return.
0:11:17.500,0:11:21.089
Make the guidelines visible
0:11:21.089,0:11:25.290
and open you're Rectangular Marquee Tool. Drag a rectangle
0:11:25.290,0:11:29.250
across the left half of your document
0:11:29.250,0:11:33.390
and cut and copy the left half.
Make the full shadow
0:11:33.390,0:11:37.079
active and drag a rectangle
0:11:37.079,0:11:40.550
across the right half.
0:11:40.550,0:11:43.959
Cut and copy the right half
0:11:43.959,0:11:48.339
and hide the guidelines.
Open your Transform Tool,
0:11:48.339,0:11:51.529
go to the top, middle...press Ctrl
0:11:51.529,0:11:55.980
or Cmd + Shift and drag it to the right.
0:11:55.980,0:12:00.050
Go to the bottom, middle and using the
same keystrokes,
0:12:00.050,0:12:05.190
drag it to the left, so the shadow is
directly under your subject.
0:12:05.190,0:12:08.550
Then, press Enter or Return.
0:12:08.550,0:12:15.550
Make the left shadow active
and repeat the steps.
0:12:17.230,0:12:21.029
The last step is to make the top of your
subject a bit brighter
0:12:21.029,0:12:25.589
to make it look like it's reflecting
light off its surface.
0:12:25.589,0:12:28.730
Make the subject active
and make a selection
0:12:28.730,0:12:33.750
of its shape.
Make a Layer Mask of the selection
0:12:33.750,0:12:38.769
and make the subject active again.
Open your Brush Tool
0:12:38.769,0:12:42.040
and make the size, 400 pixels.
0:12:42.040,0:12:45.120
Make the blend mode, "Linear Dodge"
0:12:45.120,0:12:50.470
and the Opacity, 10%.
Then, press Enter or Return.
0:12:50.470,0:12:54.700
Invert the foreground and background colors.
0:12:54.700,0:12:58.130
Brush once over the top of your subject
at a downward angle.
0:12:58.130,0:13:01.930
Have fun transforming one of your photos
0:13:01.930,0:13:07.269
into a 3D, pop-out card.
This is Marty from Blue Lightning TV.
0:13:07.269,0:13:08.100
Thanks for watching!
Profiles
Profile 1
| Purpose | Tutorial (why) |
|---|---|
| Content | |
| Participants | nameless (f) model, nameless (m) model, Photoshop (m) geek, Audience |
| Form | Tutorial (how) |
| Time | |
| Place |
Profile 2
| Purpose | Tutorial |
|---|---|
| Content | Portrait, Scene |
| Participants | nameless (f) model, nameless (m) model, Photoshop (m) geek |
| Form | Tutorial (how) |
| Time | Real time |
| Place | Desktop |